POWR
Power unit
5-23 67C3K11
Removing the timing belt and
sprocket
1. Remove the manual starter and driven
sprocket cover. (M and W model)
Remove the flywheel magnet cover. (E
model)
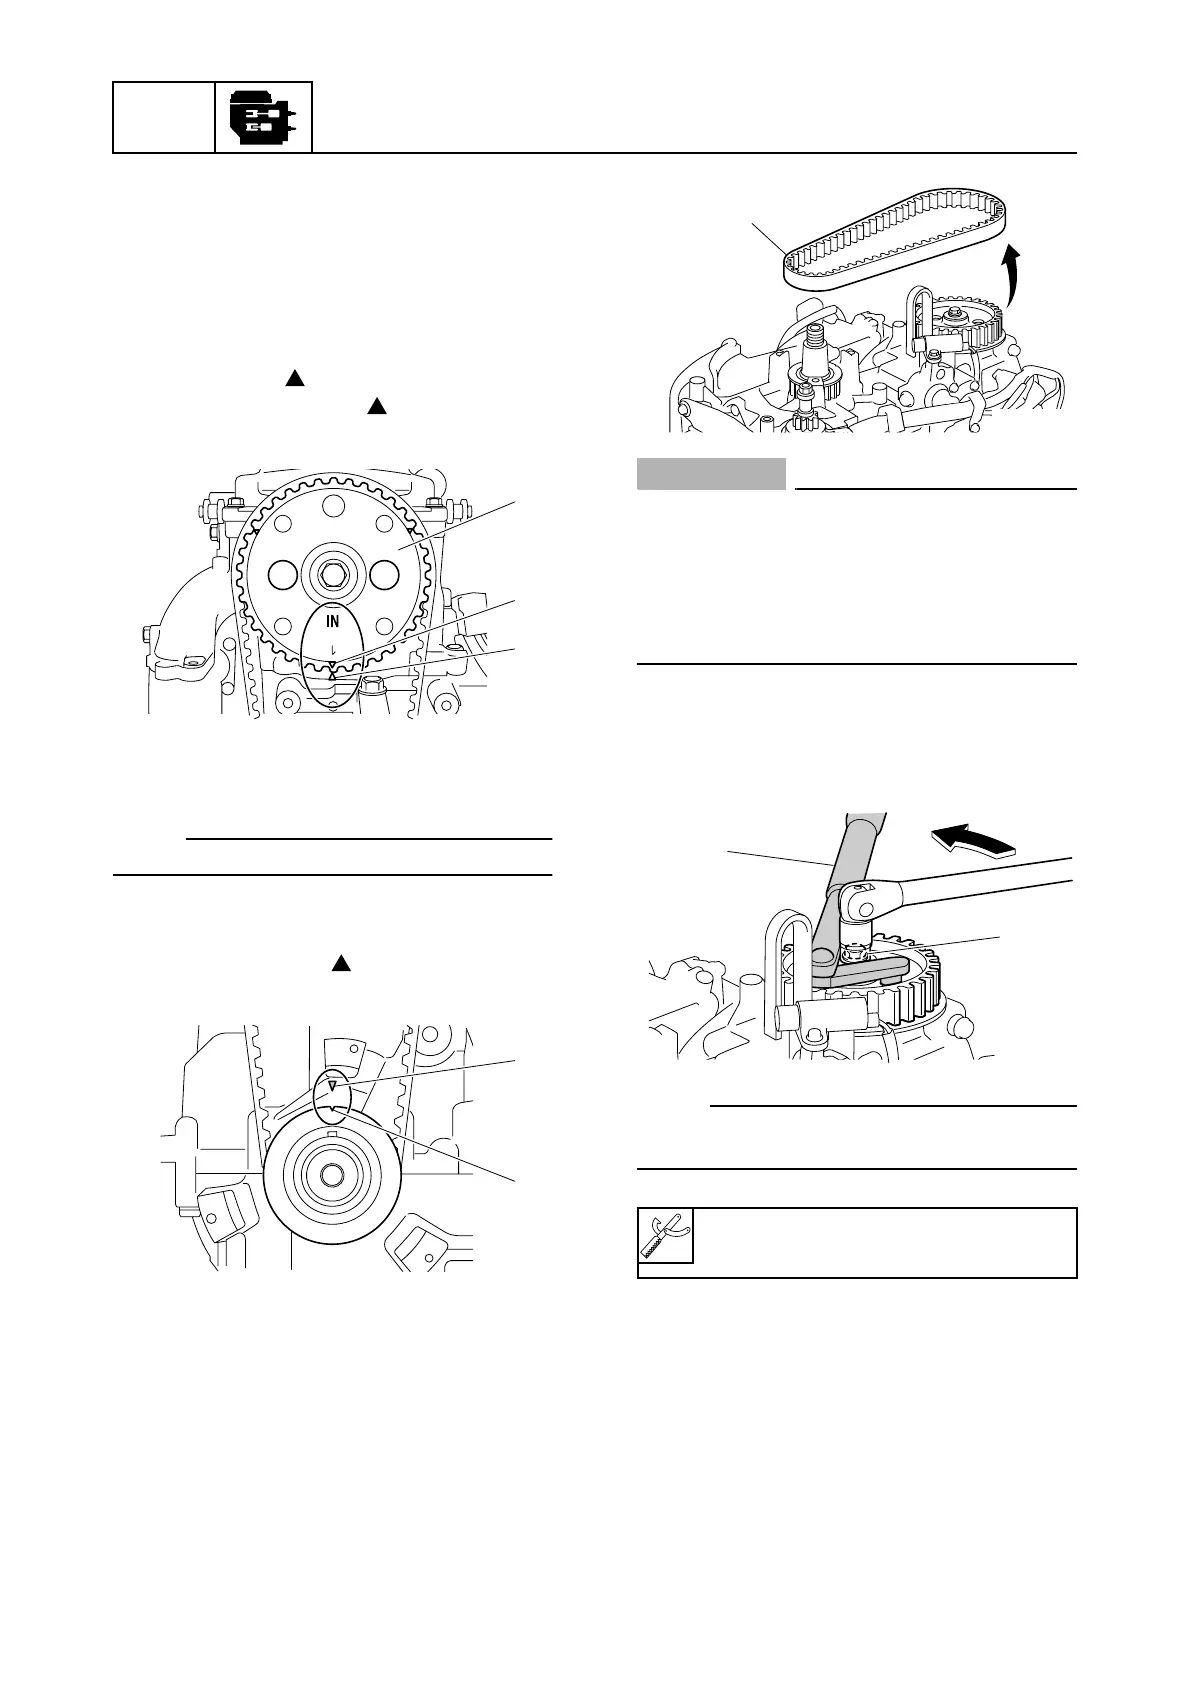
2. Align the “1 ” mark a on the driven
sprocket 1 with the “” mark b on the
cylinder head.
3. Remove the flywheel magnet, spring
washer, and stator assembly.
NOTE:
See “Replacing the timing belt” (5-3).
4. Check that the notch c in the drive
sprocket and the “” mark d on the cyl-
inder block are aligned.
5. Remove the timing belt 2 from the
driven sprocket, and then remove it from
the drive sprocket.
CAUTION:
Unless directed to do so in the following
instructions, do not turn the drive
sprocket or driven sprocket when the tim-
ing belt is not installed. Otherwise the pis-
tons and valves will collide with each
other and be damaged.
6. Hold the driven sprocket using the spe-
cial service tool 3, and then remove the
bolt 4.
NOTE:
Make sure that the driven sprocket does not
turn when loosening the bolt.
7. Remove the driven sprocket and dowel.
8. Remove the drive sprocket and Woodruff
key.
S67C5049
1
a
b
S67C5018
d
c
Flywheel holder 3: 90890-06522
S67C5051
2
S67C5053
4
3