BRKT
Bracket unit
7-31 67C3K11
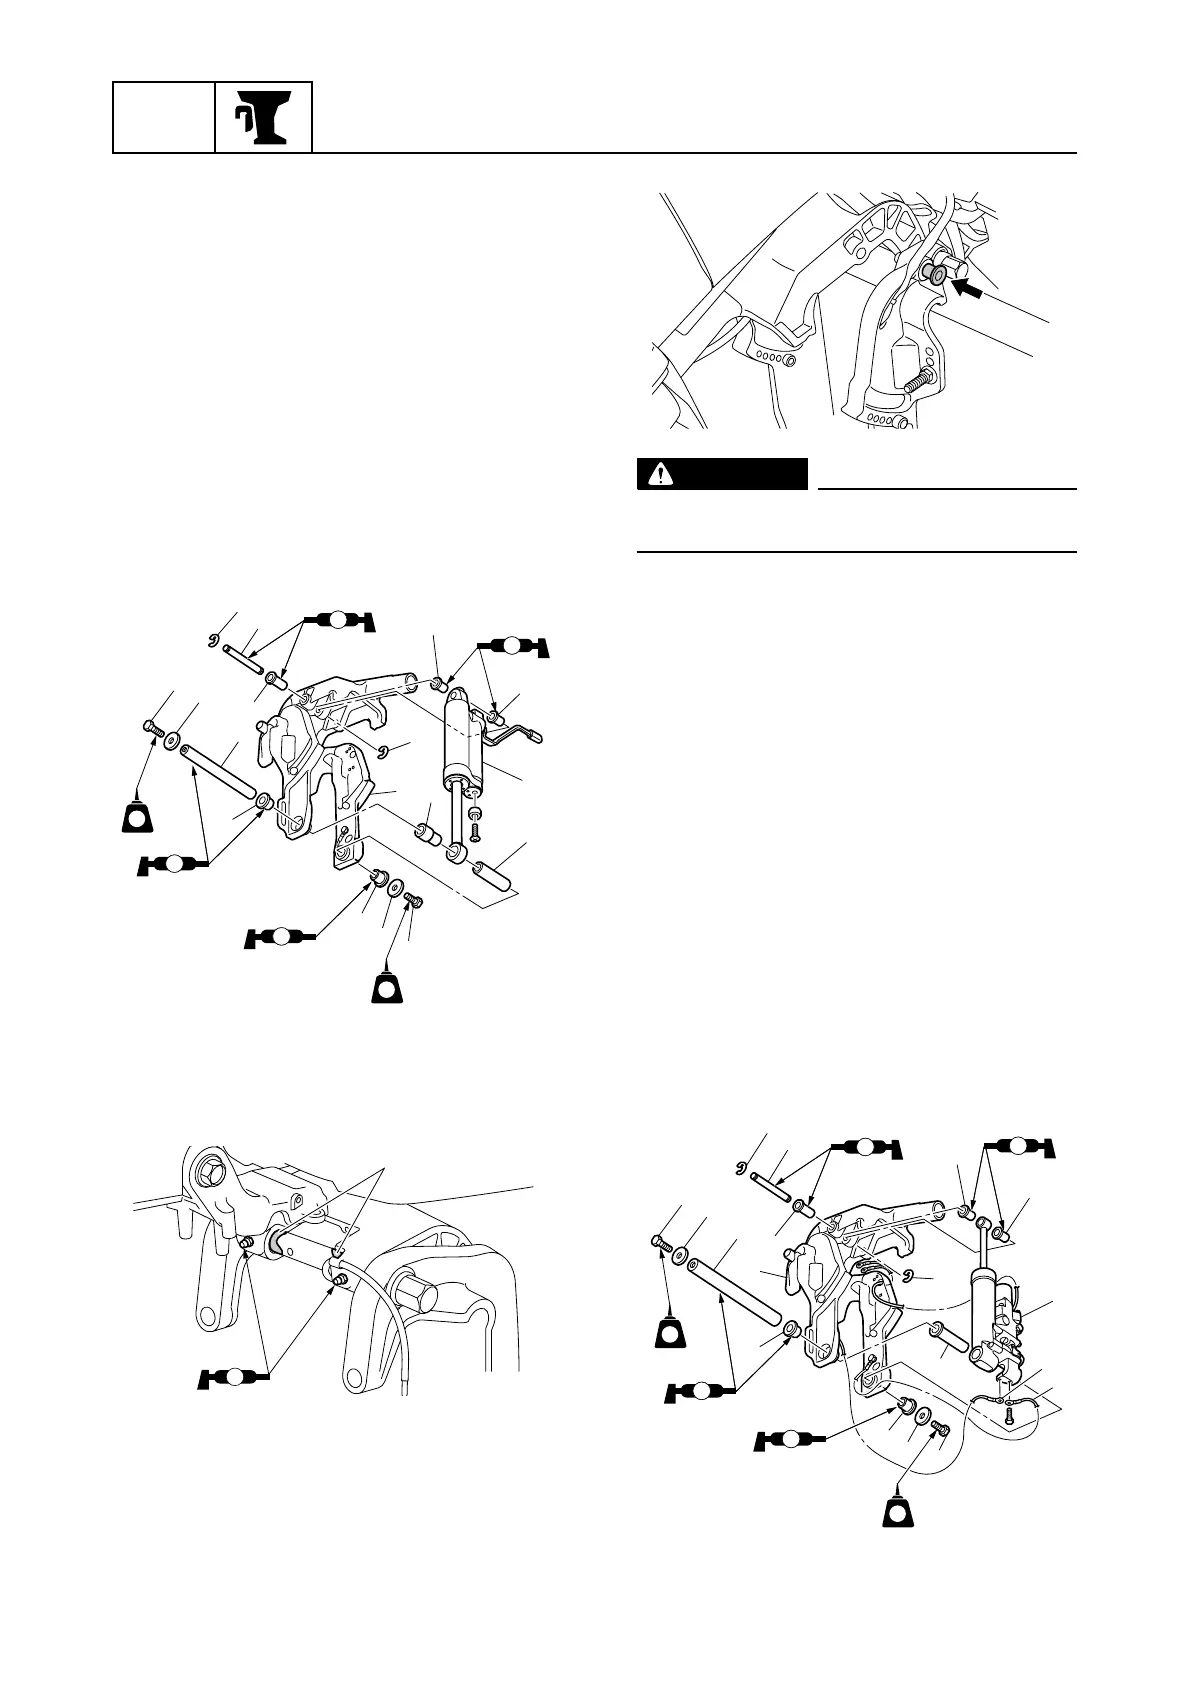
2. Install the collar 1 onto the hydraulic tilt
unit 2.
3. Install the hydraulic tilt unit 2, collar 3,
bushings 4, shaft 5, and washers 6
onto the clamp brackets 7, and then
tighten the bolts 8.
4. Install a bushing 9 to the hydraulic tilt
unit 2 and install a bushing 9 and the
bushing 0 to the swivel bracket.
5. Install the hydraulic tilt unit 2, shaft A,
and E-clips B to the swivel bracket.
6. Apply grease to all grease nipples until it
comes out from the areas a.
Installing the PTT unit
1. Tilt the outboard motor to the fully up
position, and then support it with the tilt
stop lever.
WARNING
After tilting the outboard motor up, be
sure to support it with the tilt stop lever.
2. Install the bushing 1 onto the PTT unit
2.
3. Install the PTT unit 2, bushings 3, shaft
4, and washers 5 onto the clamp
brackets 6, and then tighten the bolts
7.
4. Install a bushing 8 to the PTT unit 2
and install a bushing and the bushing 9
to the swivel bracket.
5. Install the PTT unit 2, shaft 0, and E-
clips A to the swivel bracket.
6. Install the ground lead terminals B and
C to the PTT unit 2.
S67C7124
AA
AA
AA
AA
LT
242
LT
LT
242
LT
B
A
8
6
5
0
4
4
6
8
3
2
1
B
7
9
9
S67C3053
A
a
S67C7123
S67C7055
A
AA
AA
AA
AA
LT
242
LT
LT
242
LT
A
0
9
7
5
4
3
6
1
3
5
7
B
C
2
8
8