ELEC
Electrical system
– +
8-9 67C3K11
Removing the starter motor
1. Remove the starter motor from the power
unit.
NOTE:
• Check the engine start switch, neutral
switch, starter relay, and fuse before
removing the starter motor.
• To remove the starter motor, see “Starter
motor, starter relay, and PTT relay (E and
W model)” (5-15).
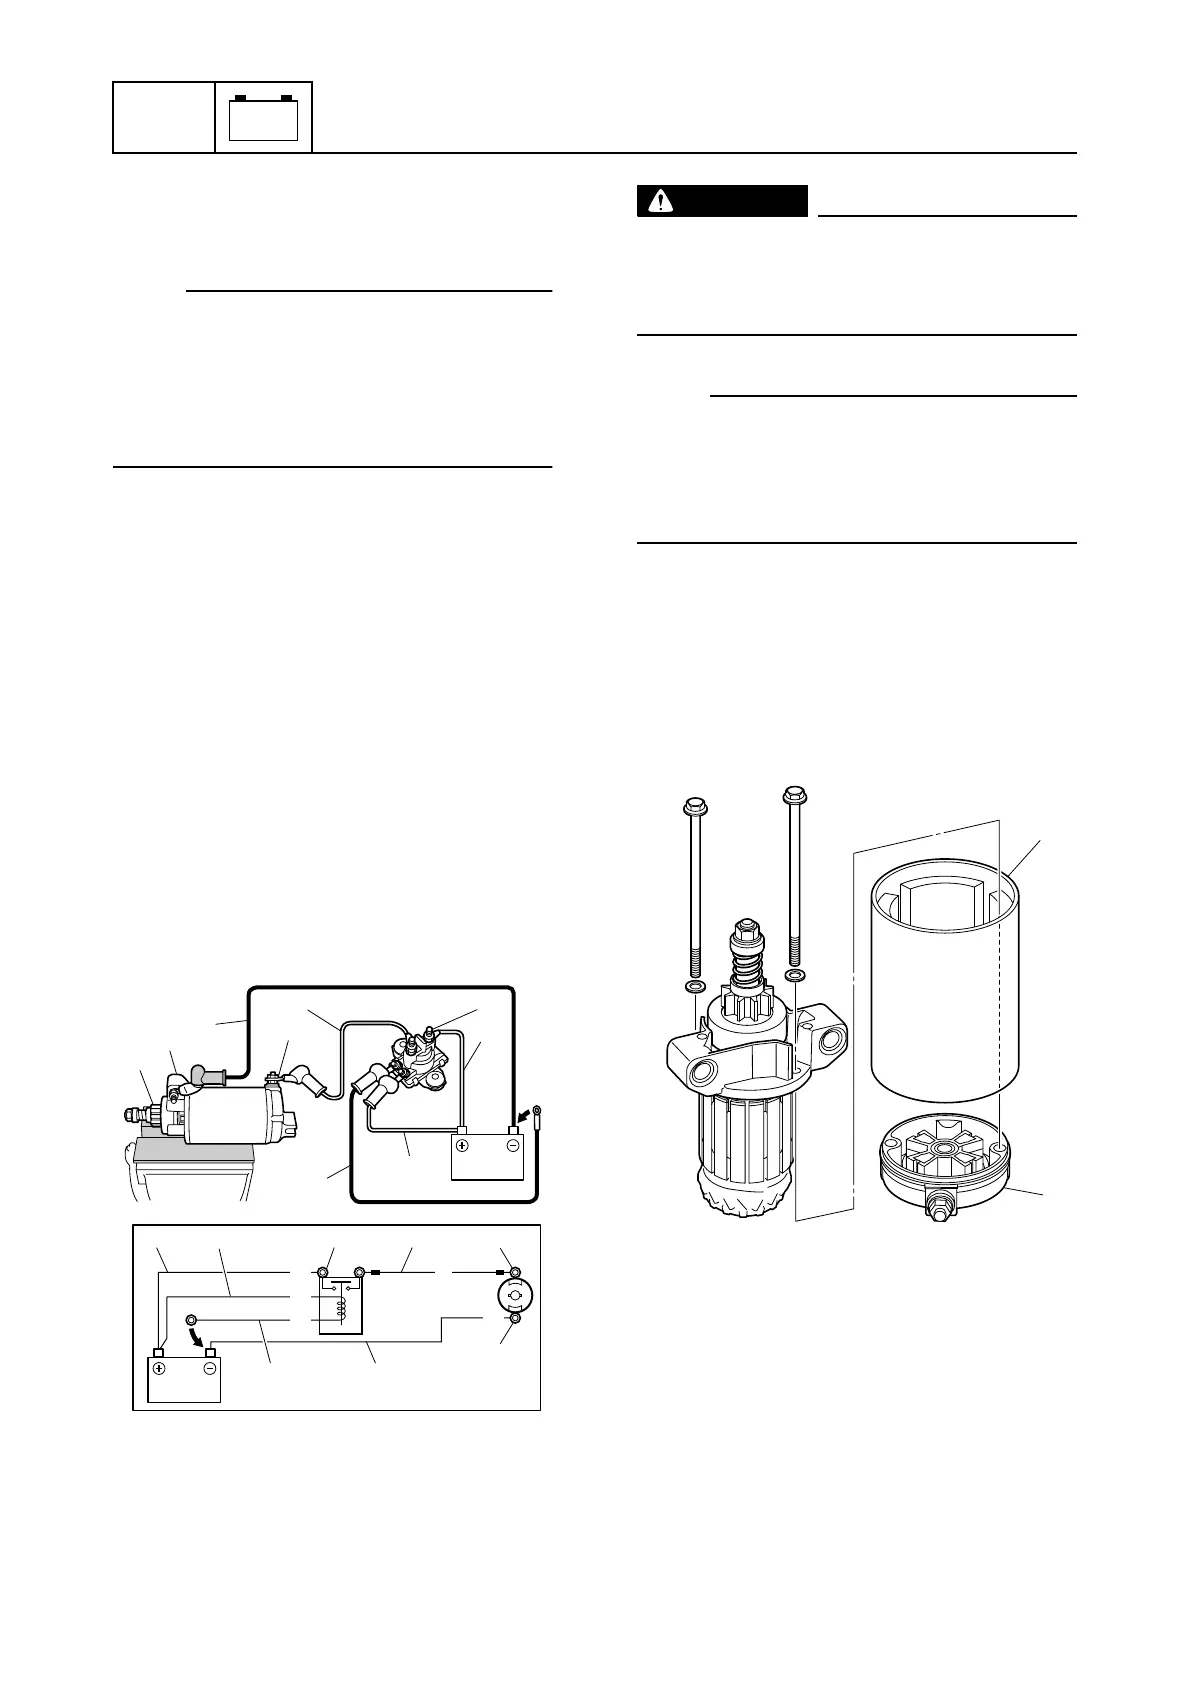
Checking the starter motor operation
1. Hold the starter motor in a vise using alu-
minum plates on both sides.
2. Connect the positive battery cable 1 to
the starter relay terminal 2, connect the
starter motor lead 3 to the starter motor
positive terminal 4, and connect the
negative battery cable 5 to the starter
motor body 6.
3. Connect the starter relay lead (brown) 7
to the positive battery terminal. Connect
the starter relay lead (black) 8 to the
negative battery terminal to check the
starter motor operation.
WARNING
Do not place any objects near the pinion
or touch it. The pinion 9 moves slightly
away from the starter motor body and
rotates at high speed.
NOTE:
• Check the starter motor operation for a few
seconds.
• If the starter motor is disassembled for
maintenance, be sure to check the opera-
tion again after assembling it.
4. Disconnect the negative battery cable
and positive battery cable from the bat-
tery terminals.
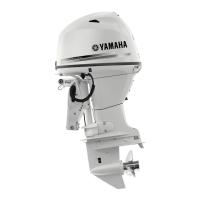
Disassembling the starter motor
1. Remove the bracket 1 and stator 2.
2. Remove the nut 3, washer 4, pinion
stoppers 5, and spring 6, and then
remove the pinion 7 and cover 8 from
the armature 9.
S67C8014
B
R
B
Br
R
6
1
7
4
5
9
4
2
3
8
6
58
71
2 3
S67C8017
2
1