Chapter 2 Hardware Installation and Connection
GS1920v2 Series User’s Guide
35
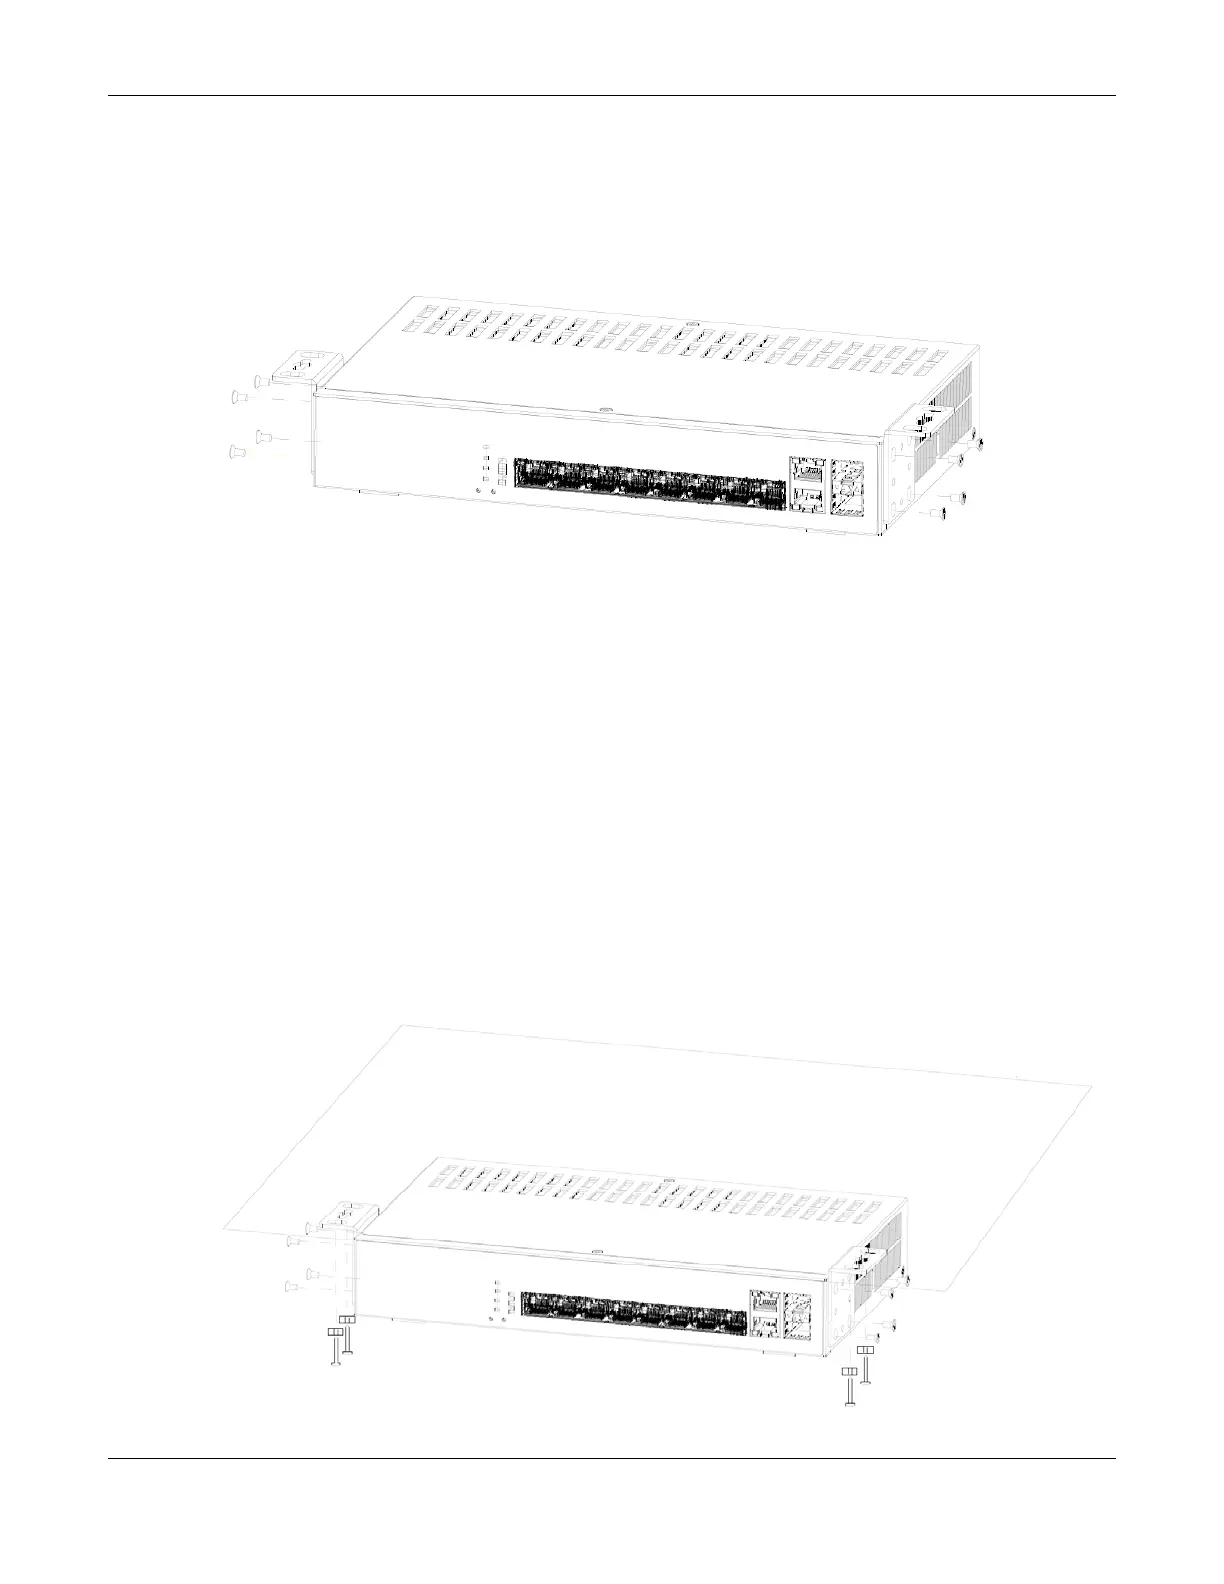
2.4.3 Attaching the Mounting Brackets to the Switch
1 Position a mounting bracket on one side of the Switch, lining up the four screw holes on the bracket with
the screw holes on the side of the Switch.
Figure 8 Attaching the Mounting Brackets
2 Using a #2 Philips screwdriver, install the M3 flat head screws through the mounting bracket holes into
the Switch.
3 Repeat steps 1 and 2 to install the second mounting bracket on the other side of the Switch.
4 You may now mount the Switch under a table. Proceed to the next section.
2.4.4 Mounting the Switch under a Table
1 Determine where you want to mount the Switch under a table. See Section 2.4 on page 34 to choose a
suitable location.
2 Position the Switch in place and mark the places for drilling with the attached brackets.
3 Drill holes at the marked places under the table.
4 Line up the two screw holes on the bracket with the screw holes under the table.
Figure 9 Mounting the Switch under a Table

 Loading...


