116 1100 Series Nano Pump Service Manual
3 Repairing the Pump
2 Disconnect the waste tube. Beware of leaking solvents due to hydrostatic
pressure.
3 Using the 14 mm wrench unscrew the purge valve and remove it from the
purge valve holder.
4 Remove the plastic cap with the gold seal from the purge valve.
5 Using a pair of tweezers or a toothpick to remove the frit.
6 Place a new frit into the purge valve with the orientation of the frit as
shown above.
7 Replace the cap with the gold seal.
8 Insert the purge valve into the purge valve holder and locate the pump
outlet and the waste outlet as shown below.
9 Tighten the purge valve, reconnect outlet capillary and waste tubing.
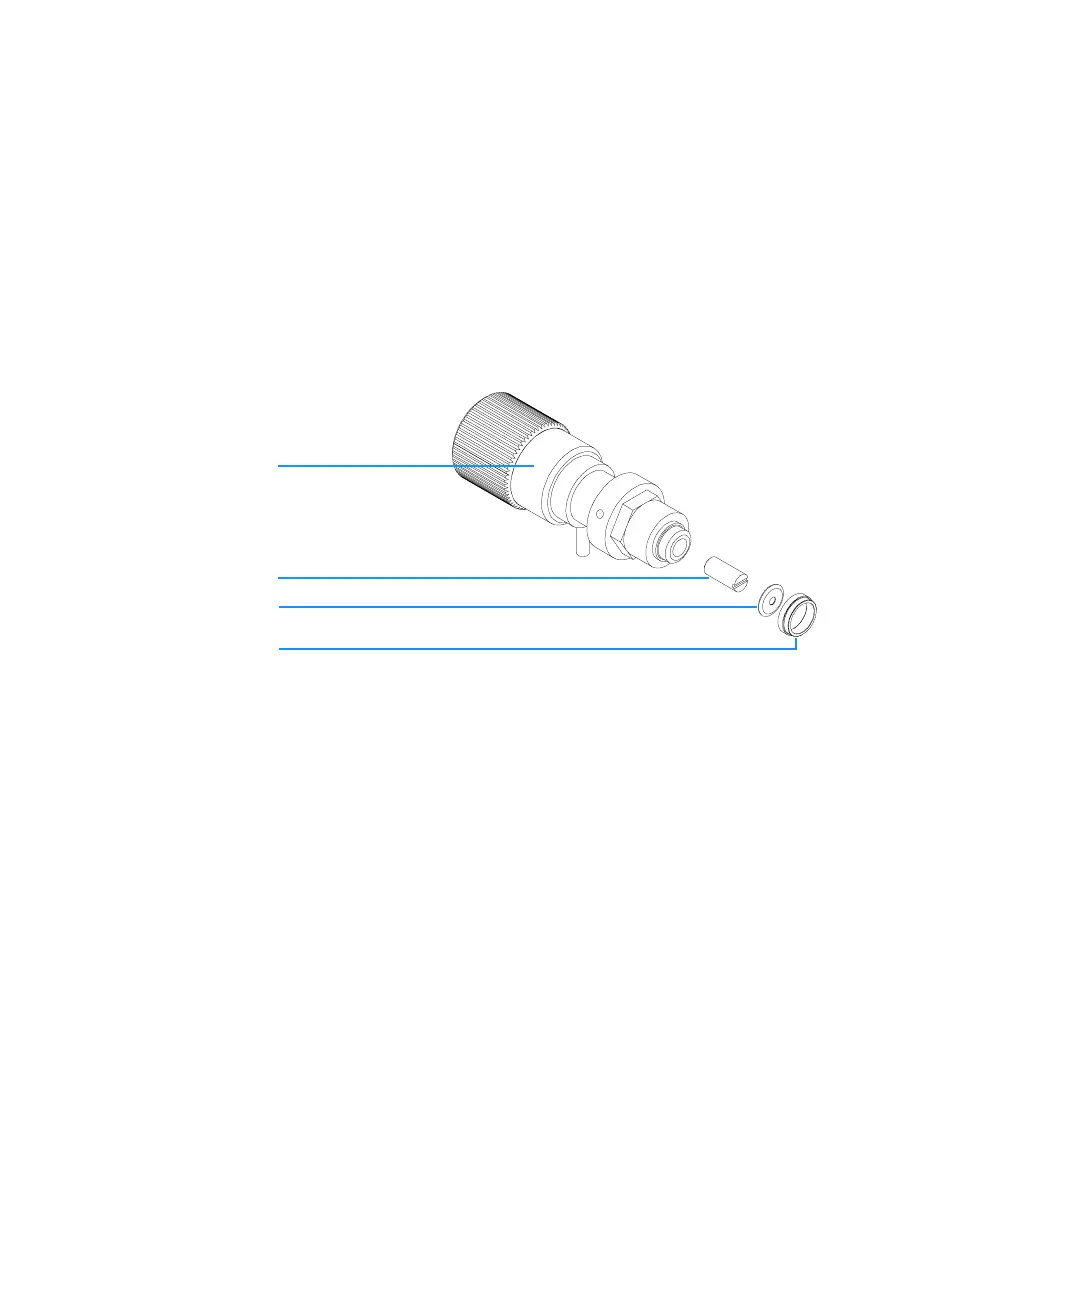
Figure 19 Purge Valve Parts
Valve body
Gold seal
PTFE frit
Plastic cap
Before reinstallation always check the gold seal. A deformed seal should be exchanged.
When fused silica capillaries are used, use the 4 mm wrench together with the torque tool
to avoid overtightening.
 Loading...


