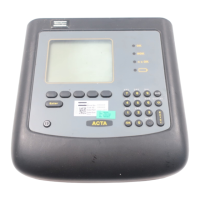
Calibration
118
19. A small pop-up window appears asking you to input a torque value manually. The
torque value you input here is the value produced by your “Deadweight
equipment” when you pressed ‘Save’ in step 20.
20. When you have entered your torque value, press ‘Enter’. The first checkpoint
with load is now saved and you can see that row number 1 and 2 in the
“Deadweight calibration” window have changed and now read: “Number of cal.
points 1” and “Load on transducer” respectively.
21. You have now completed the first full linearity check measurement for this
transducer, both at rest and at a specific torque value.
22. If you need to, repeat steps 18-22.
23. When you have done this, the “Deadweight calibration” window should display
“Number of cal. points 3” confirming that three full linearity check measurements
have been completed.
11.2.3 Saving and printing the new calibration value
24. Now press the ‘Ready’ menu block.
25. Another window appears asking if you would like a printout. The printout is a full
calibration report of the above process. Refer to the example on the following page.
26. Choose a printout or simply press cancel.
27. Press ‘Save’ if the new values are to be saved in the transducer memory. Two
questions are asked. The first is the name of the user. The second is the next
calibration date. The next calibration date will be used to display a message if the
date has expired or if there are less than 30 days to the next calibration of the
transducer, refer to 11.1 Calibrating the ACTA 3000.
28. The “Deadweight calibration” window now displays the old (current) calibration
value of the transducer and the new (now measured) calibration value. You are also
asked if you wish to save the new value in the memory of the transducer. This is
possible if you use an Atlas Copco memory transducer.
29. To save, select ‘OK’. If the transducer is not an Atlas Copco memory transducer or
if you do not wish to save the new cal. value, select ‘Cancel’ in the “Deadweight
calibration” window.
After this you will have finished calibrating your transducer and the measurement window on
the ACTA 3000 will return. Remember to mark the new calibration value on your transducer.
 Loading...