EasyManua.ls Logo

Beastx MICROBEAST PLUS User Manual

Beastx MICROBEAST PLUS
353 pages
To Next Page IconTo Next Page
Page #1 background imageLoading...
Page #1 background image
BEASTX Wiki:Books/MBPlus 52 ENG
wiki.beastx.com

Table of Contents

Other manuals for Beastx MICROBEAST PLUS

Question and Answer IconNeed help?

Do you have a question about the Beastx MICROBEAST PLUS and is the answer not in the manual?

Beastx MICROBEAST PLUS Specifications

General IconGeneral
TypeFlybarless System
Gyro SensitivityAdjustable
CompatibilityHelicopters
Gyro SensorsMEMS
Supported ProtocolsPPM, S.Bus
Control FunctionsCyclic, Tail, Governor
Programming InterfacePC Software
Operating Temperature-10°C to +60°C
Dimensions36mm x 25mm x 14mm

Summary

5 Hardware options

6 Software options

7 Safety Notes

15 Receiver connection

16 Standard receiver

18 Remote satellite (Spektrum® DSM/JR® DMSS/ALIGN® iBus)

19 Spektrum® SRXL2 receiver

21 Preparing the radio system

25 Adjustment on the device

25.1 Point A - Receiver type

Detects and selects the connected receiver type for proper signal input.

25.2 Function assignment

Covers default and manual assignment of control functions based on receiver type.

22 Spektrum® DSM2/DSMX receiver binding

23 Receiver Menu

23.1 Receiver type

Sets the receiver type to ensure proper signal input and function assignment.

23.2 Function assignment

Covers default and manual assignment of control functions based on receiver type.

24 Preset function assignments for Single-line receivers

25.3 Point N - Throttle failsafe

26 Setup with StudioX

26.1 Receiver type

Configures receiver type and performs automatic detection.

26.2 Function assignment

Covers default and manual assignment of control functions based on receiver type.

26.3 Throttle failsafe

27 SETUP MENU (Basic heli setup)

28 Adjustment on the device

28.1 Button control

Explains how to navigate through menu points using the device button.

28.2 Stick control

Describes using transmitter sticks to change settings within menus.

30 SETUP MENU A - Device orientation

31 Adjustment at the device

Status-LED Device orientation

Maps Status-LED colors to specific device mounting orientations.

33 SETUP MENU B - Swashplate frequency

34 Adjustment on the device

36 Servo connection

37 SETUP MENU C - Rudder pulse width

38 Adjustment on the device

40 SETUP MENU D - Rudder servo frequency

41 Adjustment on the device

43 Manuals:MBPlusFblV52:Setupmenu E

44 Mechanical setup of the rudder servo

45 Adjustment on the device

45.1 SETUP MENU E - Rudder limits

Adjusts the servo limits to prevent binding and ensure correct movement.

45.2 SETUP MENU F - Rudder control direction

Sets the correct direction for rudder control and gyro response.

49 SETUP MENU G - Collective and cyclic pitch mixing (CCPM)

50 Adjustment on the device

53 SETUP MENU H - Servo directions

54 Adjustment on the device

Status-LED Servo reverse

Maps Status-LED colors to specific servo reverse adjustments.

56 SETUP MENU I - Cyclic directions

57 Adjustment on the device

2. Now set the internal control direction for the MICROBEAST PLUS gyro:

Sets the internal gyro direction for correct swashplate movement.

61 SETUP MENU J - Servo trim

62 Adjustment on the device

62.1 Separate servo trim

Adjusts individual servo center positions for precise horn alignment.

62.2 Trimming the swashplate

Allows simultaneous trimming of the swashplate for leveling.

64 SETUP MENU K - Cyclic throw

65 Adjustment on the device

68 SETUP MENU L - Collective pitch

69 Adjustment on the device

4. Finally adjust the maximum collective pitch when the thrust stick is at full deflection.

Adjusts maximum collective pitch at full thrust stick deflection.

73 SETUP MENU M - Servo limit

74 Adjustment on the device

By rudder stick input you can increase/decrease the amount of maximum servo throw/servo limit

Adjusts the maximum servo throw or limit using the rudder stick.

78 Hardware installation

79 Activating the governor function

80 Adjustment on the device

Status-LED Governor mode

Maps Status-LED colors to governor modes (Off, Electric, Nitro).

82 Sensor test routine

83 Motor start position

84 Adjustment on the device

86 Full throttle position

87 Adjustment on the device

89 GOVERNOR MENU D - Setting up the transmitter

91 GOVERNOR MENU E - Throttle signal divider

92 Adjustment on the device

94 GOVERNOR MENU F, G & H - Main gear ratio

95 Adjustment on the device

Menu point F

Sets the integer part of the gear ratio using Status-LED colors.

Menu point G

Sets the first decimal of the gear ratio using Status-LED colors.

Menu point H

Sets the second decimal of the gear ratio using Status-LED colors.

97 PARAMETER MENU A - Quick Trim

98 Adjustment at the device

98.1 Trimming the swashplate

Trims swashplate for optimal hovering and pitch response.

98.2 Rudder servo

Trims rudder servo for precise tail rotor torque counteraction.

100 PARAMETER MENU B - Control Style

101 Adjustment at the device

Status-LED Control style

Maps Status-LED colors to different control styles (normal, sport, pro, extreme).
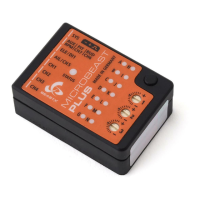
104 Adjustment at the device

108 Tail gyro

109 Cyclic adjustment

110 Adjustment at the device

112 AttitudeControl

113 What is AttitudeControl and how to use it

113.4 Flying with AttitudeControl

113.5 Fine tuning of AttitudeControl

114 Adjustment at the device

116 Bank Switching (optional)

120 Reset to default settings

121 Performing factory reset at the device

126 Windows PC/mac and USB2SYS computer interface

127 Smartphone/tablet and BLE2SYS bluetooth interface

130 BLE2SYS Configuration

132 Preset helicopter settings

133 Backup/Restore

134 Reset all settings

135 Firmware update

138 Update procedure

Related product manuals