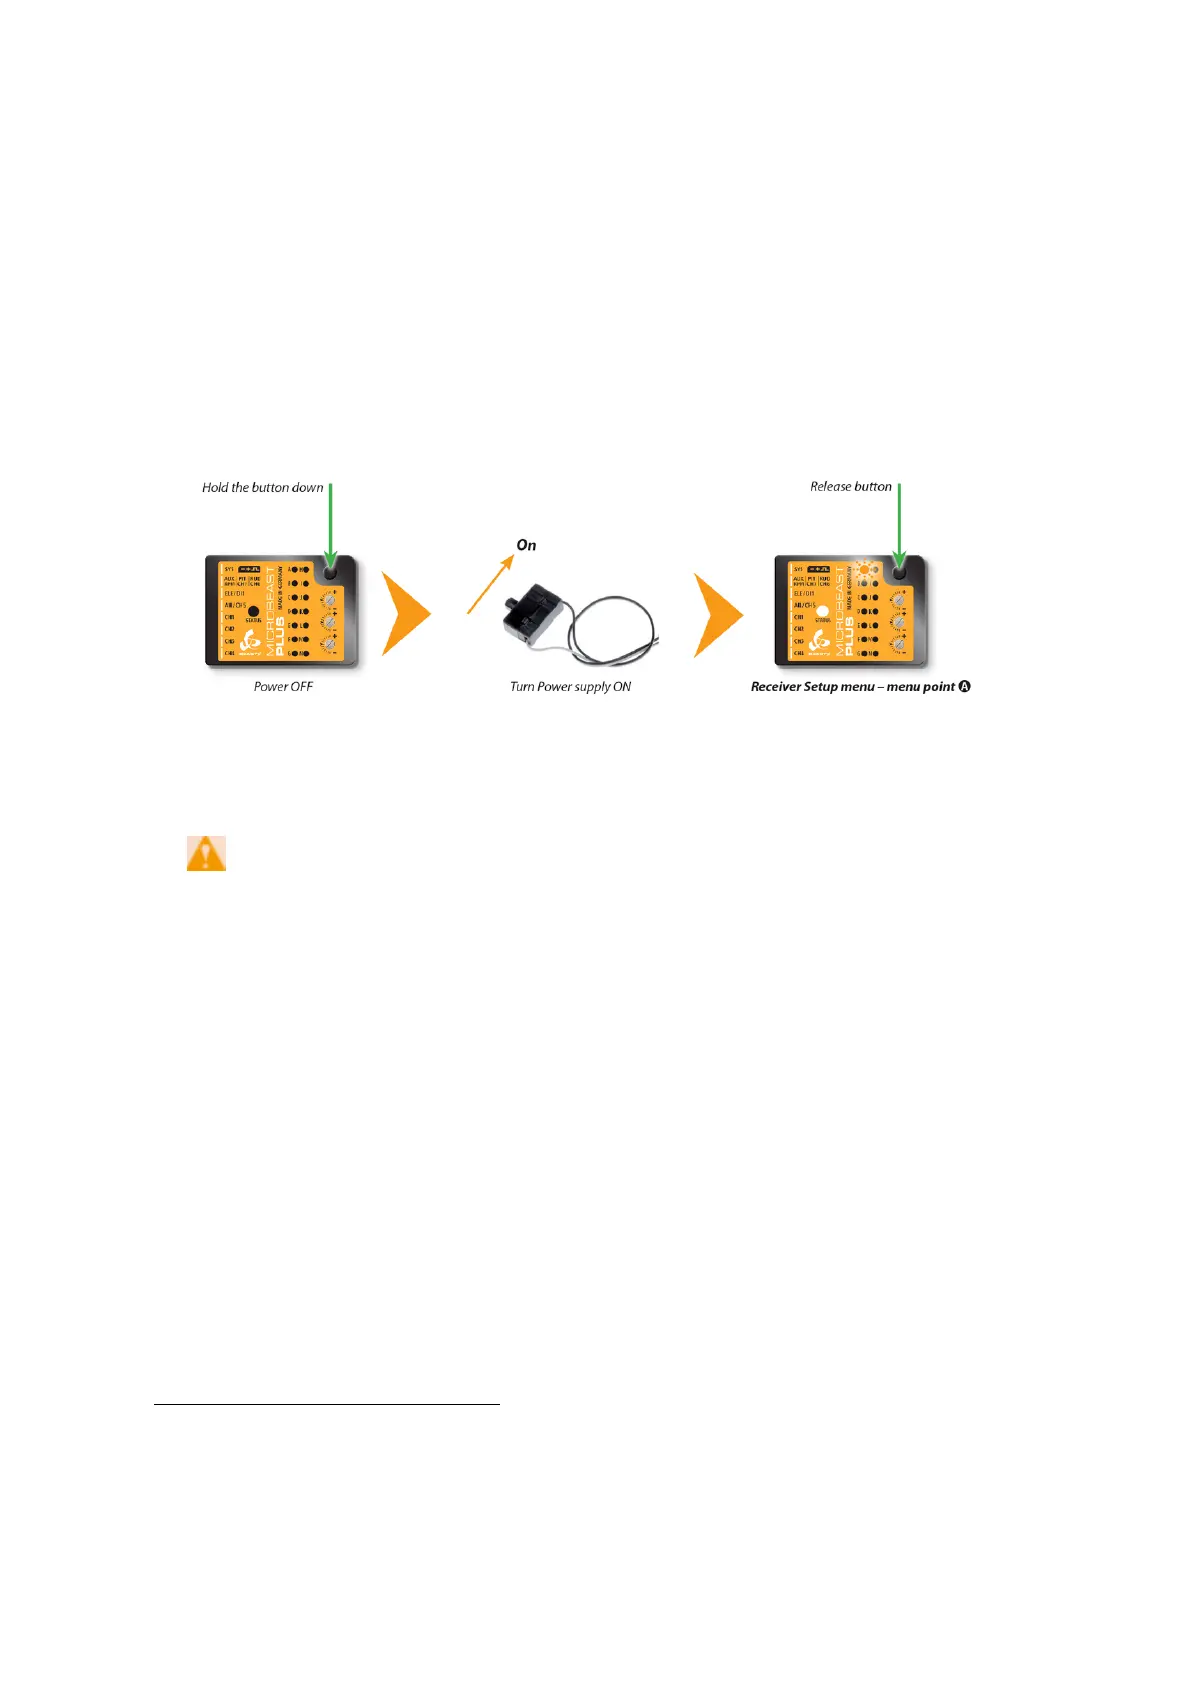
25 Adjustment on the device
To get into the Receiver menu press the button on MICROBEAST PLUS and hold it down
before(!) and while turning on the receiver power supply. The yellow Menu-LEDs start to
cycle immediately. When you release the button, Menu LED A will be flashing and the
color of the Status LED will indicate the receiver type that is selected at the moment.
Figure 70
Note that in the first menu points of Receiver setup menu no control signal is
emitted on [CH5] Output of MICROBEAST PLUS (in case you are using a single-line
receiver). At Menu Point N (Throttle failsafe setting) the output is activated though to
check throttle position! If you use a speed controller with BEC, disconnect the
motor to avoid unintentional starting of the motor!
For a heli with combustion
engine you should remove the servo horn from the throttle servo to avoid linkage binding
or breaking the servo horn.
25.1 Point A - Receiver type
In order to detect the connected receiver type make sure the receiver is bound to the
transmitter and sending out signals. Also make sure the transmitter is setup correctly as
shown in the chapter Radio System
1
. Then briefly press the button to start automatic
1
https://wiki.beastx.com/./index.php/Manuals:MBPlusFblV5:Radio_System/en
55