Embroidery Preparation
143
> Loosen the screw on the outer hoop.
> Remove the inner hoop.
> Make sure that the arrows marks of both hoops match.
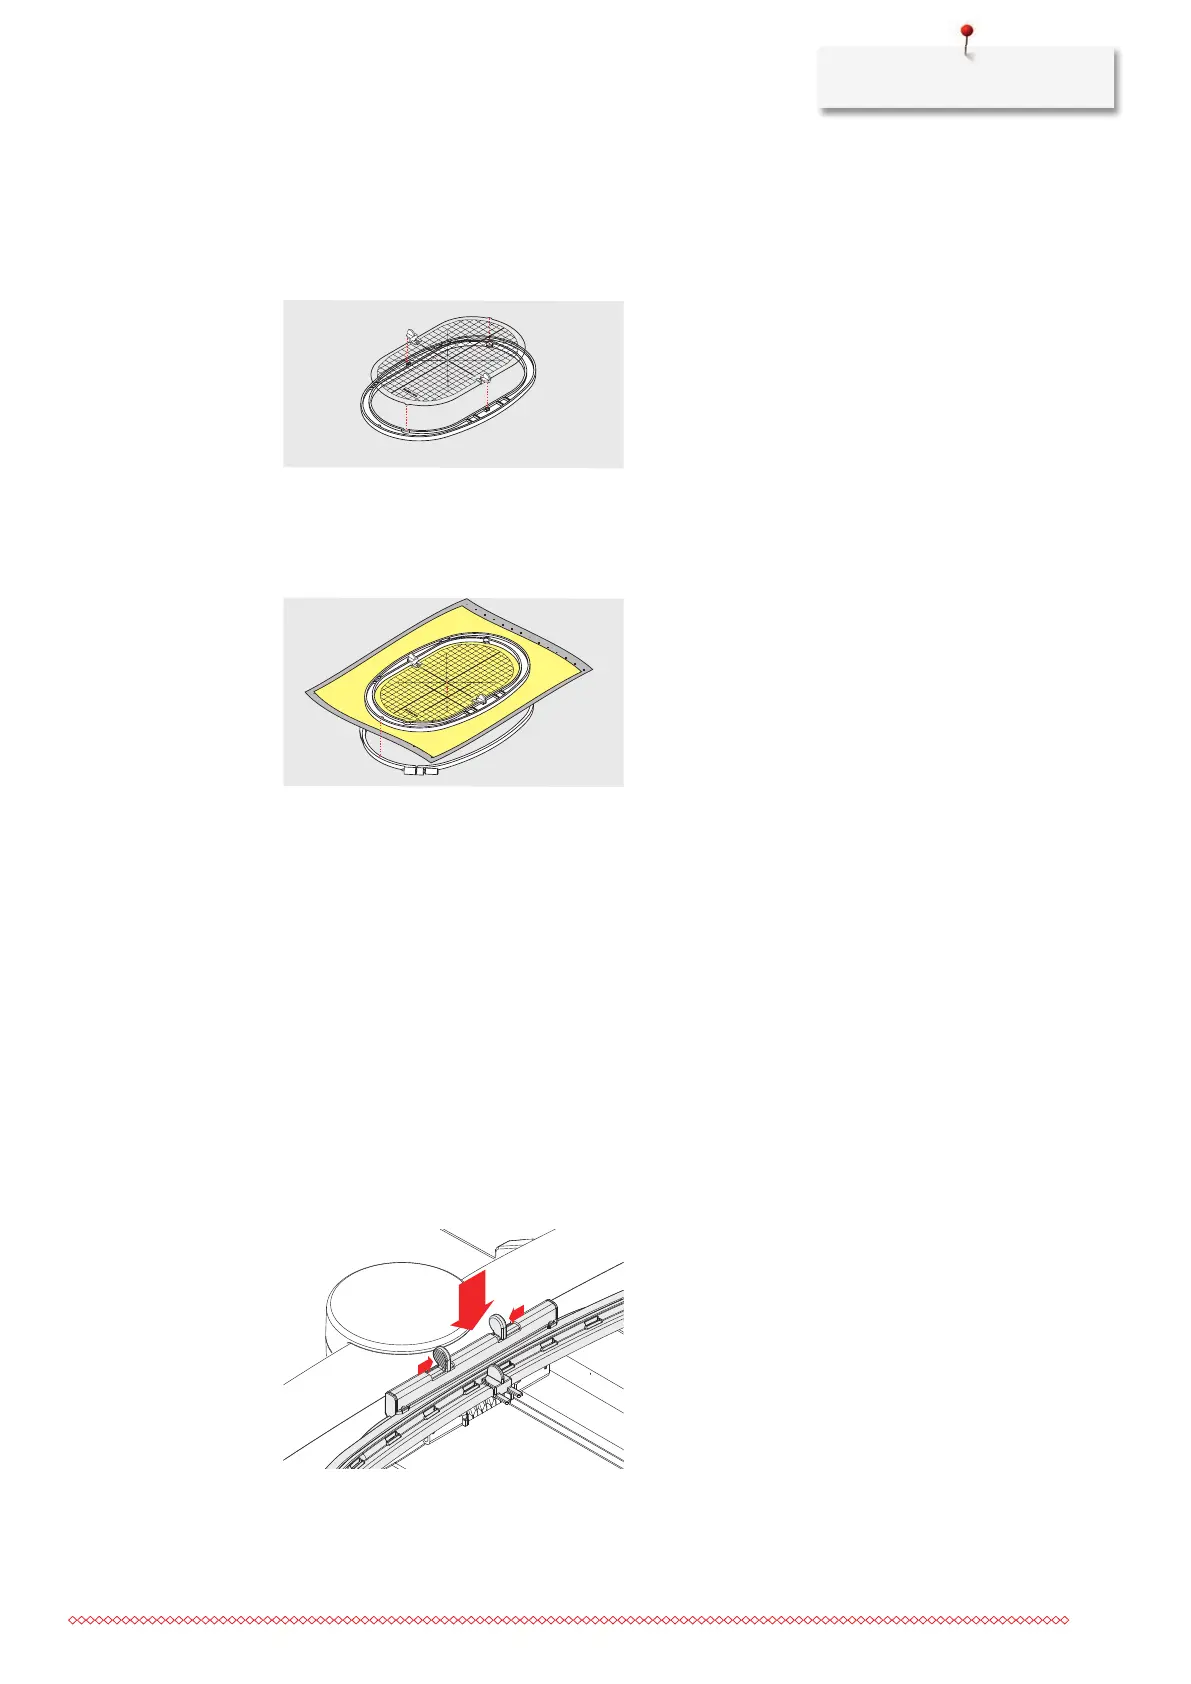
> Attach the template holder.
> Place the template in the inner hoop, so the BERNINA logo is at the front edge at the arrow mark until it
clicks into place.
> Place the fabric under the inner hoop.
> Line up the marked center point on the center of the template.
> Place the material and the inner hoop on the outer hoop, so that the arrow markings of both hoops are
aligned.
> Fit the hoops into each other so that the material does not move.
> Hoop the fabric tautly in the embroidery hoop.
> Tighten the screw.
> Remove the template from the hoop by using the template holder.
> To avoid scratches on the free arm, press the inner hoop into the outer hoop so that the inner hoop
including the fabric protrudes downwards by up to 1 mm.
Attaching the Hoop
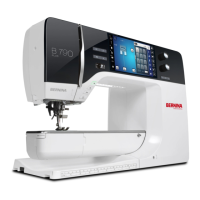
> Raise the needle.
> Raise the embroidery foot.
> Hold the hoop with the right side of the fabric up with the attaching mechanism to the left.
> Position the hoop below the embroidery foot.
> Press both attaching mechanisms (1) of the hoop towards each other.
> Position the embroidery hoop (2) above the bracket of the embroidery arm.
> Press the hoop down until it clicks in position.
> Release the attaching mechanism (1).
> Press the attaching mechanisms of the hoop towards each other to remove the hoop.
> Remove the hoop.