Sewing Preparation
44
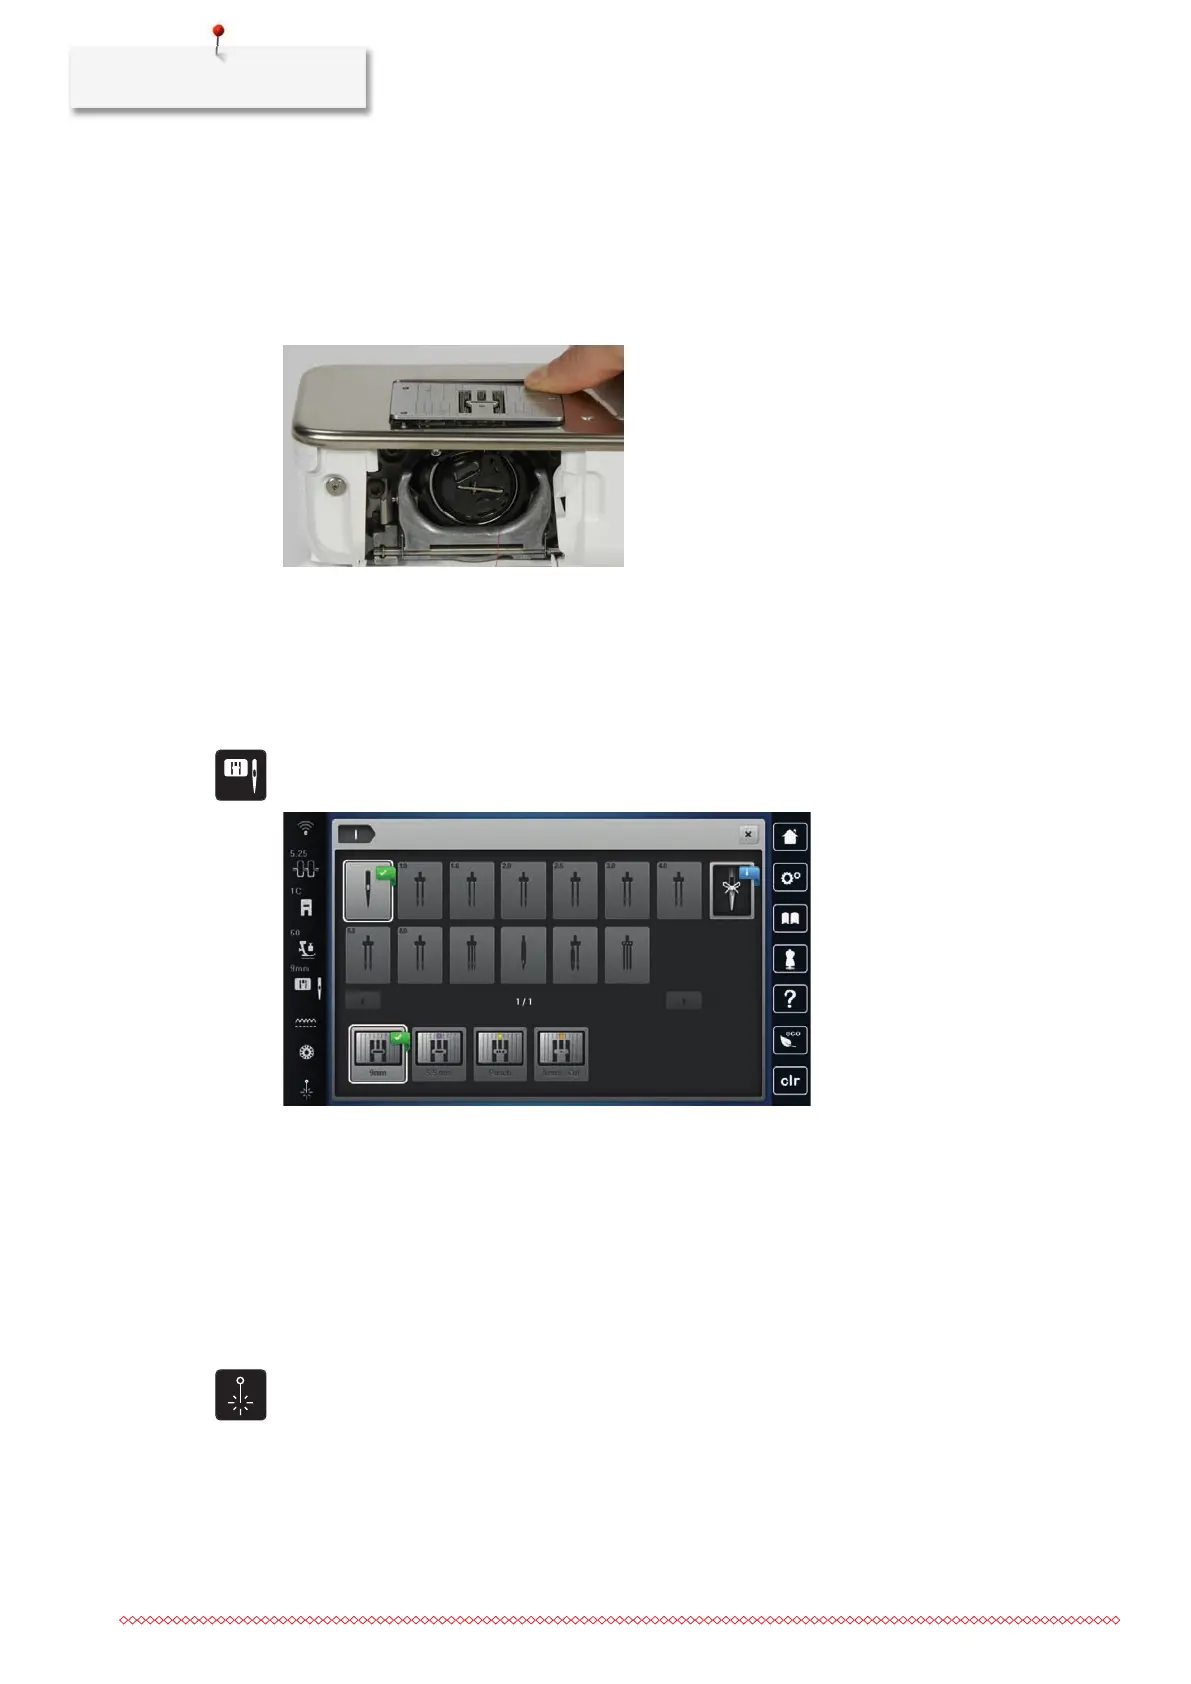
Changing the Stitch Plate
The stitch plate is marked with vertical, horizontal and diagonal lines in millimeters (mm) and inches (inch).
These markings are helpful for sewing or precise top-stitching.
> Lower the feed dog.
> Switch off the machine.
> Remove the needle and presser foot.
> Press the stitch plate down at the marking at the back on the right until it tilts.
> Remove the stitch plate.
> Place the openings of the new stitch plate above the corresponding guide pins and press down until it
clicks into place.
Selecting the Stitch Plate in the User Interface
After changing the stitch plate, you can check whether this can be used with the selected needle.
> Tap «Stitch Plate Selection».
> Select the previously fitted stitch plate.
– If the selected stitch plate is suitable to be used in combination with the needle, sewing can begin.
– If the selected stitch plate is not suitable to be used in combination with the needle, an error message
is displayed and starting the machine is automatically prevented.
Switching the Laser On/Off
The laser can be used to indicate the exact needle entry point.
• The needle is raised.
> To activate the laser, tap «Laser».
– The entry point is displayed. Depending on the presser foot and needle position, the entry point may
be concealed by the presser foot.
> To avoid the deflection of the laser with transparent presser feet, lower the presser foot before the
sewing start, e.g. with the knee lifter.
> To switch off the laser, tap the field highlighted in yellow «Laser».