Creative Embroidering
158
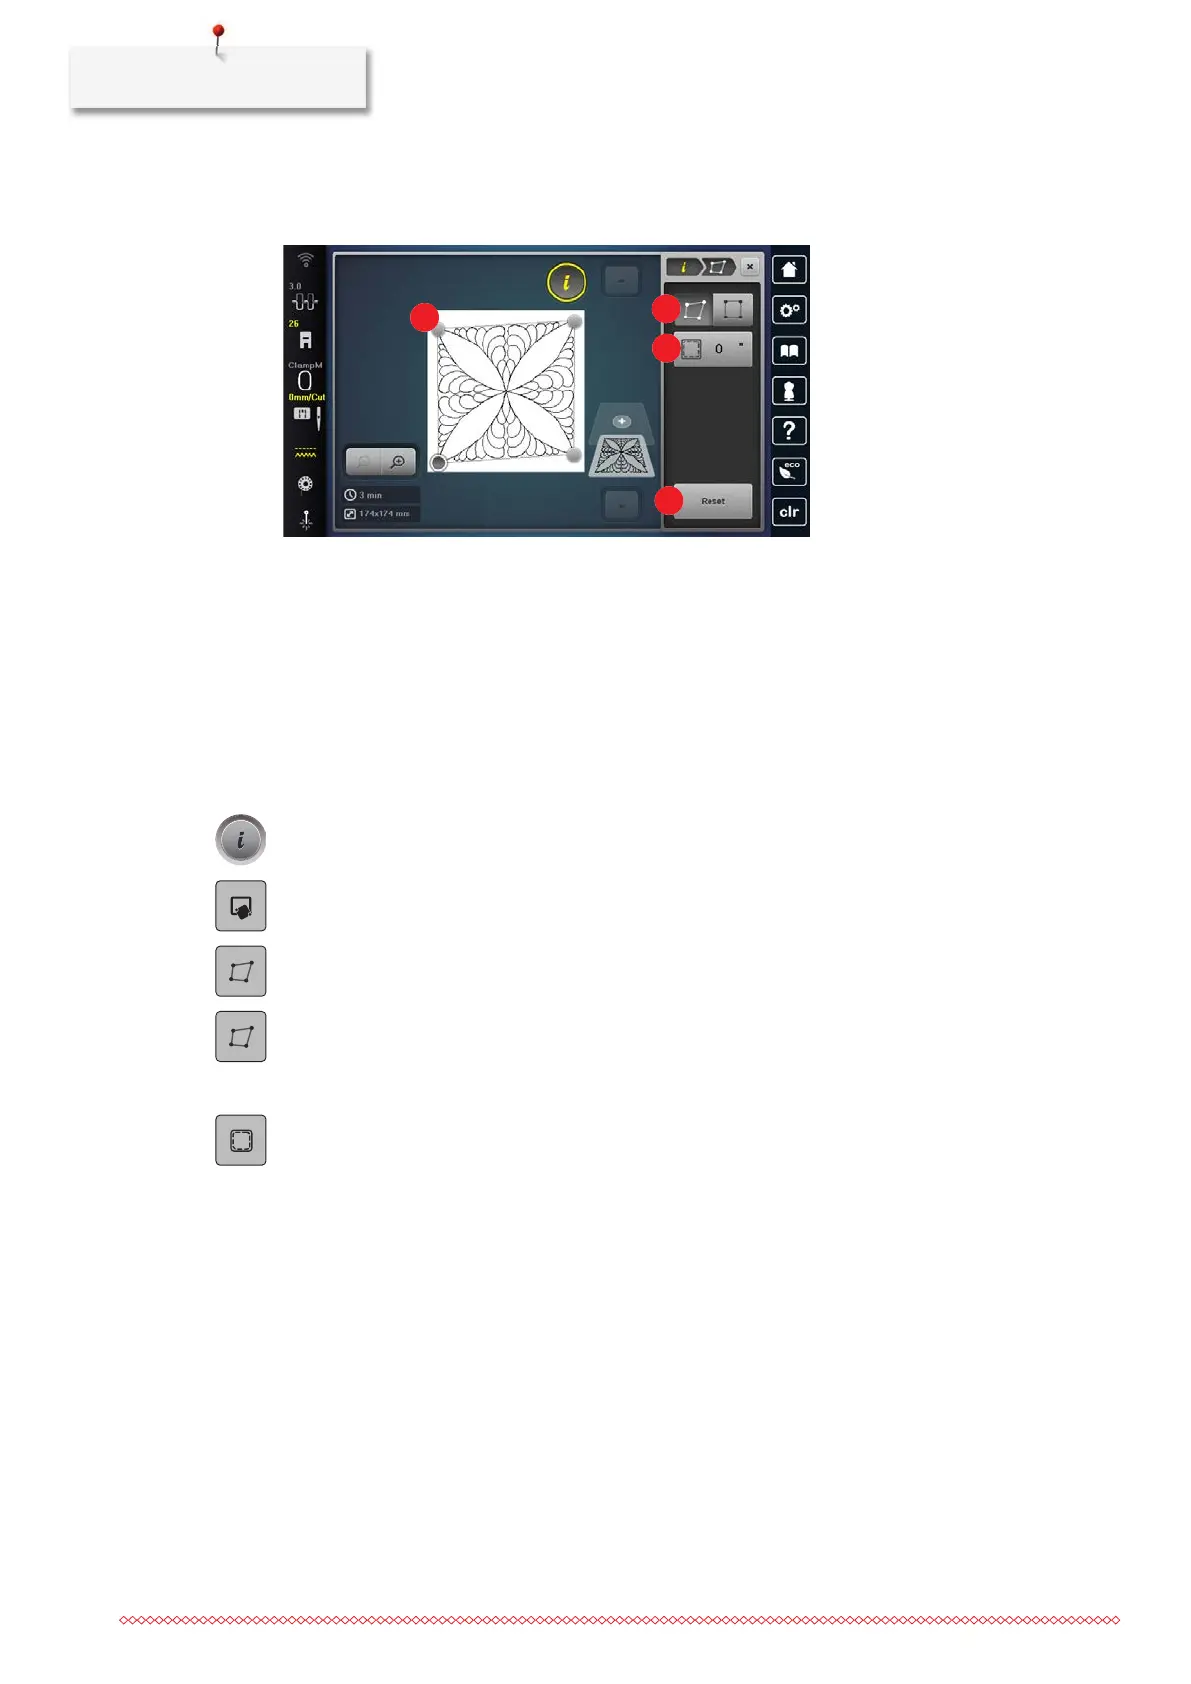
Placing an Embroidery Design into a Square in a deformed Shape
This function allows embroidery designs to be placed exactly on the fabric in a square boundary. In the
process, the embroidery design is inserted within the boundary and morphed to fit.
1 Corner Point 3 «Margin Spacing»
2 «Morph» 4 «Resetting»
• The four corner points of the embroidery design are marked on the fabric with chalk or a water-soluble
pen. The place or the location where the embroidery design is to be positioned is clearly visible.
• The attached embroidery hoop is selected.
> Select the embroidery design.
> Adjust the size of the embroidery design to fit into the hoop, as well as the position and the alignment.
> Tap «i-Dialog».
> Tap «Pinpoint Placement».
> Tap «4-point Placement».
> Tap «Morph».
> Select one of the corner points and position the needle over the corresponding marking on the fabric via
the multi-function knobs. For the precise positioning of the needle, the laser can be switched on.
> Select the next corner point and position the needle.
> If necessary, adjust the margin spacing.
– The embroidery design is placed and can be embroidered.
 Loading...