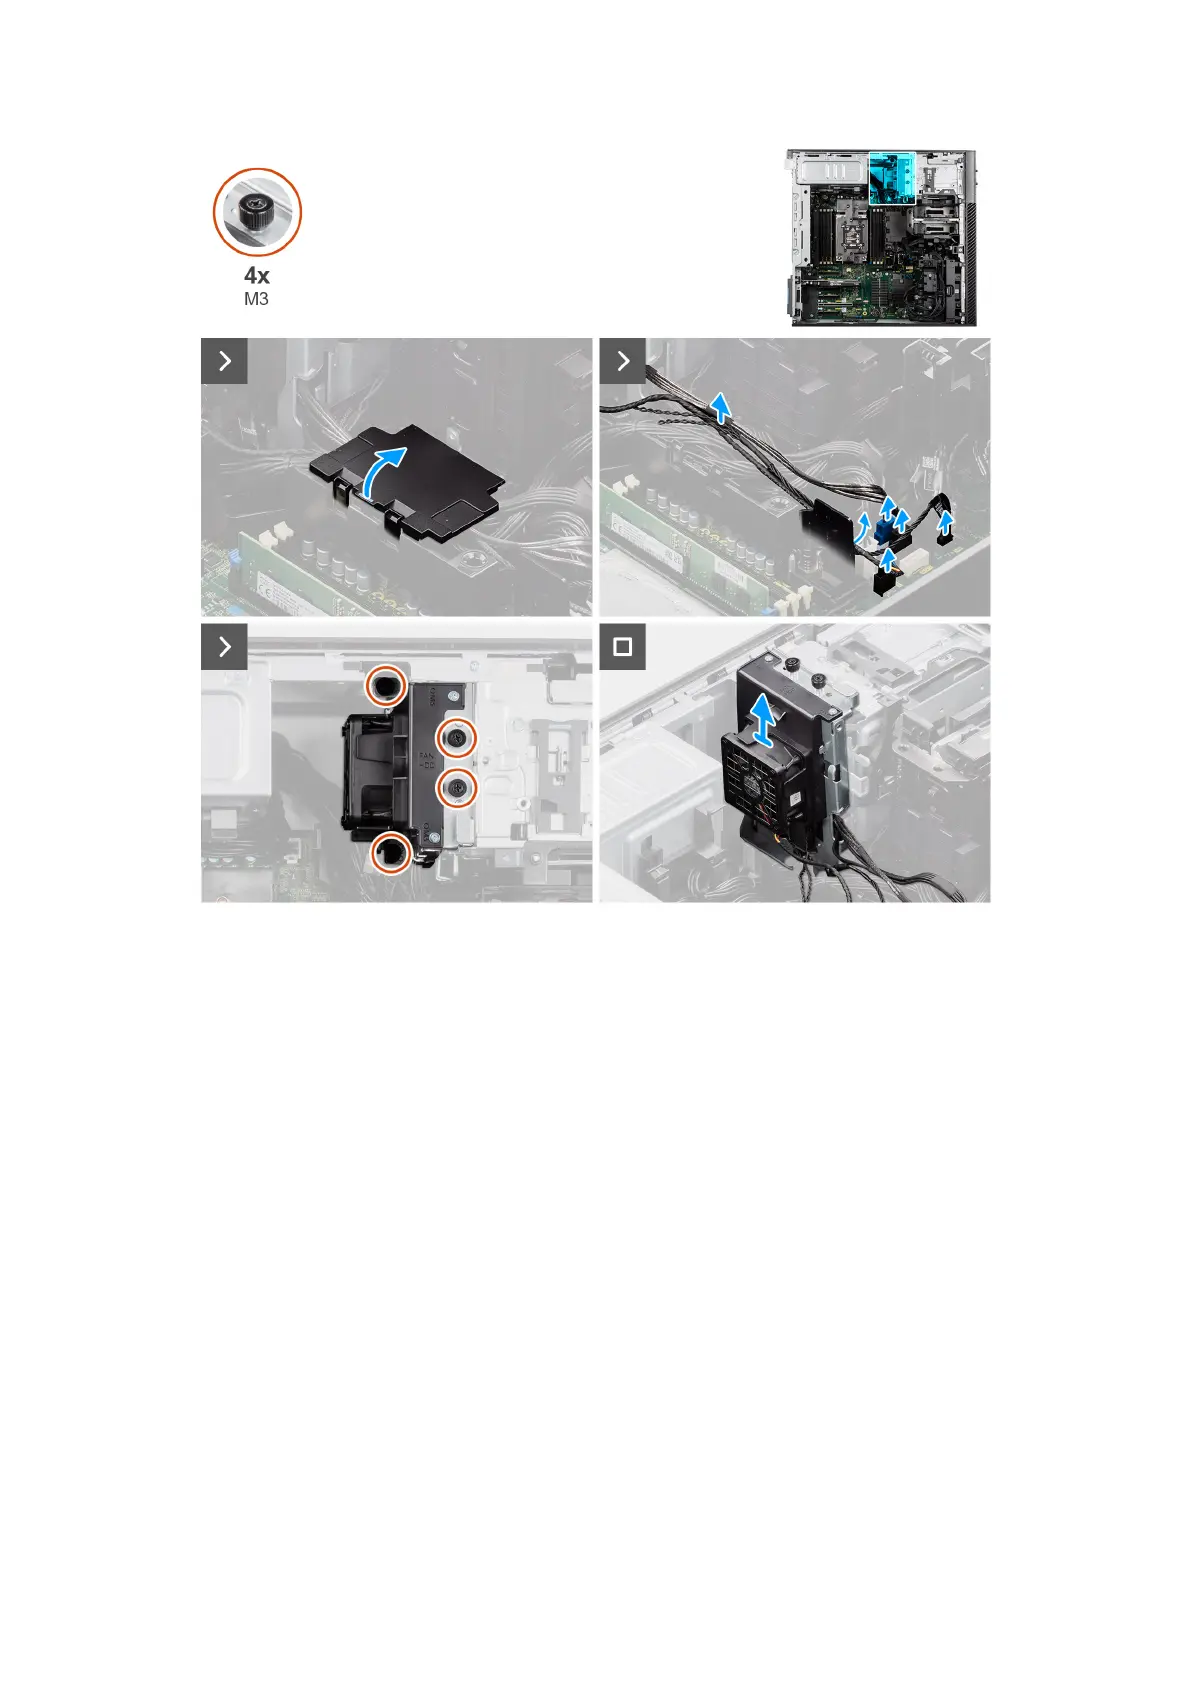
Figure 93. Removing the hard-drive fan assembly
Steps
1. Disconnect the SATA power cables, thermal sensor cable, and fan hard drive assembly cable from the connectors on the
system board.
2. Lift the cover of the bottom air shroud to unroute the cables.
3. Loosen the four (M3) captive screws securing the hard-drive fan assembly to the chassis and system board.
4. Lift and remove the hard-drive fan assembly from the computer along with SATA power cables, thermal sensor cable, and
fan hard drive assembly cable.
Installing the hard-drive fan assembly
Prerequisites
If you are replacing a component, remove the existing component before performing the installation procedure.
About this task
The following images indicate the location of the hard-drive fan assembly and provide a visual representation of the installation
procedure.
122
Removing and installing Field Replaceable Units (FRUs)