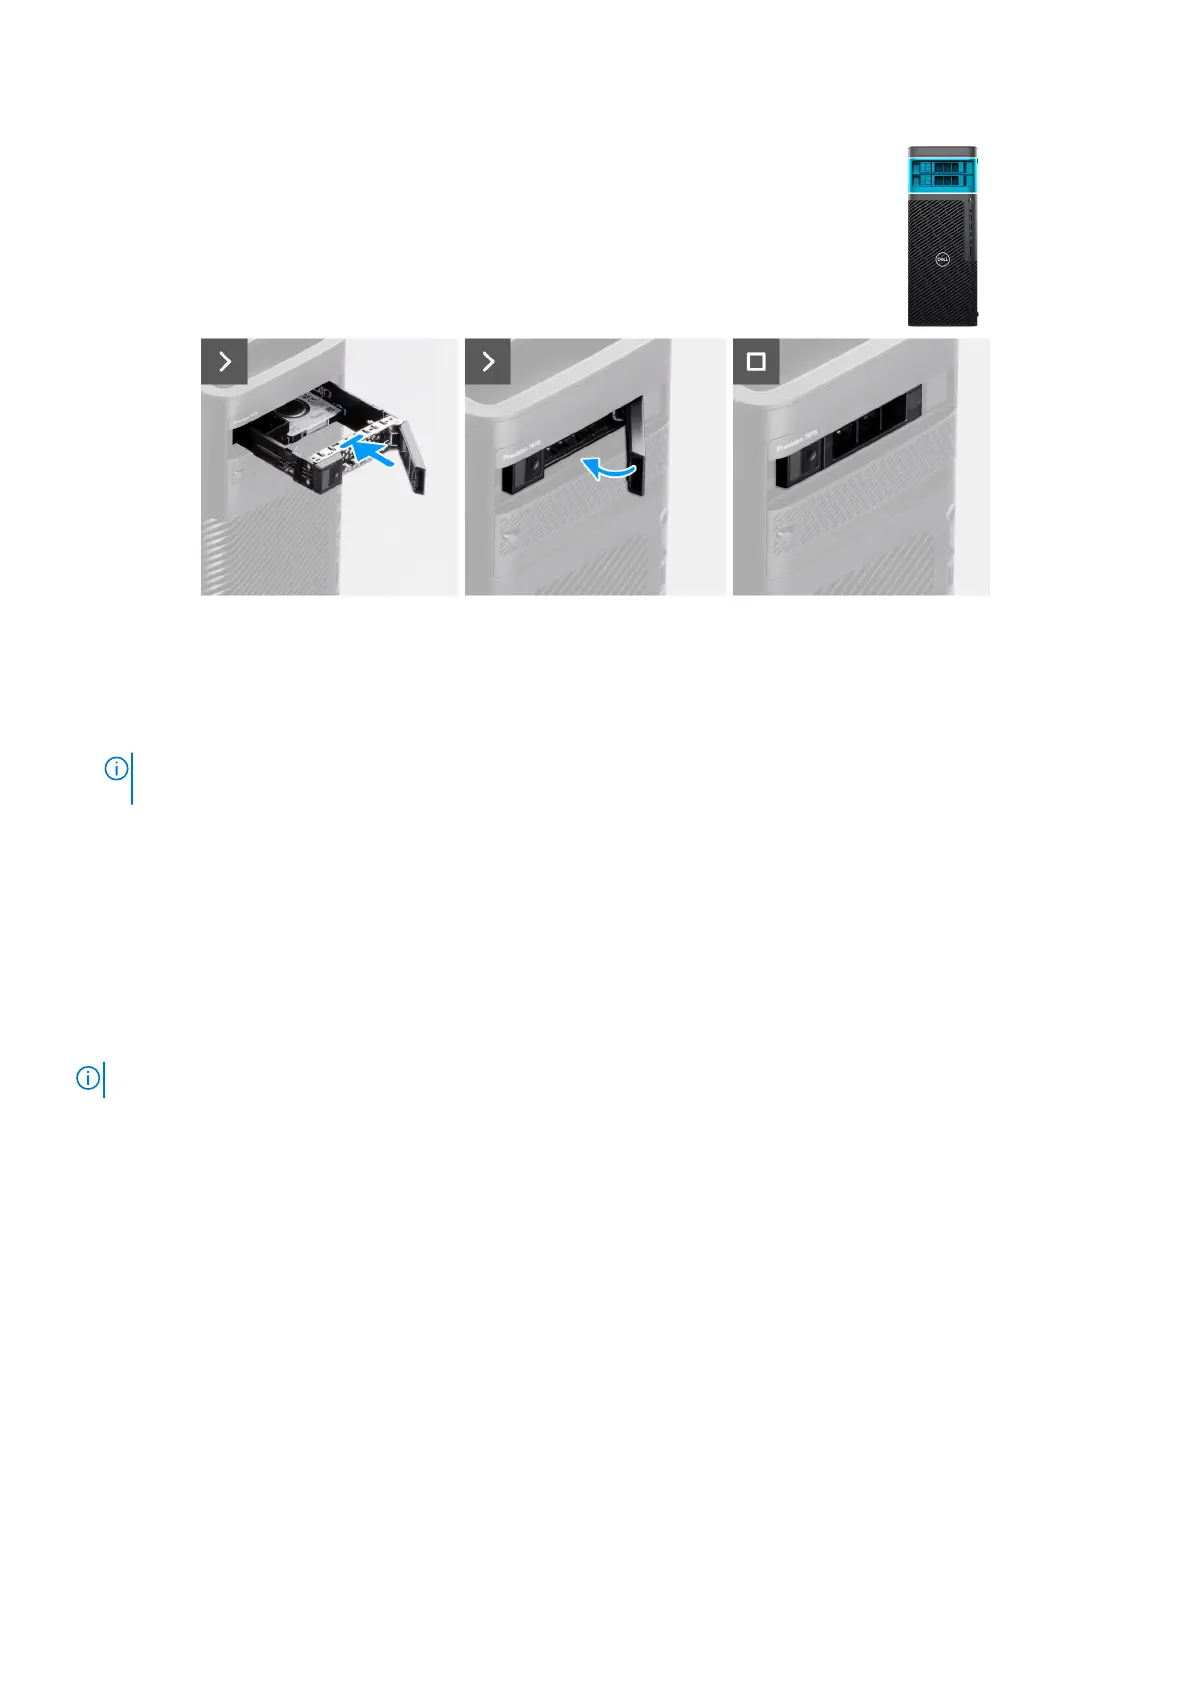
Figure 25. Installing the external 2.5-inch hard-drive assembly
Steps
1. Slide and insert the hard-drive assembly into the upper external flex bay slot.
2. Close the release latch to secure the hard-drive assembly in place.
NOTE:
Perform step 1 to step 2, to install the second external 2.5-inch hard-drive assembly into the lower bay (if
applicable).
Next steps
1. Follow the procedure in After working inside your computer.
Removing the external 3.5-inch hard-drive assembly
Prerequisites
1. Follow the procedure in Before working inside your computer.
NOTE: Precision 7875 Tower can support two external 3.5-inch hard-drive assemblies.
About this task
The following images indicate the location of the external 3.5-inch hard-drive assembly and provide a visual representation of
the removal procedure.
Removing and installing Customer Replaceable Units (CRUs)
51