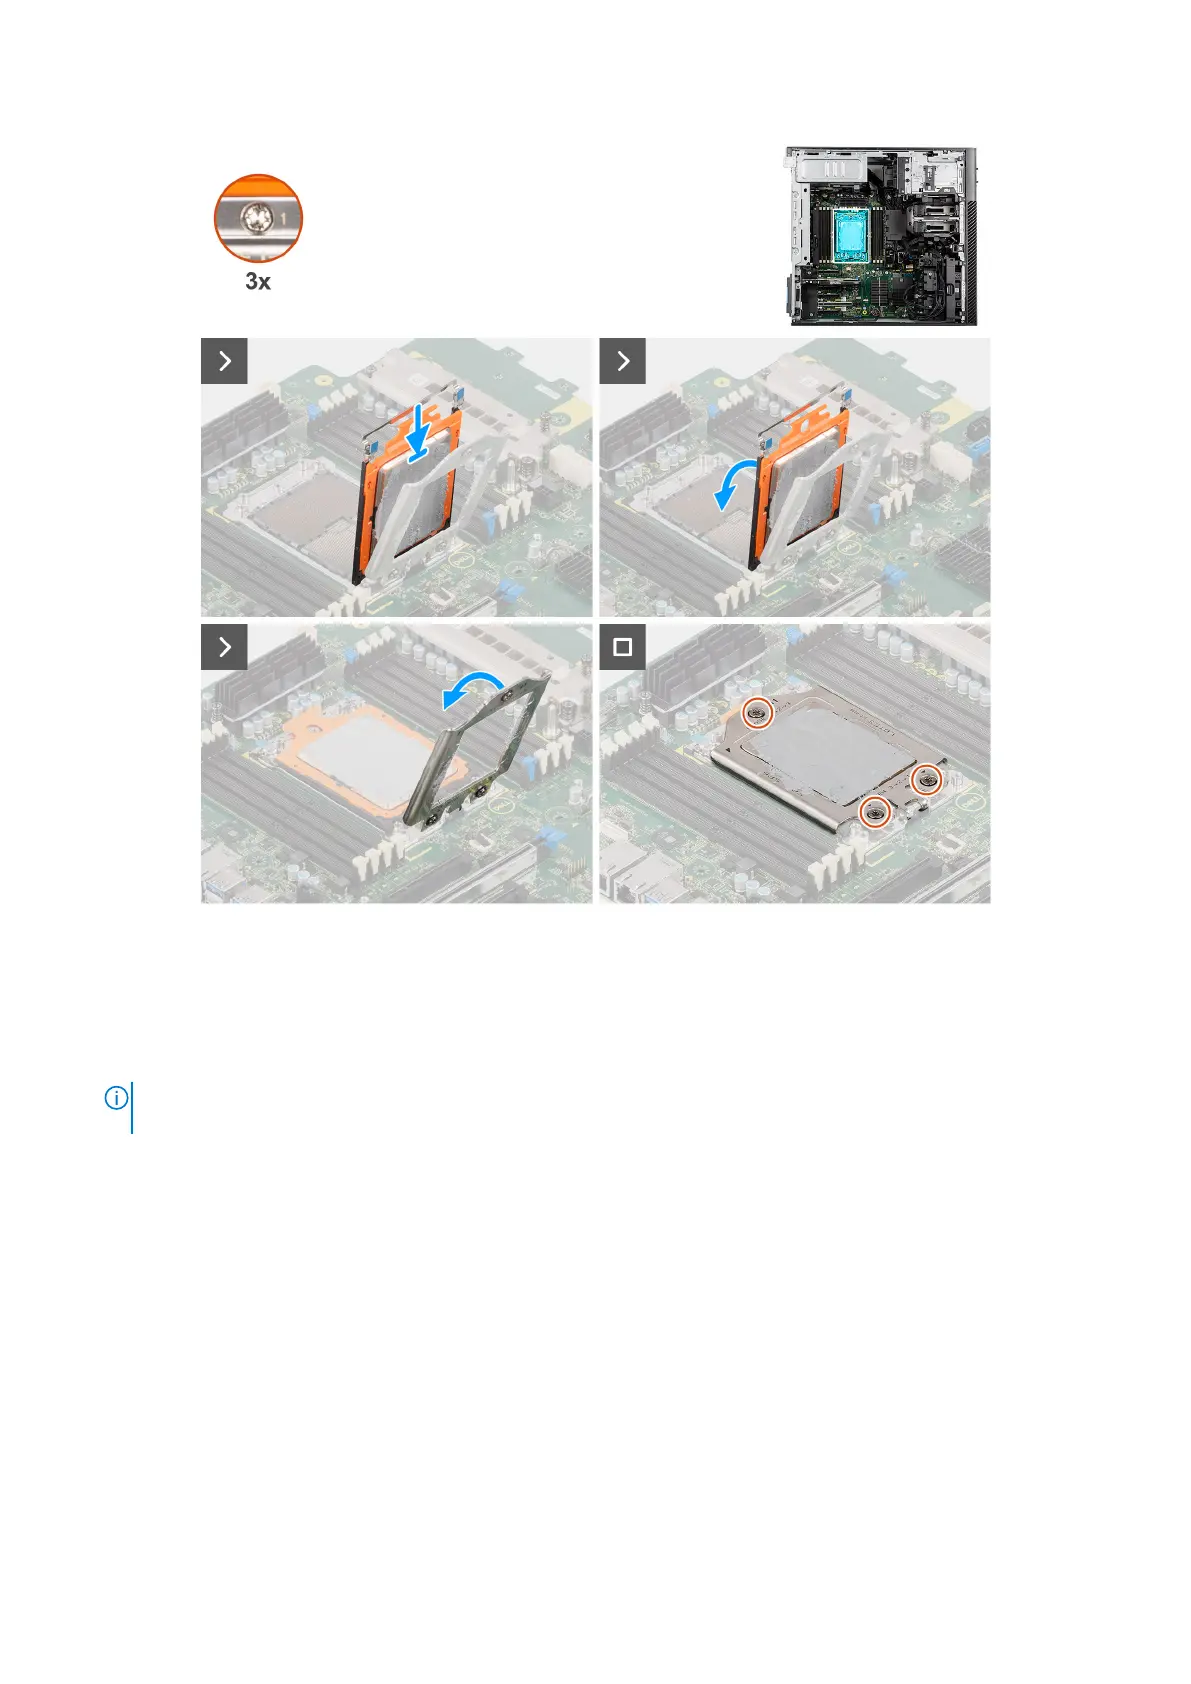
Figure 104. Installing the processor
Steps
1. Place the processor into the CPU carrier.
2. Slide the CPU carrier along with the processor by holding the two blue latch points on the rail frame and rotating it to the
horizontal position.
NOTE:
Ensure the carrier frame clicks into place in the rail frame. If the carrier frame is not properly secured, it can
damage the socket cap.
3. Close the force frame and align the screw holes on the force frame to the screw holes on the system board.
4. Using a Torx T20 screwdriver, tighten the three captive screws in a sequential order (1 > 2 > 3) to secure the force frame to
the system board.
Next steps
1. Install the heat-sink assembly.
2. Install the air shroud.
3. Install the side cover.
4. Follow the procedure in After working inside your computer.
132
Removing and installing Field Replaceable Units (FRUs)