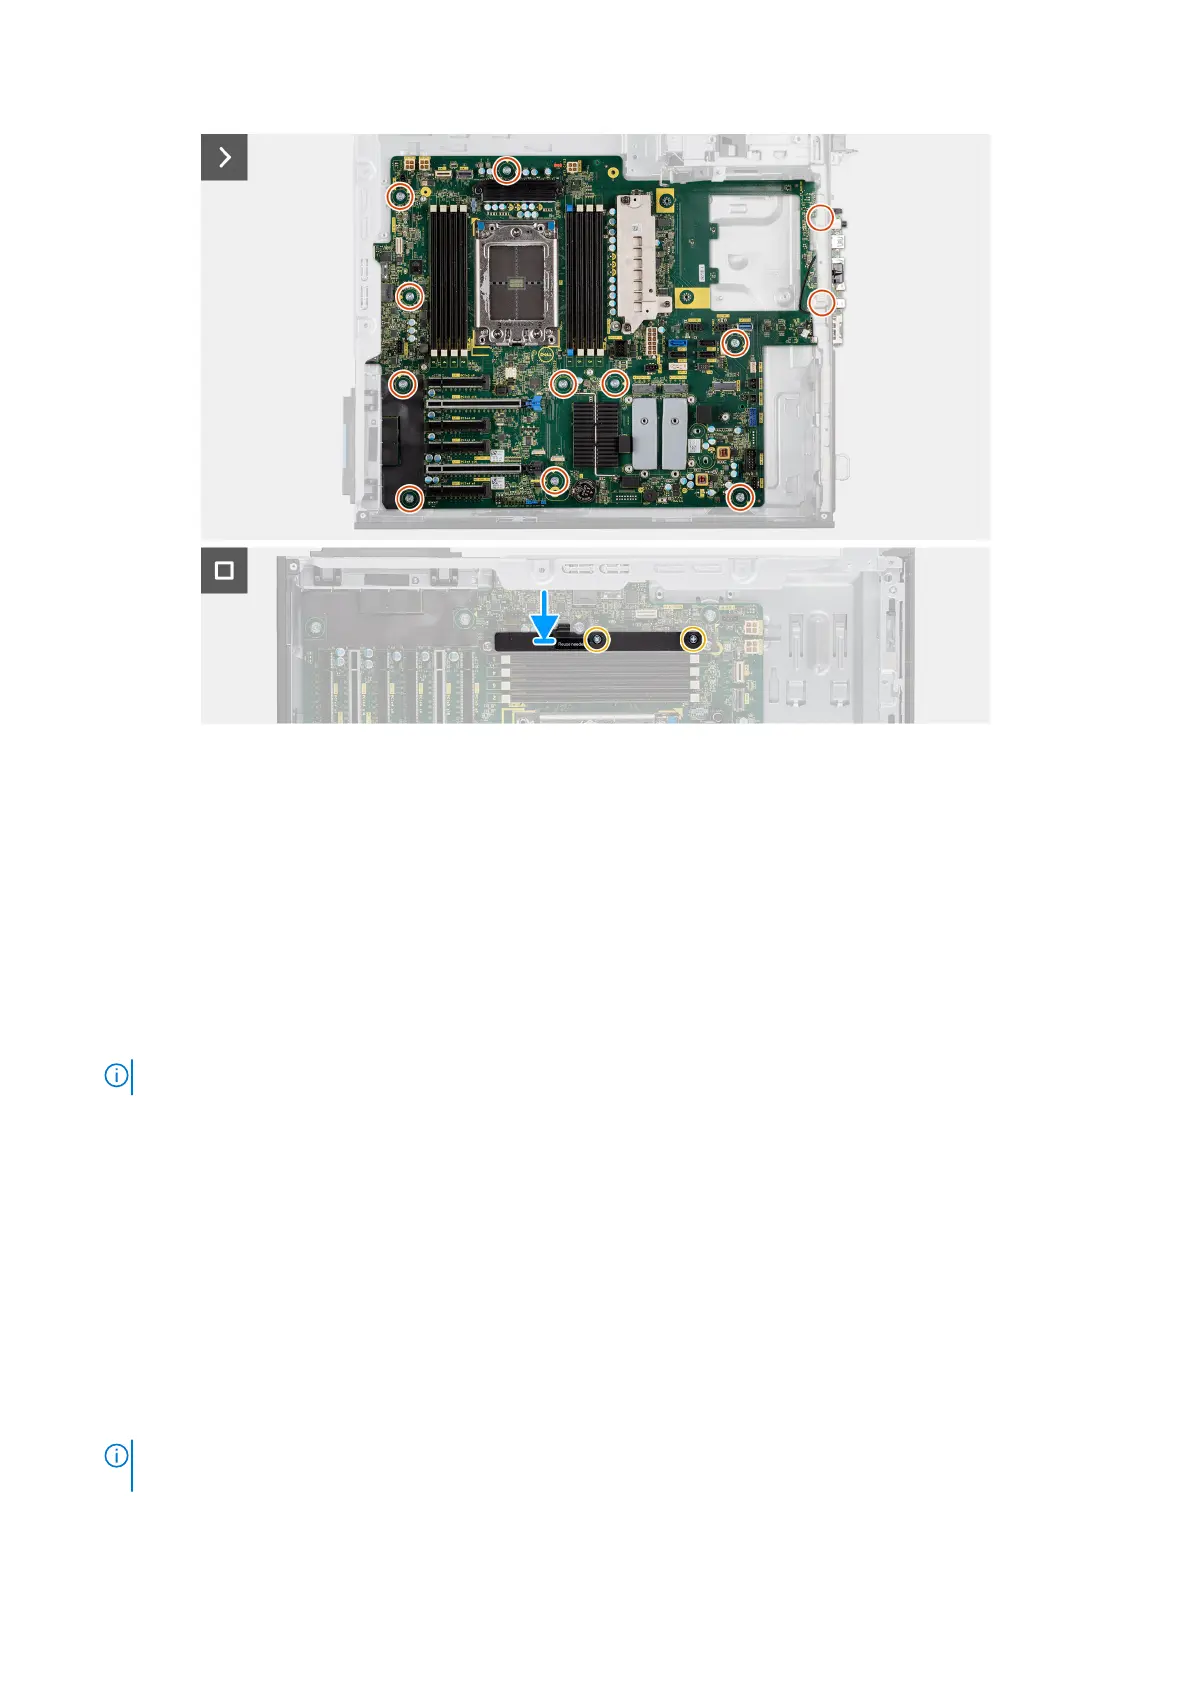
Figure 121. Installing the system board
Steps
1. Align and lower the system board into the system until the connectors at the back of the system board align with the slots
on the chassis, and the screw holes on the system board align with the standoffs on the system.
2. Replace the 12 (#6-32) screws that secure the system board to the chassis.
3. Align and place the rear bottom air shroud on the system board.
4. Replace the two (M3) screws to secure the rear bottom air shroud to the system board.
Next steps
1. Install the processor.
2. Install the power-supply unit.
NOTE: Install the power-supply cable clips to the power-supply cover replacing the system board.
3. Install the front-fan assembly and rear-fan assembly.
4. Install the heat-sink assembly.
5. Install the intrusion switch.
6. Install the internal hard-drive cage.
7. Install the hard-drive fan assembly.
8. Install the M.2 2230 PCIe solid-state drive/M.2 2280 PCIe solid-state drive.
9. Install the memory module.
10. Install the 3.5-inch hard-drive assembly /2.5-inch hard-drive assembly.
11. Install the PCIe holder.
12. Install the air shroud.
13. Install the front I/O bracket.
14. Install the front bezel.
15. Install the side cover.
16. Follow the procedure in After working inside your computer.
NOTE:
Your computer’s Service Tag is stored in the system board. You must enter the Service Tag in the BIOS setup
program after you replace the system board.
148 Removing and installing Field Replaceable Units (FRUs)