MAINTENANCE & FAULT FINDING
Replacement Print head assembly
Note: Do not handle the new print head
assembly by touching the printing edge.
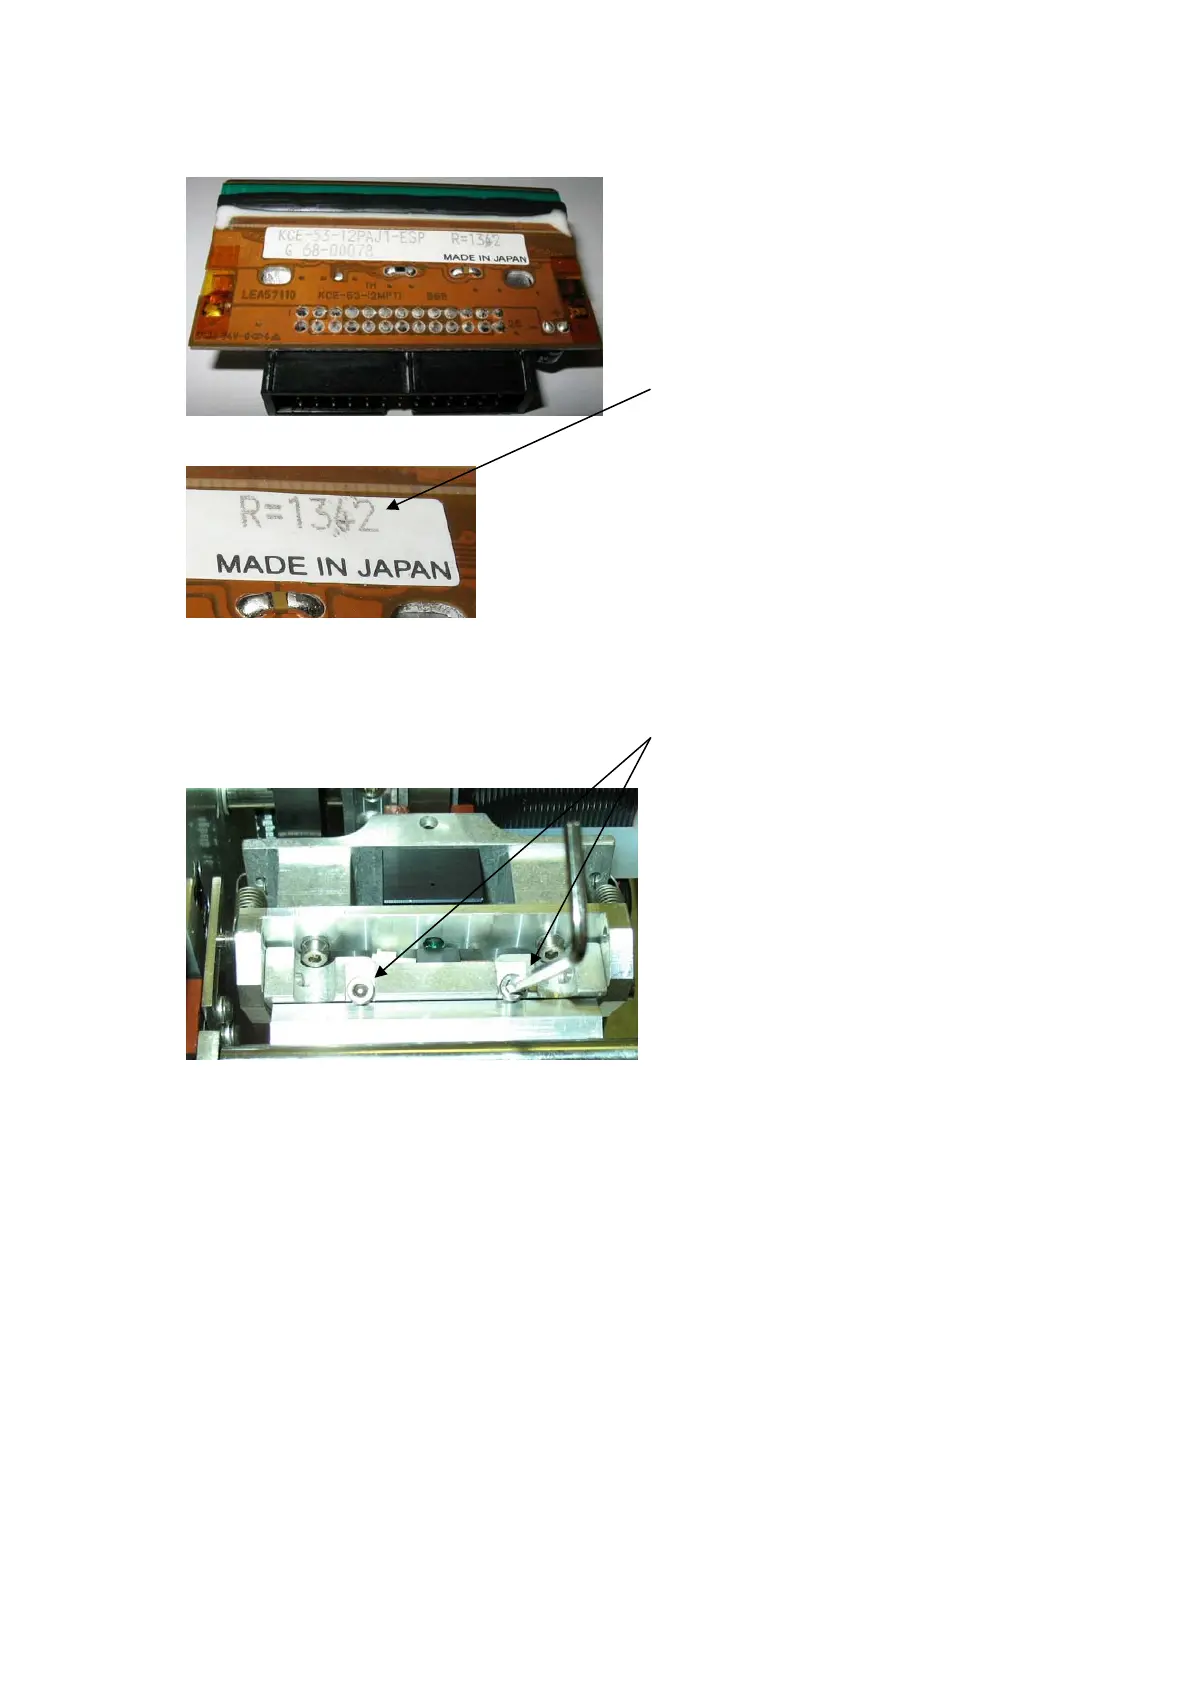
Make a note of the resistance of the
print head printe
d on the new unit.
This is needed to update the value
entered into the software.
Resistance value = 1342
Fit the new print head to the printer
and ensure the head is pushed up
flush against the mounting plate.
While holding the print head in this
position tighten the 2 screws using a
2.5mm Allen key.
Clean the print head using the
Domnio cleaning kit Part VPR0222
(see page 169: Cleaning the Print
Head)
Refit the outer cover. Screw in the
2 Knurled retaining screws and
replace the ribbon cassette
Switch on the printer and wait for it
to initialise.
From the Main Menu press:
Settings, Hardware, Printer type,
Head resistance.
Then via the on-screen keypad enter
the resistance value (in this example
1342).
Press OK, Save, OK and then
Cancel to return to the Main Menu
27864 Issue 1January 2008 (169)
 Loading...