
B
barberdominiqueAug 29, 2025
What to do if DURKOPP ADLER Sewing Machine shows internal EEprom defective?
- EEdward LeeAug 30, 2025
If the internal EEPROM is defective in your DURKOPP ADLER Sewing Machine, replace the control.


What to do if DURKOPP ADLER Sewing Machine shows internal EEprom defective?
If the internal EEPROM is defective in your DURKOPP ADLER Sewing Machine, replace the control.
What to do if maximum speed exceeded on DURKOPP ADLER 867 Sewing Machine?
If the maximum speed is exceeded on your DURKOPP ADLER Sewing Machine, replace the encoder, perform a reset, and check the class (t 51 04).
What to do if DURKOPP ADLER Sewing Machine shows no valid data on external EEprom?
If your DURKOPP ADLER Sewing Machine indicates no valid data on the external EEPROM because the internal data structures are incompatible, perform a software update.
What to do if DACextension box not responding on DURKOPP ADLER Sewing Machine?
If the DACextension box on your DURKOPP ADLER Sewing Machine is not responding, start by checking the connection cables. Next, examine the LEDs on the DACextension box for any indication of the problem. If the issue persists, try a software update.
How to fix checksum error during update on DURKOPP ADLER Sewing Machine?
If you encounter a checksum error during update on your DURKOPP ADLER Sewing Machine, check the connection cables. You may also try a software update or replace the DACextension box.
What to do if no external EEprom connected on DURKOPP ADLER 867?
If no external EEprom is connected to your DURKOPP ADLER Sewing Machine, connect the machine ID.
Why is the thread breaking on my DURKOPP ADLER Sewing Machine?
If the thread is breaking on your DURKOPP ADLER Sewing Machine, several factors could be at play. Ensure the needle and hook threads are correctly threaded. A bent or sharp-edged needle should be replaced. Make sure the needle is properly inserted into the needle bar and that you're using the recommended thread. Also, check the thread tensions, as they might be too tight for the thread being used. Inspect thread-guiding parts for any sharp edges and have damaged throat plates, hooks, or spreaders reworked by qualified specialists.
What to do if no release for sewing process on DURKOPP ADLER Sewing Machine?
If there is no release for the sewing process on your DURKOPP ADLER Sewing Machine, ensure that parameter t 51 20-t 51 33 = 25. Also, confirm that the input signal for sewing process release is present.
What to do if DURKOPP ADLER Sewing Machine shows communication error?
If you're experiencing a communication error on your DAC classic DURKOPP ADLER Sewing Machine, where only the functions of the DAC basic are available, try restarting the control. If the problem continues, attempt a software update. If neither works, consider replacing the control.
What to do if DURKOPP ADLER Sewing Machine shows checksum error during update?
If you encounter a checksum error during an update on your DURKOPP ADLER Sewing Machine, first check the connection cables. If the problem persists, attempt a software update. If the issue still occurs, consider replacing the DACextension box.
Identifies the target audience for the service instructions.
Explains symbols and formatting used for clarity in the manual.
Lists related documentation for further reference.
Outlines the manufacturer's liability limitations.
Provides fundamental safety guidelines for machine operation and maintenance.
Details hazard levels and associated symbols for safety alerts.
Emphasizes adjustment sequence and proper cable routing.
Explains procedures for accessing machine components by removing covers.
Describes shaft features and methods to secure the machine for adjustments.
Instructions for positioning the handwheel to specific marks for adjustments.
Step-by-step guide for recalibrating the handwheel's graduated scale.
Procedure to correctly position the arm shaft for proper machine function.
Instructions for aligning both upper and lower toothed belt wheels.
Detailed steps for adjusting the primary and secondary stitch length controls.
Setting stitch length limits and adjusting for forward/backward stitch consistency.
How to set feed dog position and adjust its movement cycle for accurate feeding.
Setting and adjusting the feed dog's lift height using different methods.
Procedures for aligning the needle bar linkage sideways and in the sewing direction.
Setting hook-needle clearance and synchronizing loop formation.
Adjusting the needle guard and needle bar height for correct needle-hook interaction.
Setting the lifting gap and synchronizing the bobbin case lifter's operation.
Adjusting sewing foot lift height, stroke, and pressure for material.
Fine-tuning the walking foot's movement relative to the feed dog.
Adjusting needle thread tension using the regulator and spring.
Aligning winder components and adjusting the hook thread guide.
Adjusting the winder's operation and determining bobbin fill quantity.
Adjusting knife height and the path of the thread-cutting action.
Setting cutting pressure and synchronizing the thread cutting operation.
Overview, locking latch, thread-pulling knife, counter blade, and timing adjustments for KFA.
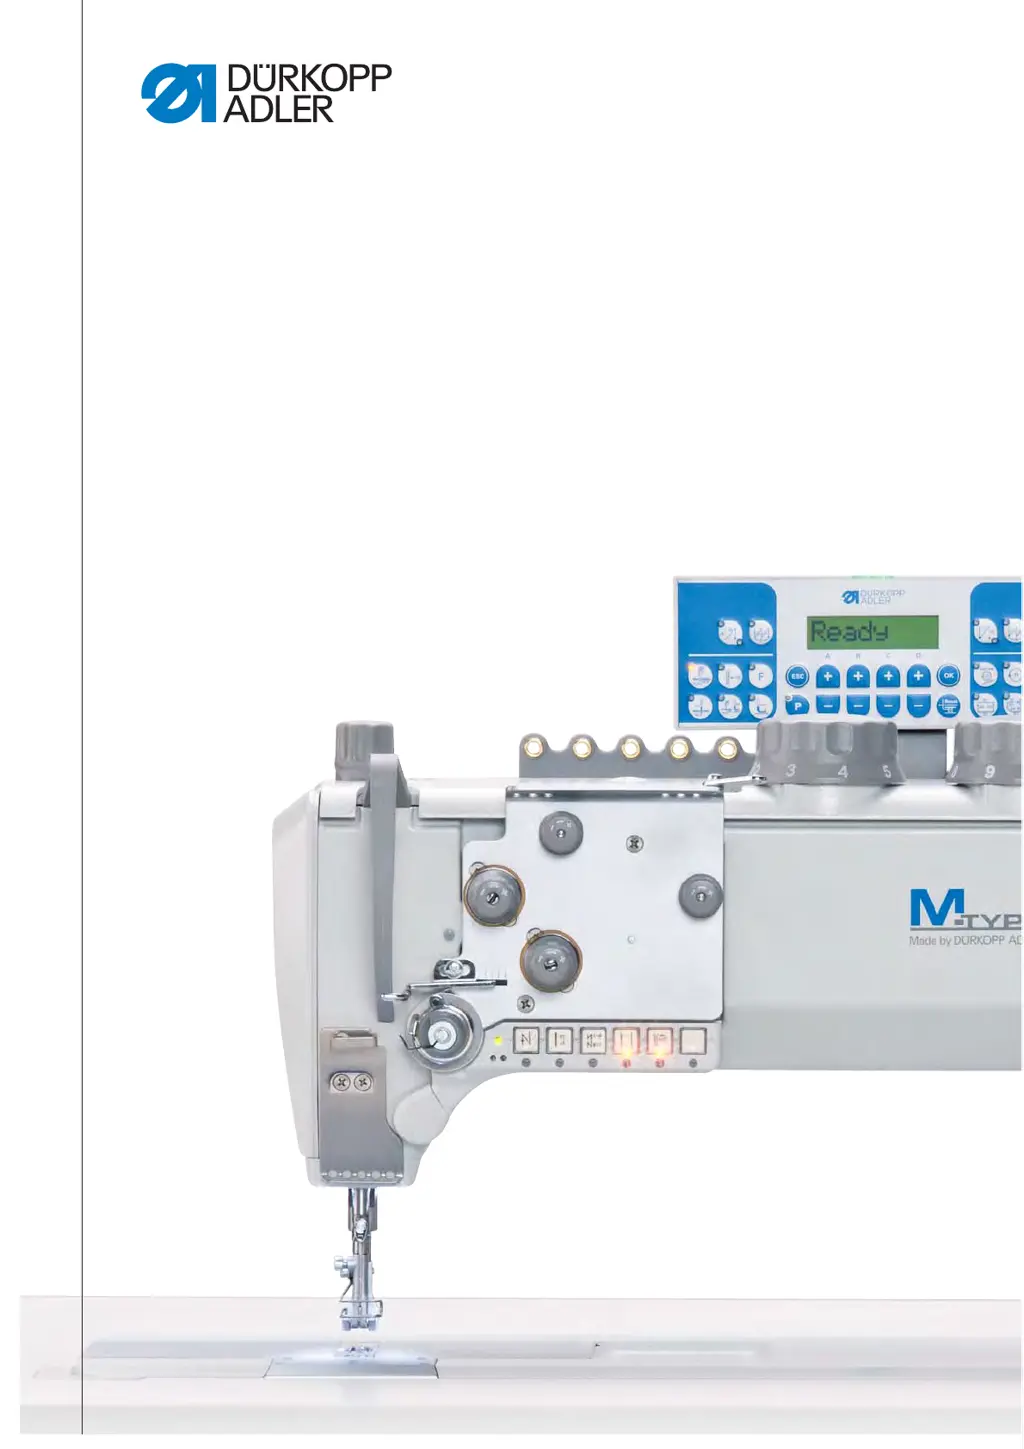
Procedure for setting the potentiometer via the control panel.
Attaching the safety clutch and setting its torque for proper disengagement.
Identifies drive components and explains disassembly/assembly procedures.
Procedures for replacing the sewing light fuse and the main printed circuit board.
Details needle bar height and slide adjustments for these machines.
Setup and fine adjustment for machines with a moving binder.
Adjustments for knife movement time, stroke, blade overlap, and cutting edge settings.
How to activate the tensioner lift and Needle Stop Brake (NSB) functions.
Procedures for cleaning the machine and lubricating its components.
Maintenance for operating pressure, water-oil draining, and filter cleaning.
Cleaning the motor fan mesh and checking the toothed belt.
Information on how to obtain a parts list for the machine.
Steps to safely take the machine out of service.
Guidelines for environmentally responsible disposal of the machine.
Contact info for support and interpretation of software messages.
Common sewing issues, causes, and solutions.
Machine's noise levels and technical specifications by subclass.
Maximum operating speeds and requirements for reliable performance.
Electrical schematics and wiring layouts for the machine.
| Stitch Type | Lockstitch |
|---|---|
| Max Stitch Length | 12 mm |
| Needle System | 134-35 |
| Needle Thread Tension | Adjustable |
| Lubrication | Automatic |
| Type | Industrial Sewing Machine |
| Max Sewing Speed | 3000 stitches per minute |
| Presser Foot Lift | 20 mm |
| Power Requirements | 230V/50Hz |


