User’s Manual
65
Step 3. The first camera will be layer 1, and so on. The latest layer will be on
top, if camera displays overlapped on one another. Level of layer can
be changed by right click on the camera display and select Layer to
Top, Layer Up, Layer Down or Layer to Bottom.
Step 4. In addition, the pull-down menu also includes Remove, Dome Setting,
Dome Control, Camera Info., Display: Main Stream and Display: Sub
Stream. Refer to their related sections for more details.
Step 5. The <Remove All> button allows users to clear everything and start it
all over.
Step 6. When everything is set, click on <Save> at the bottom to save the
setting. Then users can click on the <Display Mode> button to switch
to the display mode. The button will change to <Setting Mode> for
users to switch back if more setting is required.
Step 7. In display mode, the <Snapshot> button will be available for users to
capture snapshot pictures. The snapshot files will be stored under
“\CMS\Snapshot”.
If users want to switch from AngelEye mode to regular Emap mode, click on
the button.
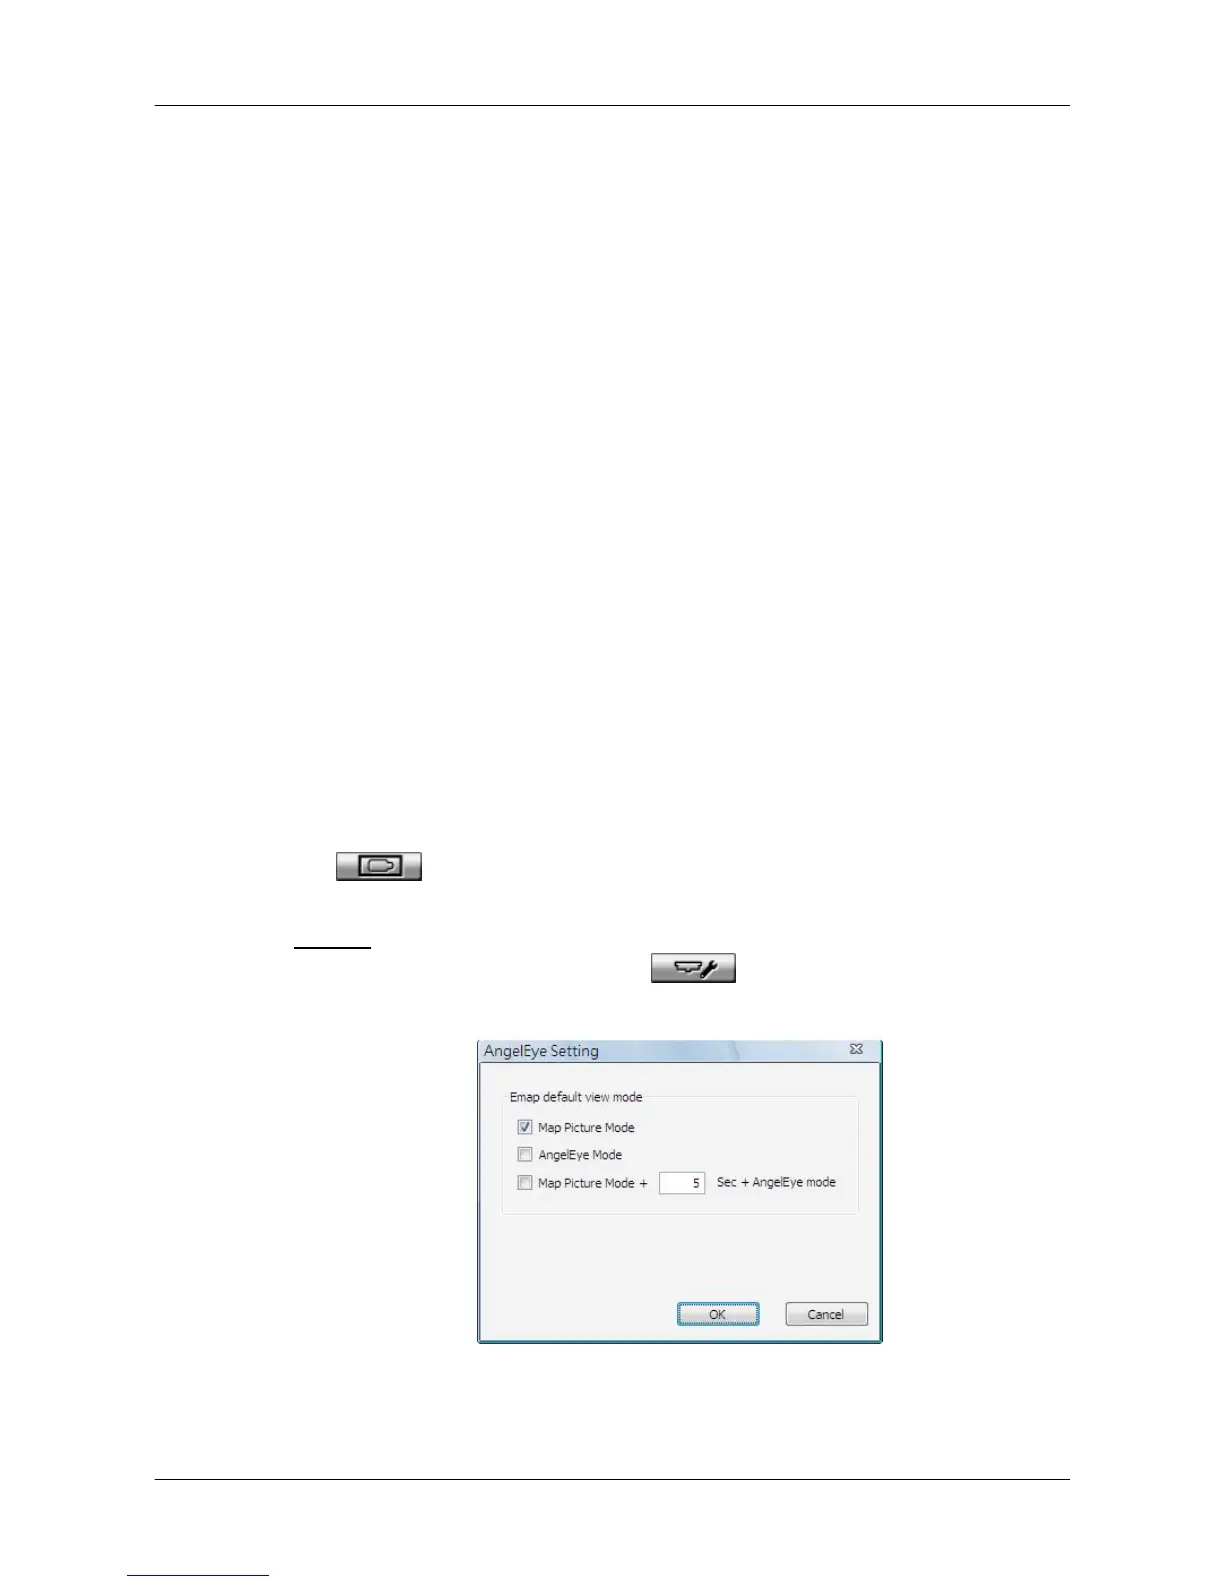
Setting
Users can click on the setting icon to setup the initial display mode
of the Emap window. The setting window is as below.
1. Check the box in front of <Map Picture Mode> to display regular Emap
mode when the Emap window starts up.