User’s Manual
78
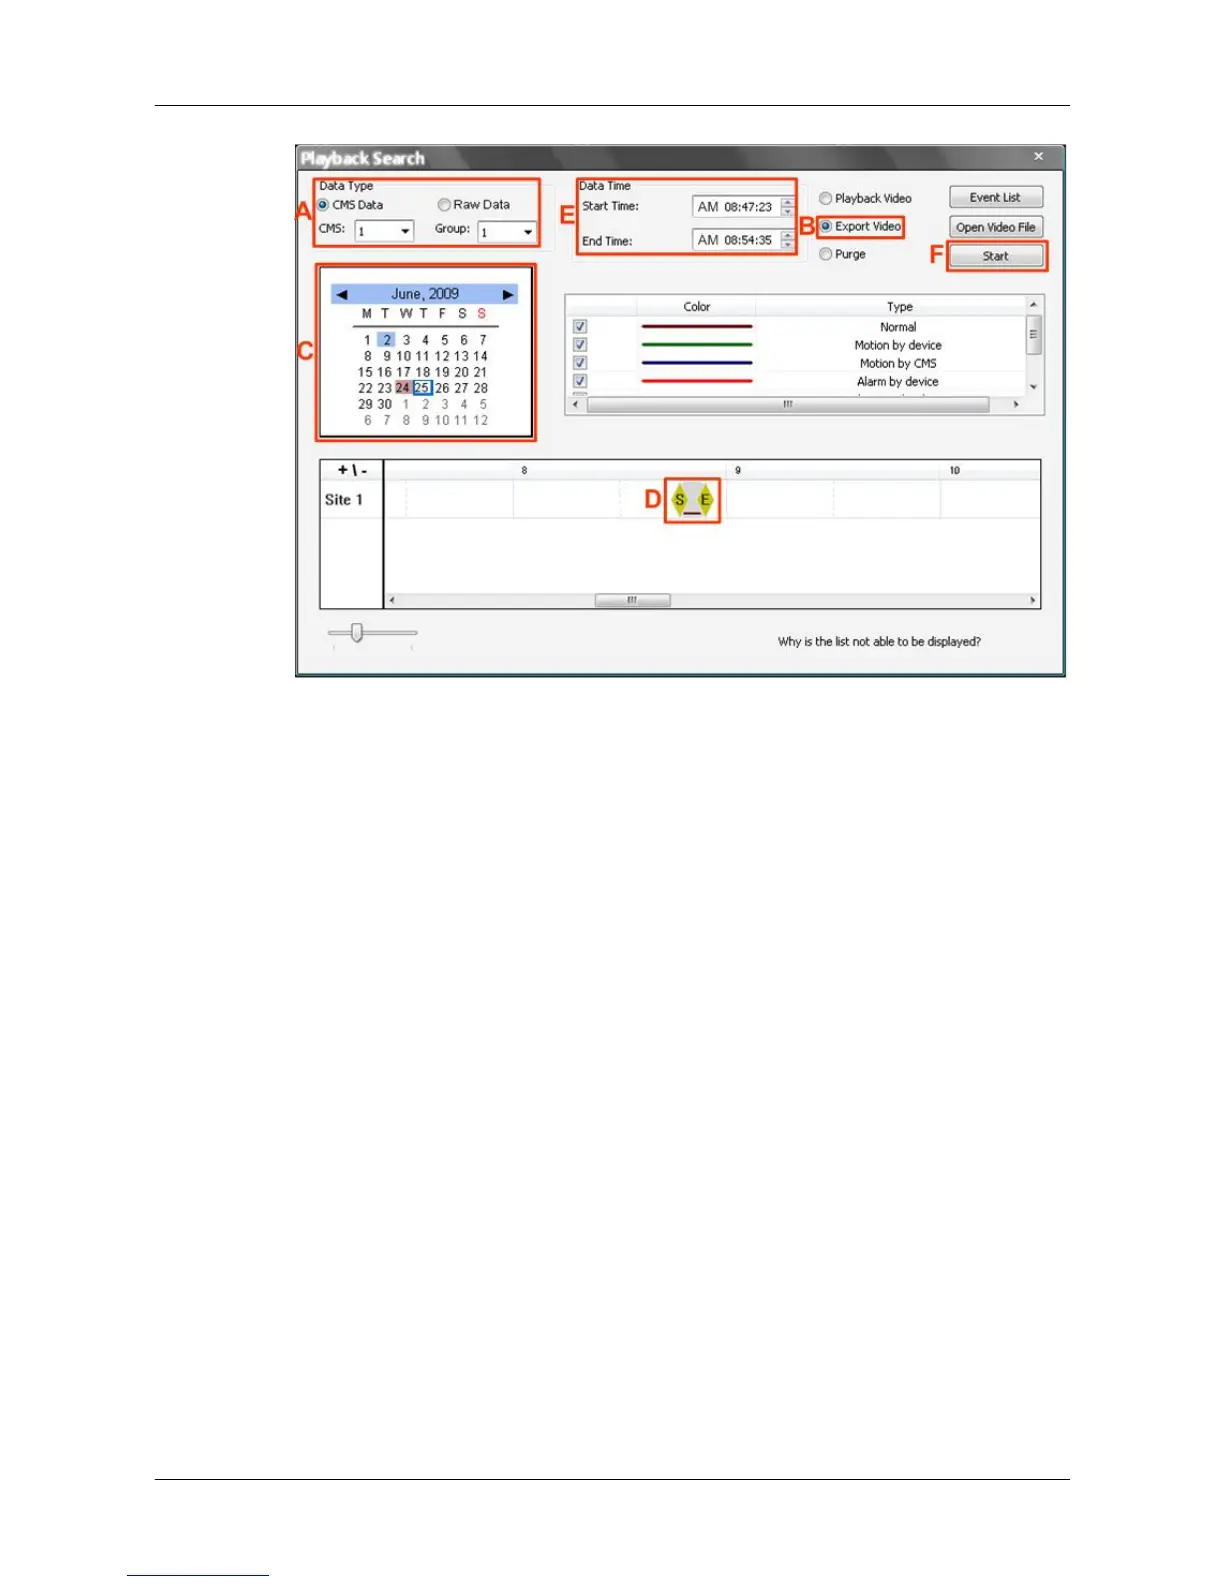
Export Video:
Step A. Select <CMS Data> and choose CMS server & group. Alternatively,
select <Raw Data> and allocate a folder containing DVR HDD files.
Step B. Select <Export Video>.
Step C. Select date of designated videos. Today’s date is in blue box, the
date with video data is highlighted in brown, and the selected date is
highlighted in blue.
Step D. Click and drag the cursor to select designated videos.
Step E. The start and end time of the selected video will be displayed here.
Step F. Click on the <Start> button. A window will pop up, and users are
allowed to enter a filename and select video type (AVI or DRV)
through the window. Then click on <Save> to start the exportation.