Epson Artisan 800/Epson Stylus Photo PX800FW/TX800FW/Epson Artisan 700/Epson Stylus Photo PX700W/TX700W
Disassembly Procedures
https://www.manualsbooks.com
4.
Disconnect the AID cable from the connector on the SUB Board.(See Fig.
4-84.)
5.
Remove the Ink System from the bottom of the printer.
Figure 4-84. Removing the Ink System (2)
So as to make description easier, the printer in the photographs is
placed vertically in the following steps. Be careful about ink spilling
if the printer is tilted in practical operation.
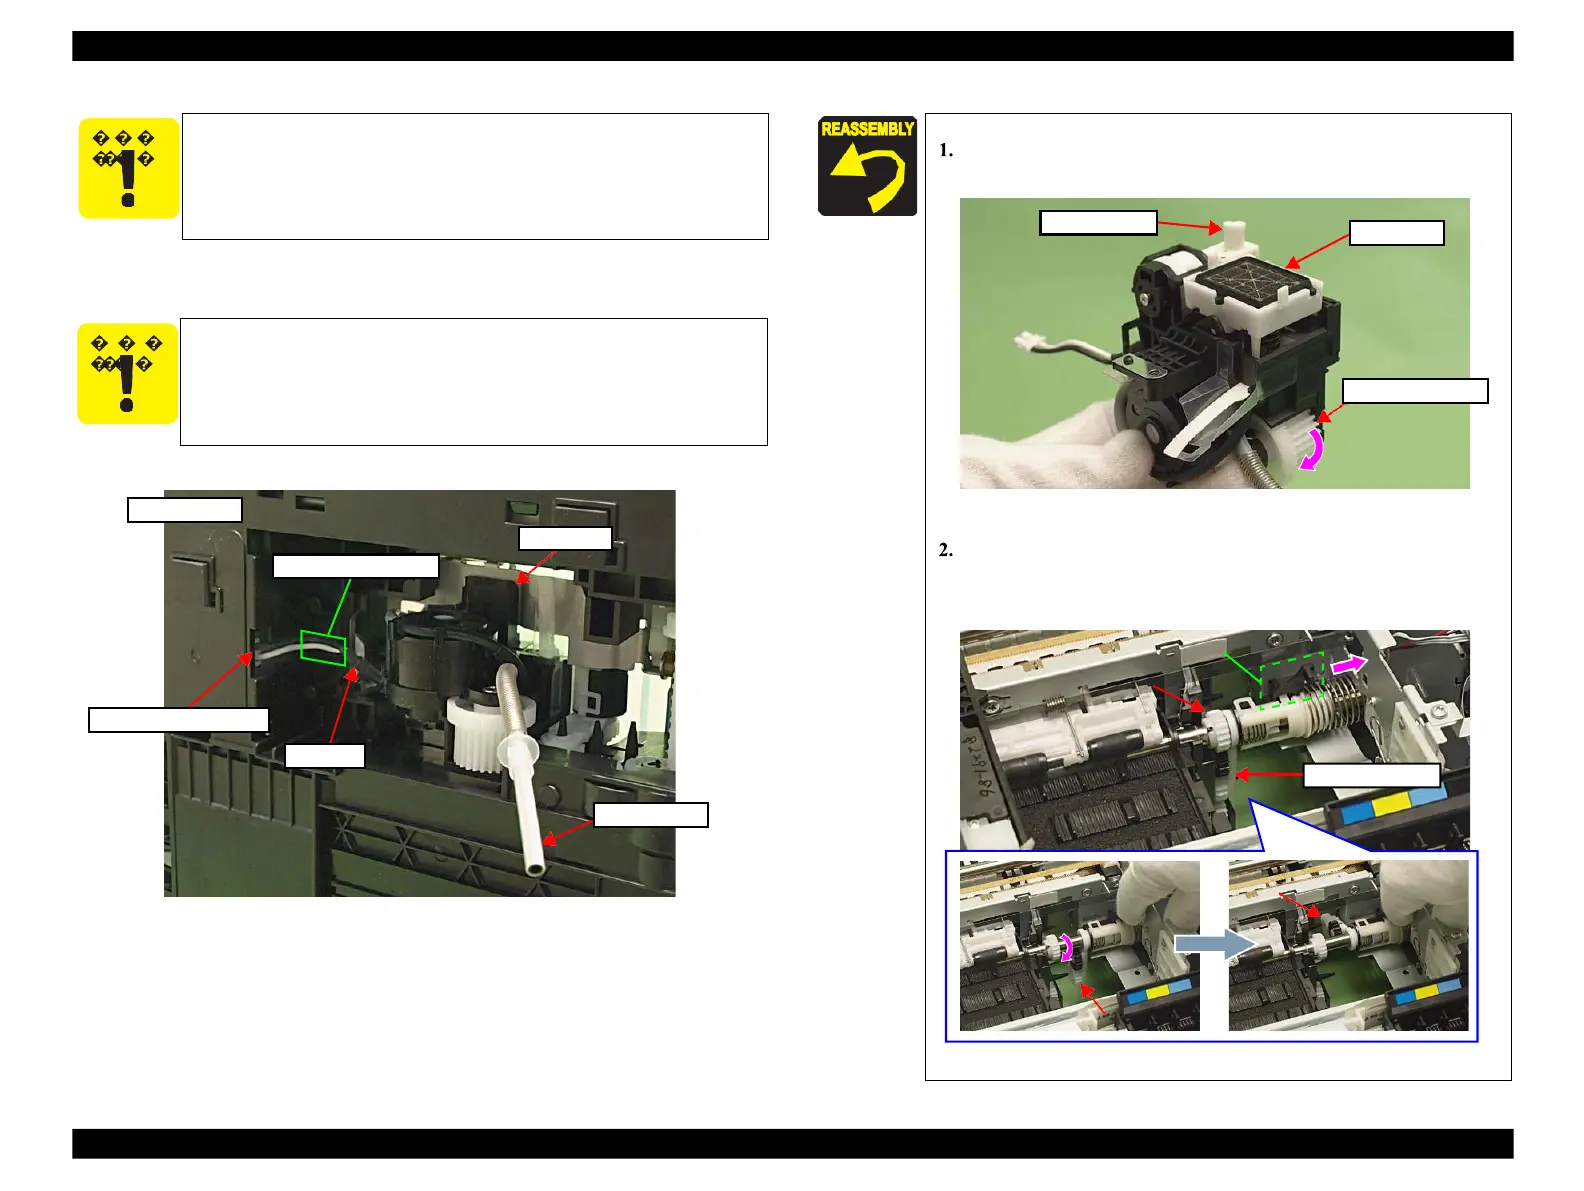
Install the Ink System as follows:
When the Carriage Lock sticks out, rotate the Combination
Gear in the direction of the arrow to lower the Carriage Lock.
Figure 4-85. Installing the Ink System (1)
Press the switch lever in the direction of the arrow and move the
Transmission Arm upward by rotating the Spur Gear to make a
room.
Figure 4-86. Installing the Ink System (2)
Be careful about ink spilling from the Waste Ink Tube.
Do not damage the Rubber Seal or the Head Cleaner on the cap
with frames or other parts. (See Fig. 4-87.)
 Loading...


