Epson Artisan 800/Epson Stylus Photo PX800FW/TX800FW/Epson Artisan 700/Epson Stylus Photo PX700W/TX700W
Adjustment Using Adjustment Program
https://www.manualsbooks.com
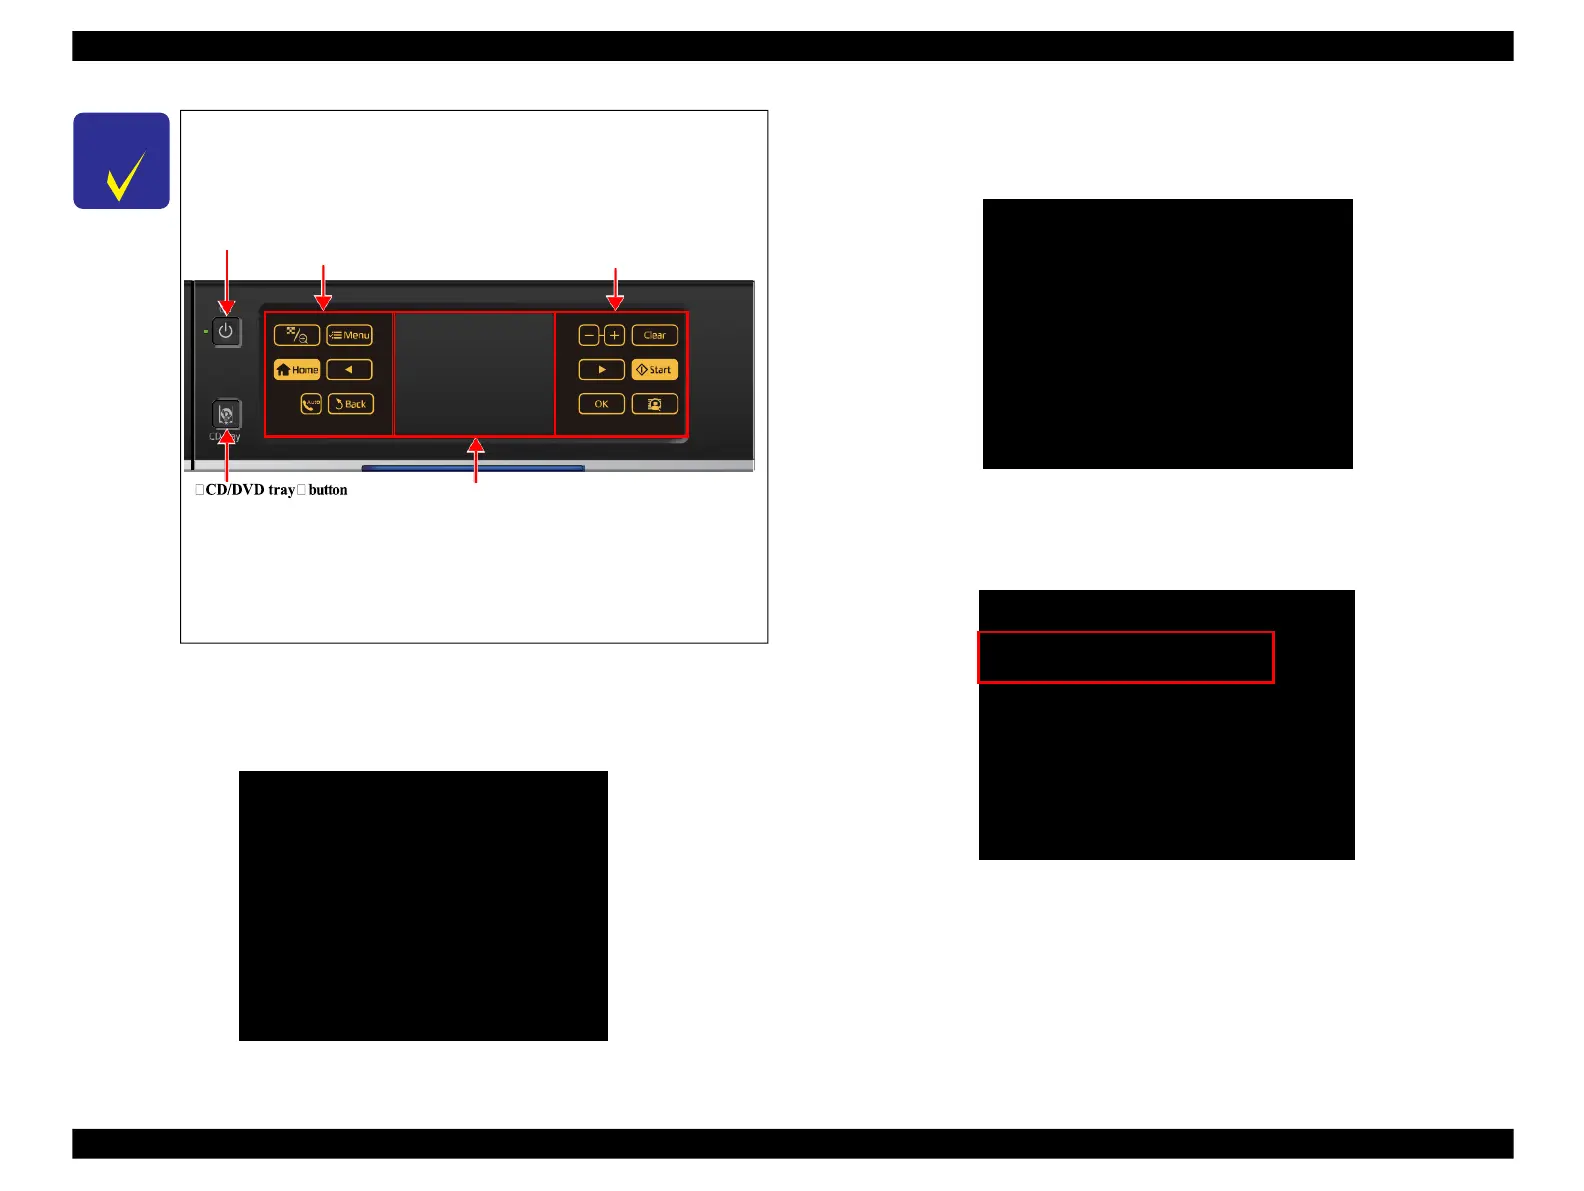
In the case of Epson Artisan 800/Epson Stylus Photo PX800FW/
TX800FW, you can operate selection of each menu, etc. by
pressing the following areas on the touch panel while in the
Power Left side of the touch panel
(Menu backward)
Right side of the touch panel
(Menu forward)
Figure 5-16. Panel Operation in Special Inspection Mode
In the case of Epson Artisan 700/Epson Stylus Photo PX700W/
TX700W, use the “ Cross Key and OK” button for menu
2.
Select “ Special Inspection” , and press LCD (Epson Artisan 800/Epson Stylus
Photo PX800FW/TX800FW) or “ Cross Key and OK” button (Epson Artisan 700/
Epson Stylus Photo PX700W/TX700W).
Figure 5-17. Case open sensor check (1)
3.
Select “ Sensor Check”, and press LCD (Epson Artisan 800/Epson Stylus Photo
PX800FW/TX800FW) or “ Cross Key and OK” button (Epson Artisan 700/Epson
Stylus Photo PX700W/TX700W).
Figure 5-18. Case open sensor check (2)
4.
Open the scanner and confirm the Cover open sensor condition changes to
“ Open!” .
Cover open sensor condition
Open!
Photo Tray sensor condition
Open!
DUP unit sensor condition
Open!
After Check
Push [CDR Guide] Button
Figure 5-19. Case open sensor check (3)
Inspection Mode
Run:OK / Select:[LEFT][RIGHT]
1.
Mechanism Inspection
2.
Special Inspection
3.
Fax Inspection
4.
Touch Screen Inspection
5.
Development Mode
Special Inspection Mode
Run:OK / Select:[LEFT][RIGHT]
1.
Inspection ALL
2.
CSIC & IES Check
3.
Panel Key Test
4.
LCD/RGB & LED Test
5.
Rom Ver. Check
6.
USB Host Test
7.
Sensor Check
 Loading...


