Epson Artisan 800/Epson Stylus Photo PX800FW/TX800FW/Epson Artisan 700/Epson Stylus Photo PX700W/TX700W
Adjustment Using Adjustment Program
https://www.manualsbooks.com
5.
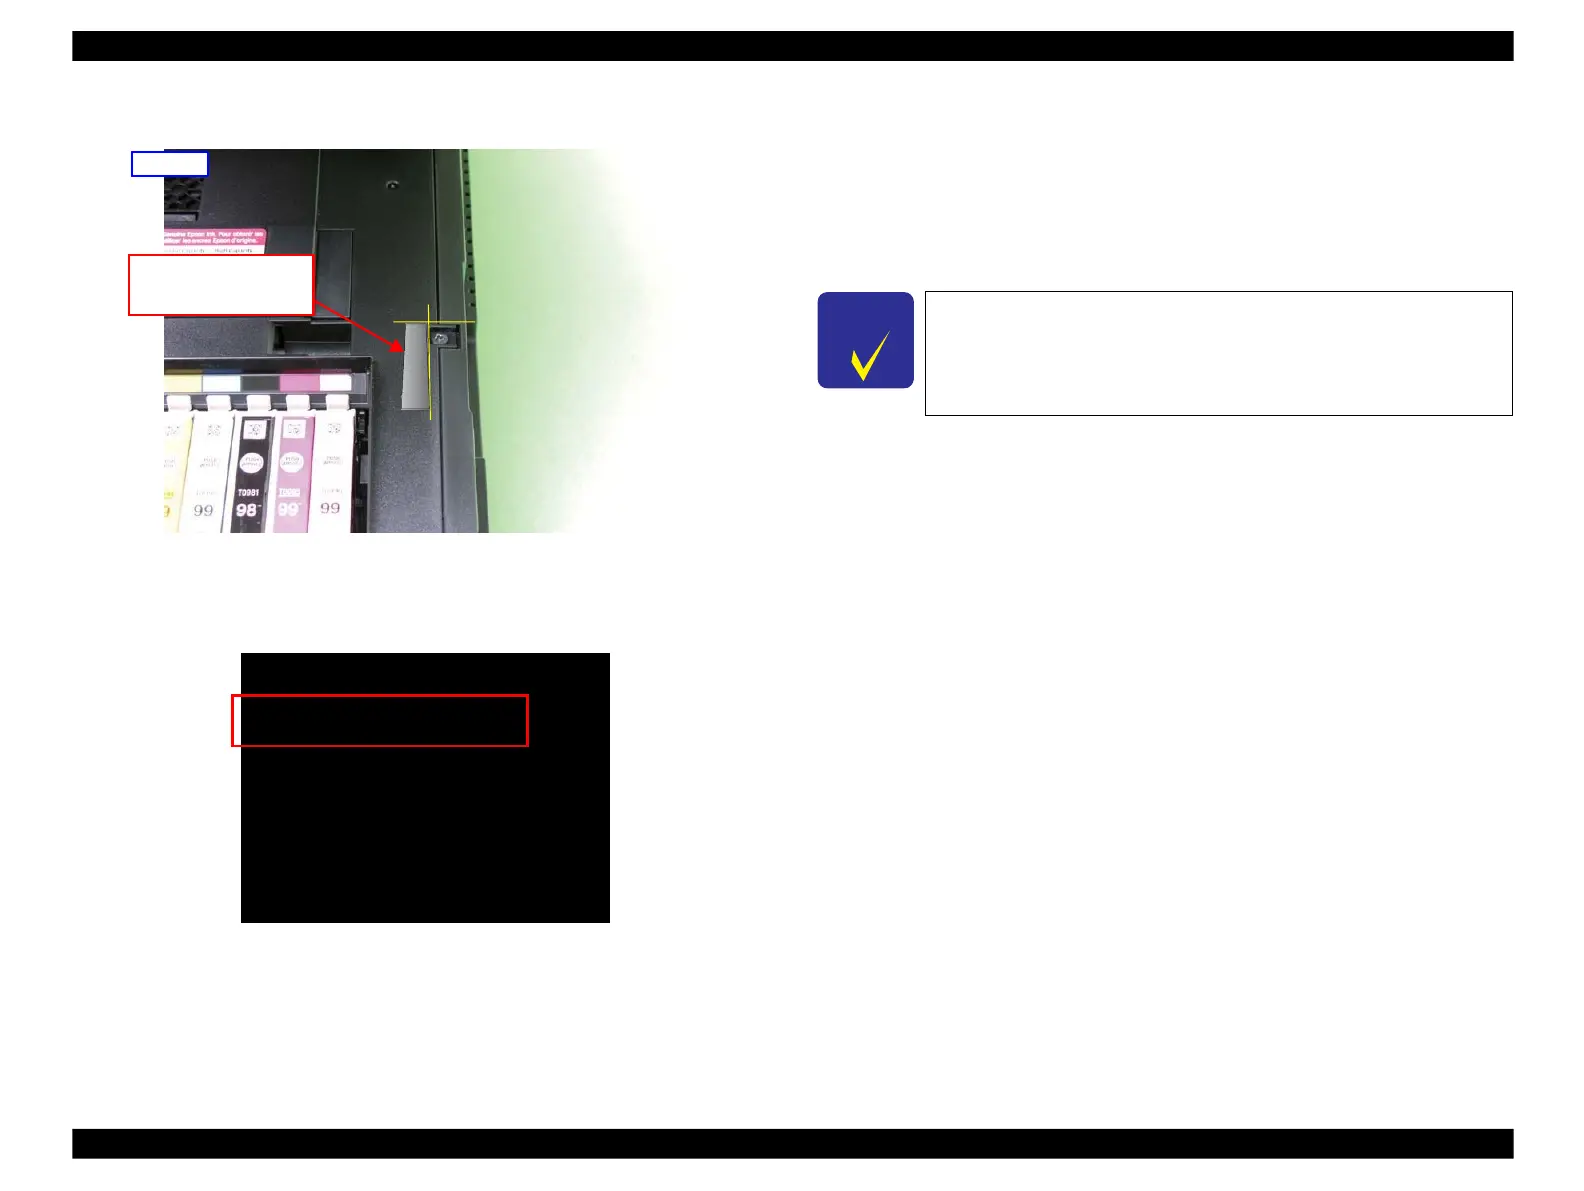
Place the thickness gauge 0.9mm on the location described in Figure 5-20.
Figure 5-20. Placement of the Thickness Gauge
6.
Close the scanner and confirm the Cover open sensor condition changes to
“ Closed!” .
Cover open sensor condition
Close!
Photo Tray sensor condition
Open!
DUP unit sensor condition
Open!
After Check
Push [CDR Guide] Button
Figure 5-21. Case open sensor check (4)
7.
Open the scanner and replace the gauge to the thickness gauge 3 mm, and confirm
the Cover open sensor condition changes to “ Open!” even when the scanner is
closed. (Refer to Figure 5-19.)
8.
Press “ CD/DVD tray” button to return to “ Special Inspection” menu.
9.
By pressing the “ Power” button, turn off the printer to complete Check 1, and
perform Check 2 (p229) continuously.
Place the gauge (0.9mm)
aligning it with the edge
of Upper Housing.
If you confirm that the cover open sensor is not operating correctly
in Step 4, Step 6, Step 7, check the connection of FFC between the
cover open sensor and the Main Board. If the correct connection
cannot improve the symptom, replace the scanner unit with a new
one.
 Loading...


