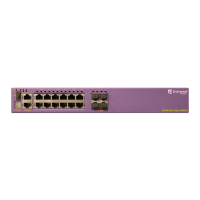
4. Install one or two power supplies (for switches that require them) and connect to an electrical
source.
See Installing Internal Power Supplies on page 227.
Note
Be aware of whether you are installing an AC-powered switch or a DC-powered switch.
The installation instructions are dierent depending upon what type of power is used.
5. Connect power to the switch.
See Connecting Power to the Switch on page 258.
6. For a stacked configuration, connect stacking cables.
See Connecting the Switches to Form the Stack Ring on page 213.
7. Connect network interface cables.
See Connecting Network Interface Cables on page 259.
8. Perform initial network connection and configuration.
See Performing Initial Management Tasks on page 259.
Safety Considerations for Installing Switches
Read the information in this chapter thoroughly before you attempt to install or remove an Extreme
Networks switch.
Ensure that proper ESD (electrostatic discharge) controls are in use before switch maintenance is
performed. This includes but is not limited to wrist straps that are grounded to the switch housing and
earth grounds.
Warning
Connect the chassis ground wire before you connect any DC power cables.
Disconnect the ground wire after you disconnect all DC power cables.
Take care to load the equipment rack so that it is not top-heavy. Start installing equipment at the
bottom of the rack and work up.
Do not cover vents that would restrict airflow.
Note
See Safety and Regulatory Information on page 478 for additional safety information.
See Technical Specifications on page 378 for additional information regarding regulatory
compliance certifications.
Pre-installation Requirements
Prepare the site for the installation, and ensure that you have the appropriate people and tools on hand.
Installing most ExtremeSwitching series switches requires two people to maneuver the switch and
attach mounting hardware.
Provide enough space in front of and behind the switch so that you can service it easily. Allow a
minimum of 48 inches (122 cm) in front of the rack and 30 inches (76 cm) behind the rack.
Safety Considerations for Installing Switches
Installing Your Extreme Networks Switch
222 ExtremeSwitching Hardware Installation Guide
 Loading...
