Operating Procedures: Microscope Control
C O N F I D E N T I A L – FEI Limited Rights Data 5-7
Inserting / Exchanging Specimen
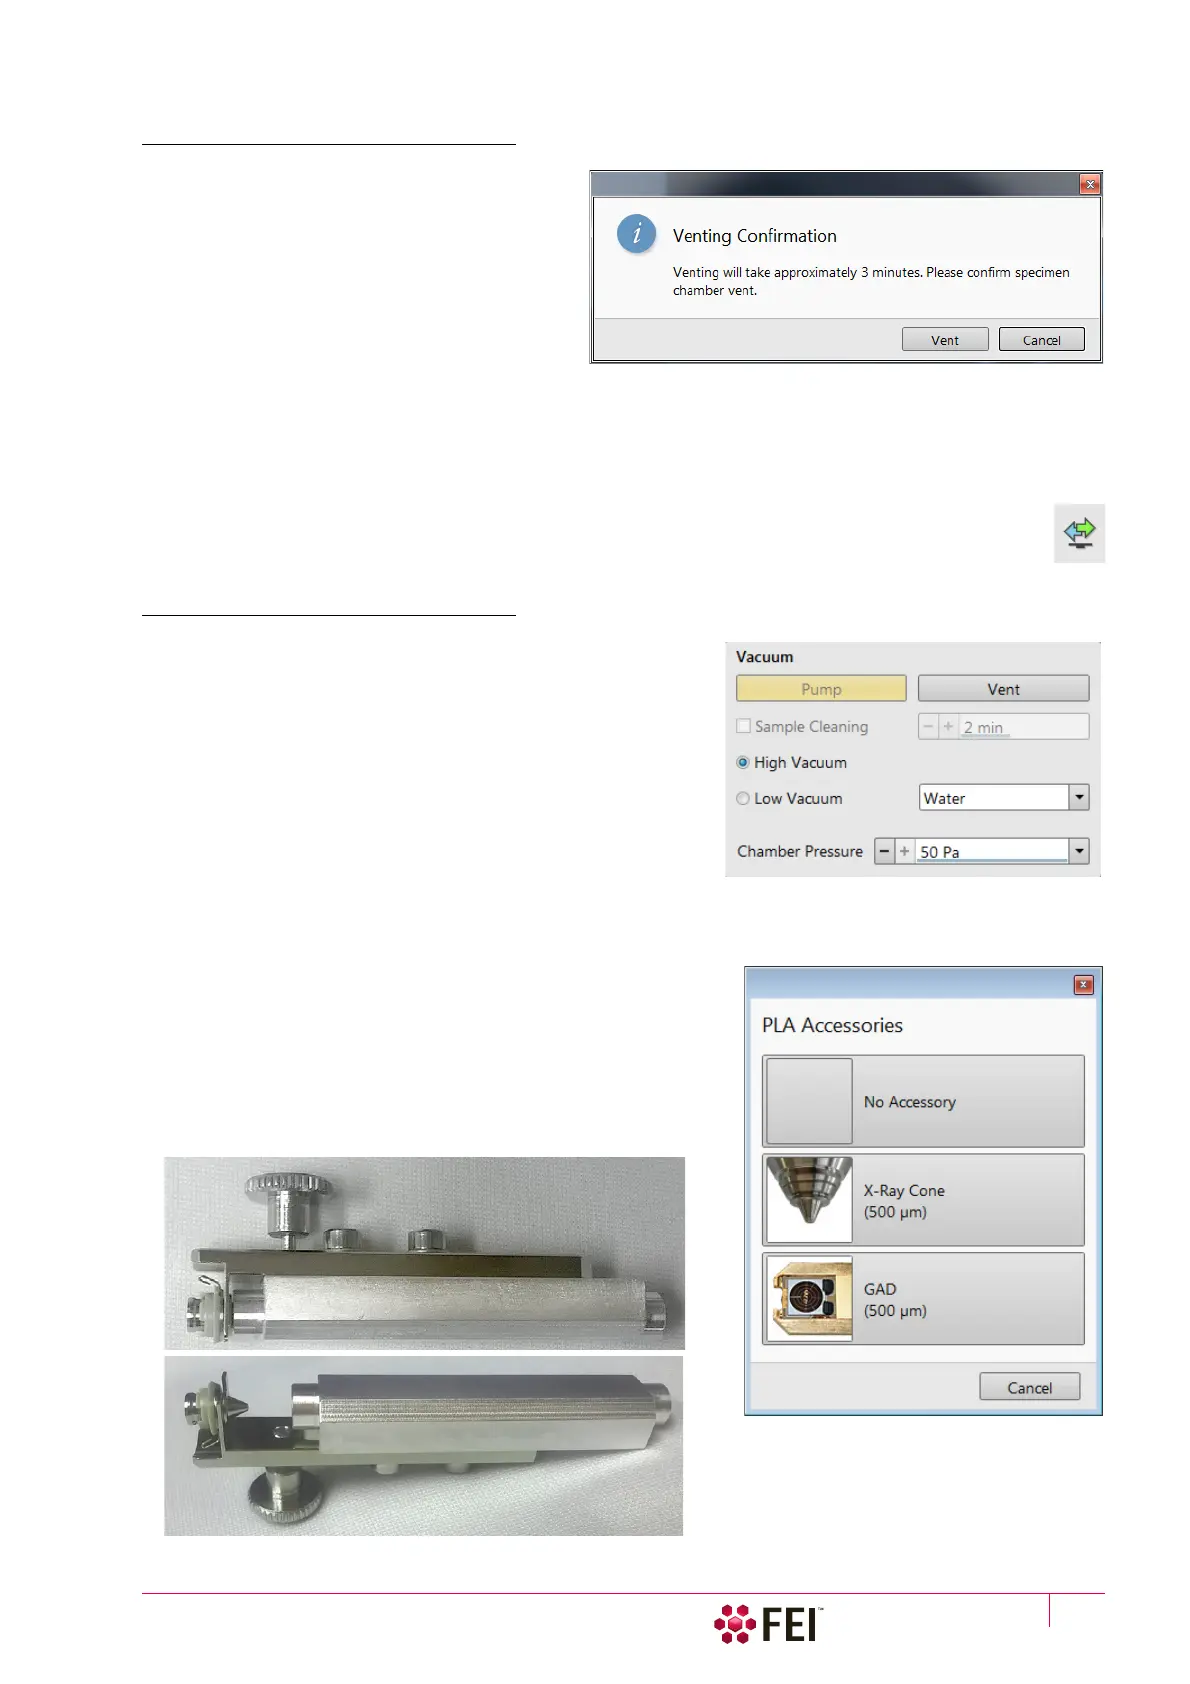
1. Click on the Vacuum module / Vent button.
The confirmation dialog appears.
After switching a High Voltage off, the
vacuum system switches off the pumps and
opens appropriate valves to vent the system.
After a specified venting time the venting
valve will close.
Note
If the venting valve closes before the chamber is at
the atmospheric pressure (the door is not possible to
open), click on the Vent button once more to open it again.
2. When vented, open the specimen chamber and, using lint-free gloves or tweezers, place a specimen into the
specimen holder.
3. Close the specimen chamber door and click on the Vacuum module / Pump button.
Instructions for a sample exchange are also shown within the informational window by clicking on the
toolbar icon.
Selecting Vacuum Mode
When a specimen and appropriate detector(s) are installed
correctly, continue the procedure (see above):
4. Check the High Vacuum module / Low Vacuum or High Vacuum
mode radio button.
For the Low Vacuum mode select the appropriate gas from the
drop down list and the target Chamber Pressure that the system
pumps to.
WARNING!
The system can be damaged by using the Low Vacuum mode without
an appropriate PLA. Do not select a PLA Cone which is not actually
used
(see Chapter 2)!
X-Ray Cone Mounting / Dismounting Procedure
Under normal operation, the system will know the PLA cone size for
the detector installed in the LoVac mode. This will allow the system
to set automatic pressure range limits for the aperture installed,
thus avoiding vacuum errors when setting chamber pressure.
For the optional GAD cone – see Chapter 7.
The X-Ray cone is stored in the provided installation tool. The large
arresting screw releases working part so it can slide along the skid.
A little spring is a conductive contact with the final lens pole.