Operating Procedures: Patterns / Measurements / Annotations
C O N F I D E N T I A L – FEI Limited Rights Data 5-43
Patterns / Measurements / Annotations
The toolbar Patterns / Measurement / Annotation items give a user
many capabilities to draw pattern shapes, to measure distances,
angles, diameters and areas as well as locating and labelling
items that are of significant interest on the sample area.
Selected tool is shown as the toolbar icon. Clicking on it activates
(drawing mode – orange background) / deactivates (white arrow
cursor – normal background) the tool. Clicking on the down arrow
icon opens the list of available tools, the chosen one is activated
from that time on and the object can be drawn onscreen. To
deactivate the drawing mode at any time is possible by pressing
the Esc (keyboard).
Each tool shows its description as a tooltip.
• Patterns – enable to create various pattern objects, which are
prepared for subsequent processing.
• Measurements graphics – enable to gain dimension information
about a specimen feature by overlaying it with a measurement
object of different shapes. By changing the magnification these objects resize accordingly.
• Annotations graphics – enable to graphically highlight and label items of interest with different shapes.
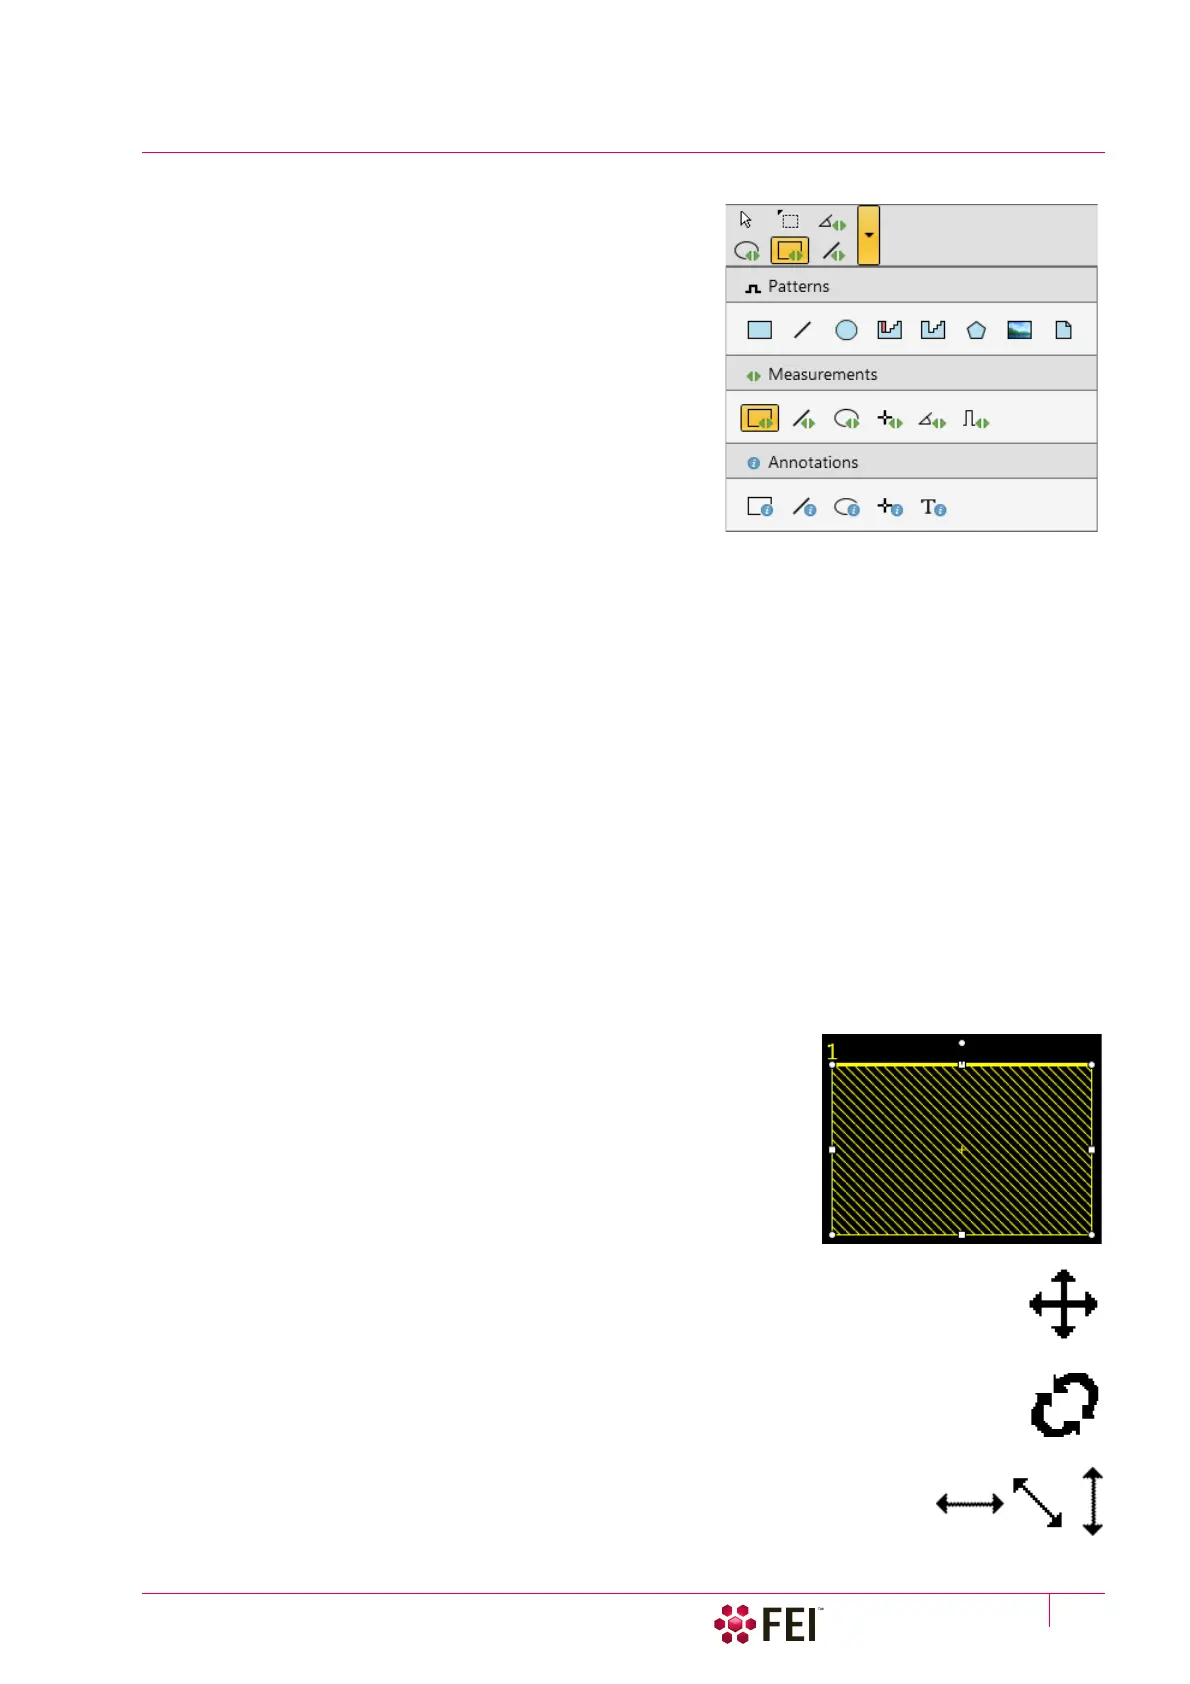
Shape Creating
1. Choose the suitable Patterns / Measurements / Annotations graphic tool.
2. Draw the graphic over the area of interest.
This can be done by:
• clicking on & dragging the cursor in any direction – create a rectangle shape
• Shift + clicking on & dragging the cursor to any direction – create a rectangle shape
starting to grow from the point where you have clicked as from the center
To create a text label click the T annotation tool, create a rectangle area into which a text should fit and start
writing.
Shape Editing
Once a Pattern / Measurement / Annotation object has been drawn, it can be correctly adjusted in size and
position over the area of interest. A number of appropriate properties are available in the Property editor, which can
be changed by a selection from a drop down list or by direct precise editing of a text or a value.
To select all objects in the active display press Ctrl + A. To delete selected object(s) press the Delete key.
Selected object is denoted by the addition of resizing handles (white rounded
or square points) to the graphic outline. Moving mouse point cursor in the
vicinity of these points forces the cursor to change:
• Moving: click on inside the boundary of the object and drag it.
Note
Holding the Ctrl + Alt keys while hitting any arrow key moves the pattern in a corresponding direction
by a fixed distance.
• Rotating: click on the object rotation control (white point in the middle above the graphic) and drag
it.
• Resizing: click on & drag the resizing handle until the desired size is reached (horizontal /
vertical / diagonal resizing cursor). Holding the Ctrl key while dragging forces
dimensions to be changed proportionally.