System Options: Remote Imaging
C O N F I D E N T I A L – FEI Limited Rights Data 7-27
Remote Imaging
The Remote Imaging enables to connect to the Microscope PC via network using the VNC application and to
control the microscope operation remotely.
For information how to install this functionality, see Installation Instructions available on the installation CD. For
more details on the remote connection and its possibilities, see VNC documentation available on the installation CD.
Connection to Microscope PC
Follow the steps below to connect to the Microscope PC.
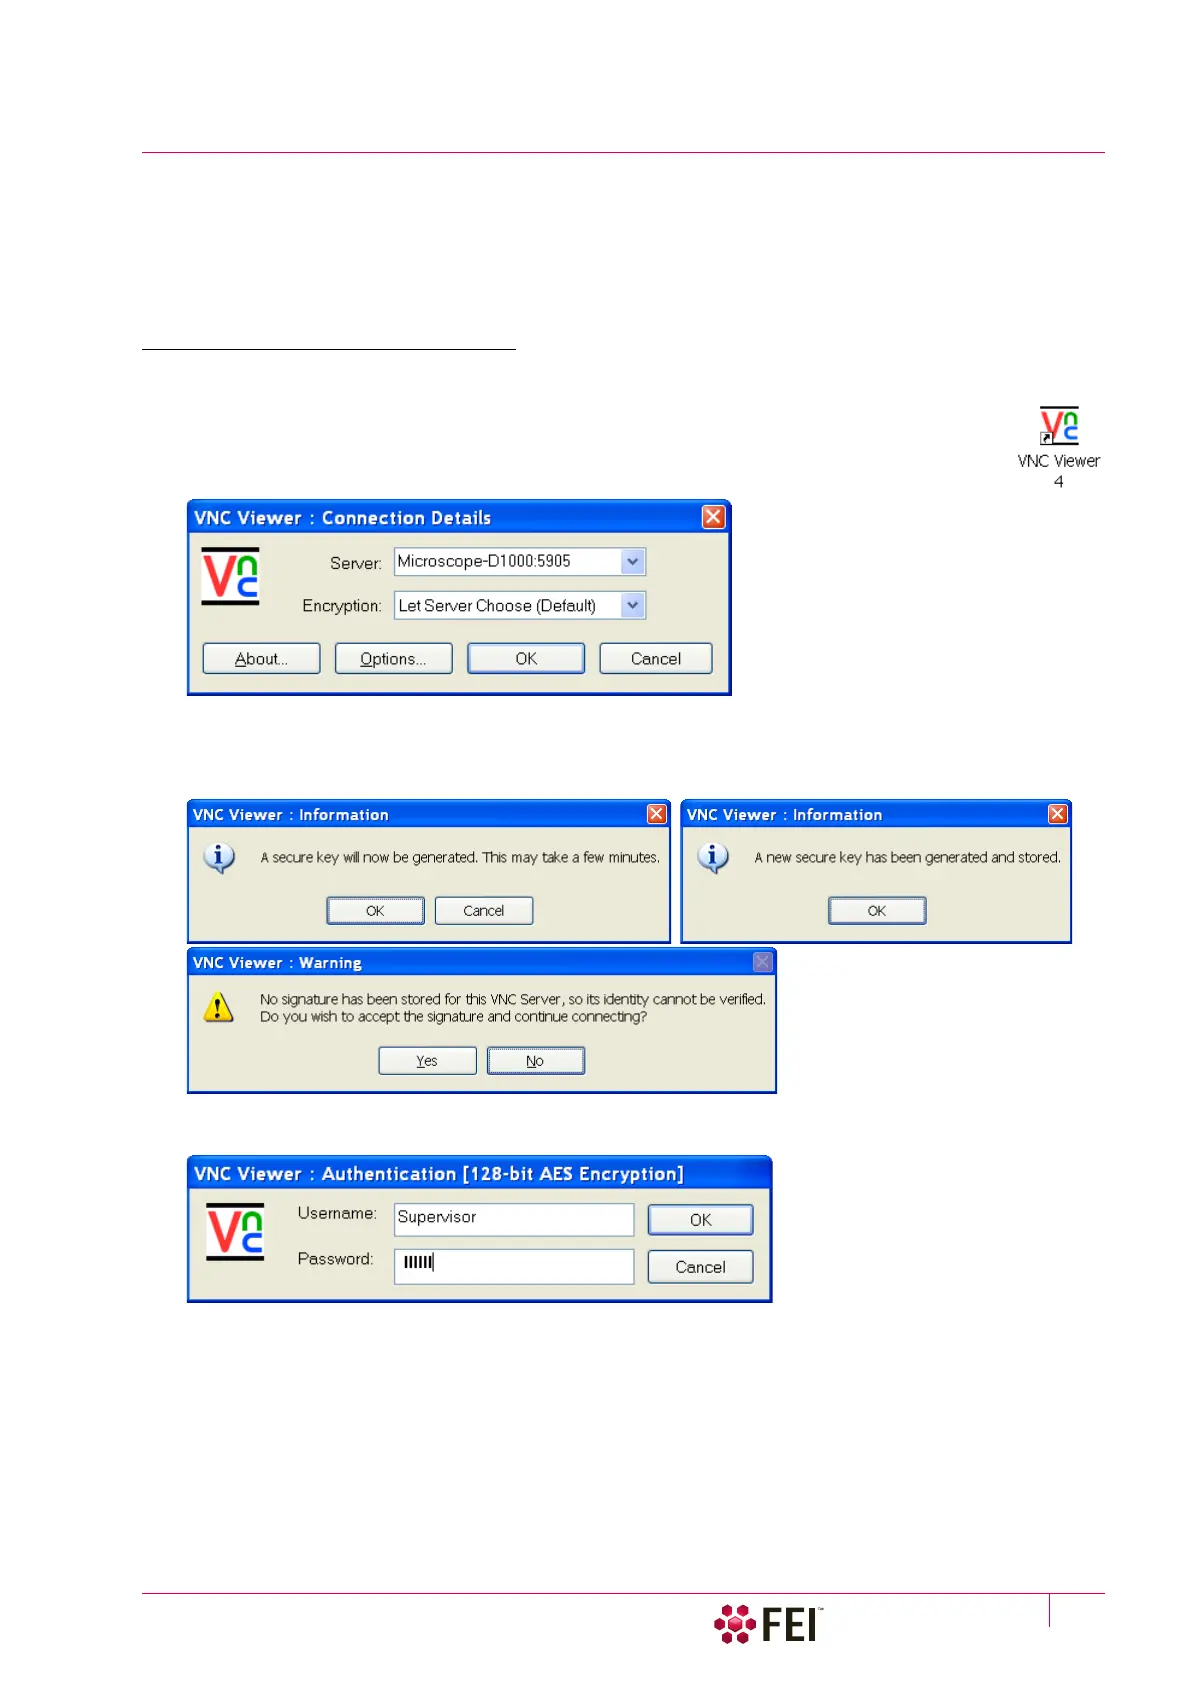
1. Double-click on the VNC Viewer icon on the remote PC desktop to launch the VNC Viewer
application.
2. In the Connection Details dialog, type the computer name of the Microscope PC you want to
connect to, followed by colon (:) and the port number 5905, into the Server field.
In case your configuration consists of both Microscope PC and Support PC, you need to connect to the Support
PC. Type the Support PC name, followed by the colon (:) and the port number 5905, into the Server field. Click on
the OK button.
3. Some secure key and signature related dialogs may appear. Confirm all of them by clicking on OK or Yes button.
4. In the Authentication dialog, fill in your microscope Username and the corresponding Password. Click on the OK
button.
When this step successfully passes, you are connected to the Microscope PC and the VNC window with its
desktop opens.
When connecting remotely, be aware of the fact that there might be some person operating the microscope locally,
i.e. working directly with the Microscope PC.
To close the remote connection to the Microscope PC, just close the VNC Viewer window.