Operating Procedures: Stage Control
C O N F I D E N T I A L – FEI Limited Rights Data5-36
Stage Related Functions
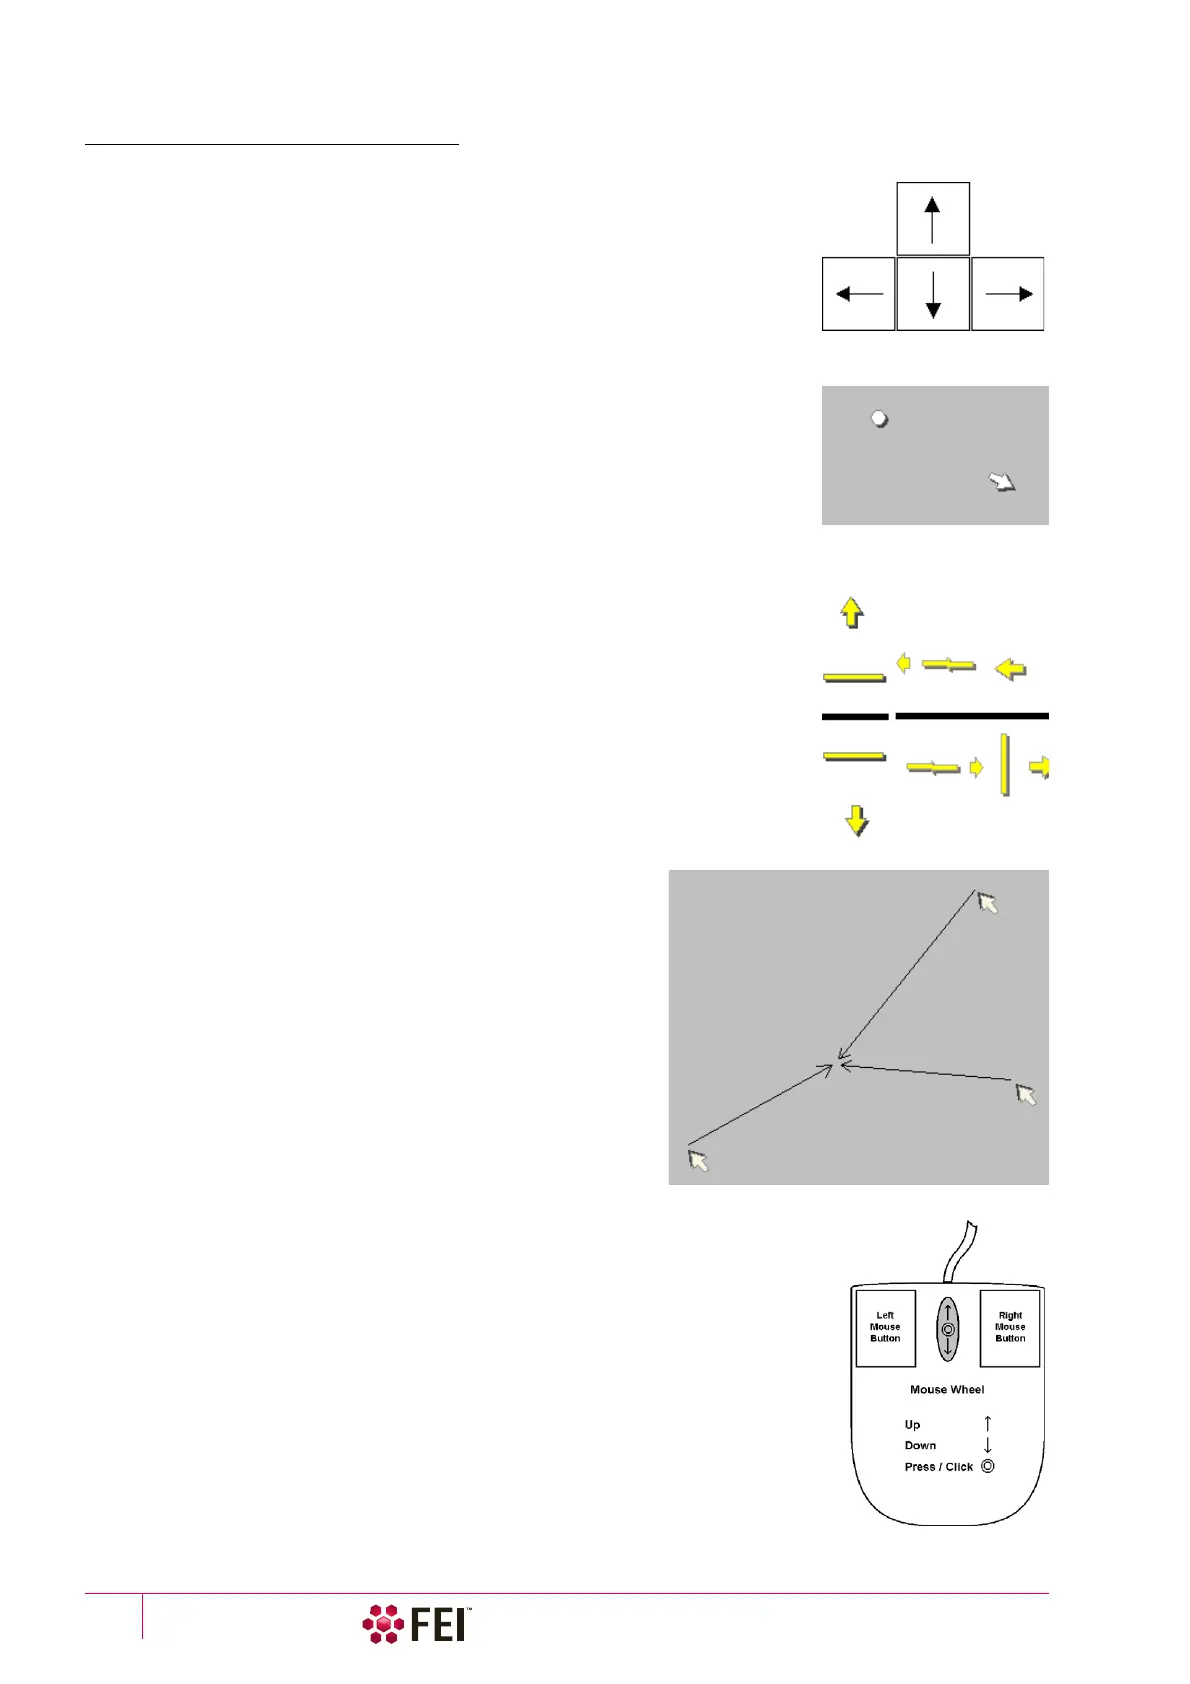
Stage Movements – Keyboard Shift
The stage can be moved by 80% / 40% of the field of view in perpendicular
direction by pressing / Shift + pressing the appropriate keyboard arrow key.
Stage Movements – Track mode
This function allows continuous directional stage movements at a variable speed
(see Preferences / General section / Switch sample tracking on mouse wheel click on
item):
• Wheel-click on & drag mode – the yellow dot appears onscreen in an active display
at the mouse cursor point. Move the mouse to the direction intended for an
observation – a yellow arrow appears onscreen denoting the direction opposite to
the stage motion. The motion speed raises with the distance between the arrow
and the dot, the direction can be changed by moving the mouse. When you come
to the place of interest, release the mouse wheel – the action stops.
• Wheel-click on & move mode – the mouse wheel does not need to be held, just
click on the desired direction to start the Track motion and click on again to stop
it.
In the optical imaging display clicking on the mouse wheel activates the stage
Z movement, which can be seen live.
• Wheel-clicking on & dragging the mouse up / down – moves the stage
up / down (Z-coordinate).
• Ctrl + Wheel-clicking on & dragging the mouse left / right – tilts the stage
in positive / negative direction.
The direction is indicated by a yellow arrow, either pointing up / down from the
horizontal line or left / right from the vertical line.
Stage Movements – Get mode
This function brings an image point of interest to the screen center.
Double-click on an image point. The object is mechanically
centered onscreen by moving the stage, which is suitable for
lower magnifications. When working at higher magnifications,
beam shift can be also employed (see the Preferences / General
section). In this case the object is electronically centered
onscreen by moving the electron beam. When the beam shift
comes to a limit in any direction, its value resets and the
necessary stage movement adapts the observed point position.
Beam Shift
When you want to employ the beam shift only (which is suitable for higher
magnifications), shift + click on an image point. Drag the Hand cursor to move the
imaging area in any direction.
When the limit of the beam shift has been reached, either the Stage menu / Auto Beam
Shift Zero or the Beam Shift Reset function needs to be applied. In this case the beam
shift is reset and the observed point position is adapted by the stage movement.
Releasing the mouse button stops the action.