C O N F I D E N T I A L – FEI Limited Rights Data 4-1
4
Alignments
On the Microscope Alignments page select an alignment procedure available from the list box. Always follow the
instructions given in the Instructions module. The Step shows the present control step number and the total number
of steps. You can find some additional explanation in this chapter.
Common Rules
Alignments should be performed in the display 1. In other case it is not possible to ensure the correct functionality
of the Contrast, Brightness and Auto functions used on the Microscope Alignments page.
Before aligning the Electron column, be sure that the final lens aperture is clean and properly centred.
During adjustment procedures it is allowed to change the magnification, the scanning speed, to use reduced area
and to optimize image contrast / brightness. It is also possible to correct astigmatism and to focus an image (for a
particular alignment this is forbidden).
During adjustment procedures it is not allowed to change a Vacuum Mode, a Spot size and a High Voltage. Do not
use the Beam Shift at any time during the adjustment procedures, as this is set to the zero value at each alignment
section. All specimen movements can be made using the stage where appropriate.
Buttons and Control Elements
The following buttons and control elements have the same behavior for all alignment procedures, when available:
• Start button – starts the procedure and proceeds with following dialogs.
• End button – moves a user to the last step (after clicking on the Next button) to be able to finish the alignment
procedure.
• Finish button – saves new settings, ends the procedure
and closes the dialog
.
• Save button – saves new settings at that point without closing the dialog.
•
OK
button
–
applies all changes made in the dialog and closes it.
• Apply button – saves and applies new settings at that point without closing the dialog.
•
Cancel
button
–
discards all changes (made from the last save) and closes the dialog. It has
the same effect as closing
the dialog with the cross (Alt + F4).
• Next button – moves a user to the following dialog after necessary settings have been done.
• Previous button – moves a user to the previous dialog when settings need to be changed.
• Contrast / Brightness adjusters – enable to optimize the image quality during alignment.
• Auto button – executes the appropriate alignment action automatically for a particular voltage / spot / direction
(whatever suitable) with the use of the Image Recognition software. If this utility does not recognize image
features well, the procedure is aborted and Warning message appears onscreen. In this case change the imaging
conditions (better focus, slower scanning, or lower magnification) and try again.
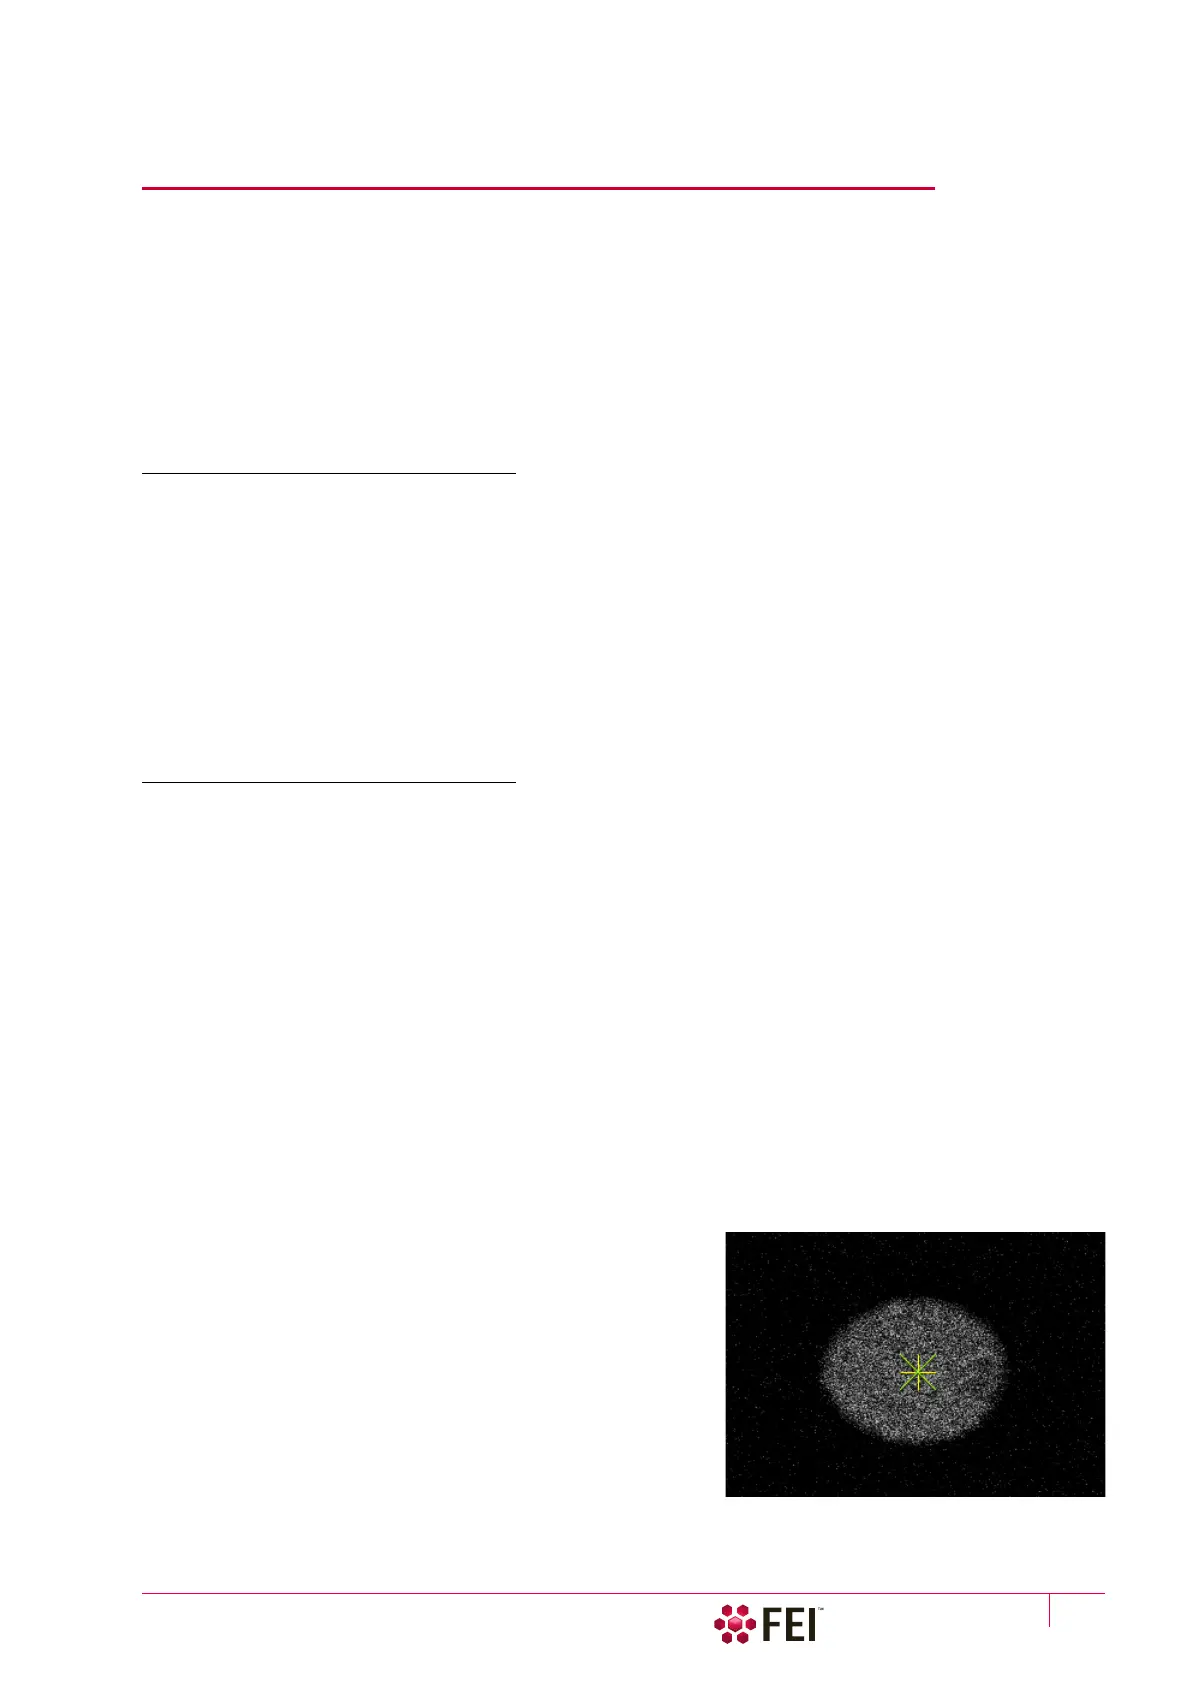
• Crossover button – activates the Crossover mode, where the
onscreen image shows the electron source tip instead of the
sample.
• Modulator button – starts automatic parameter oscillation to
facilitate the process.