System Control: System States
C O N F I D E N T I A L – FEI Limited Rights Data 2-7
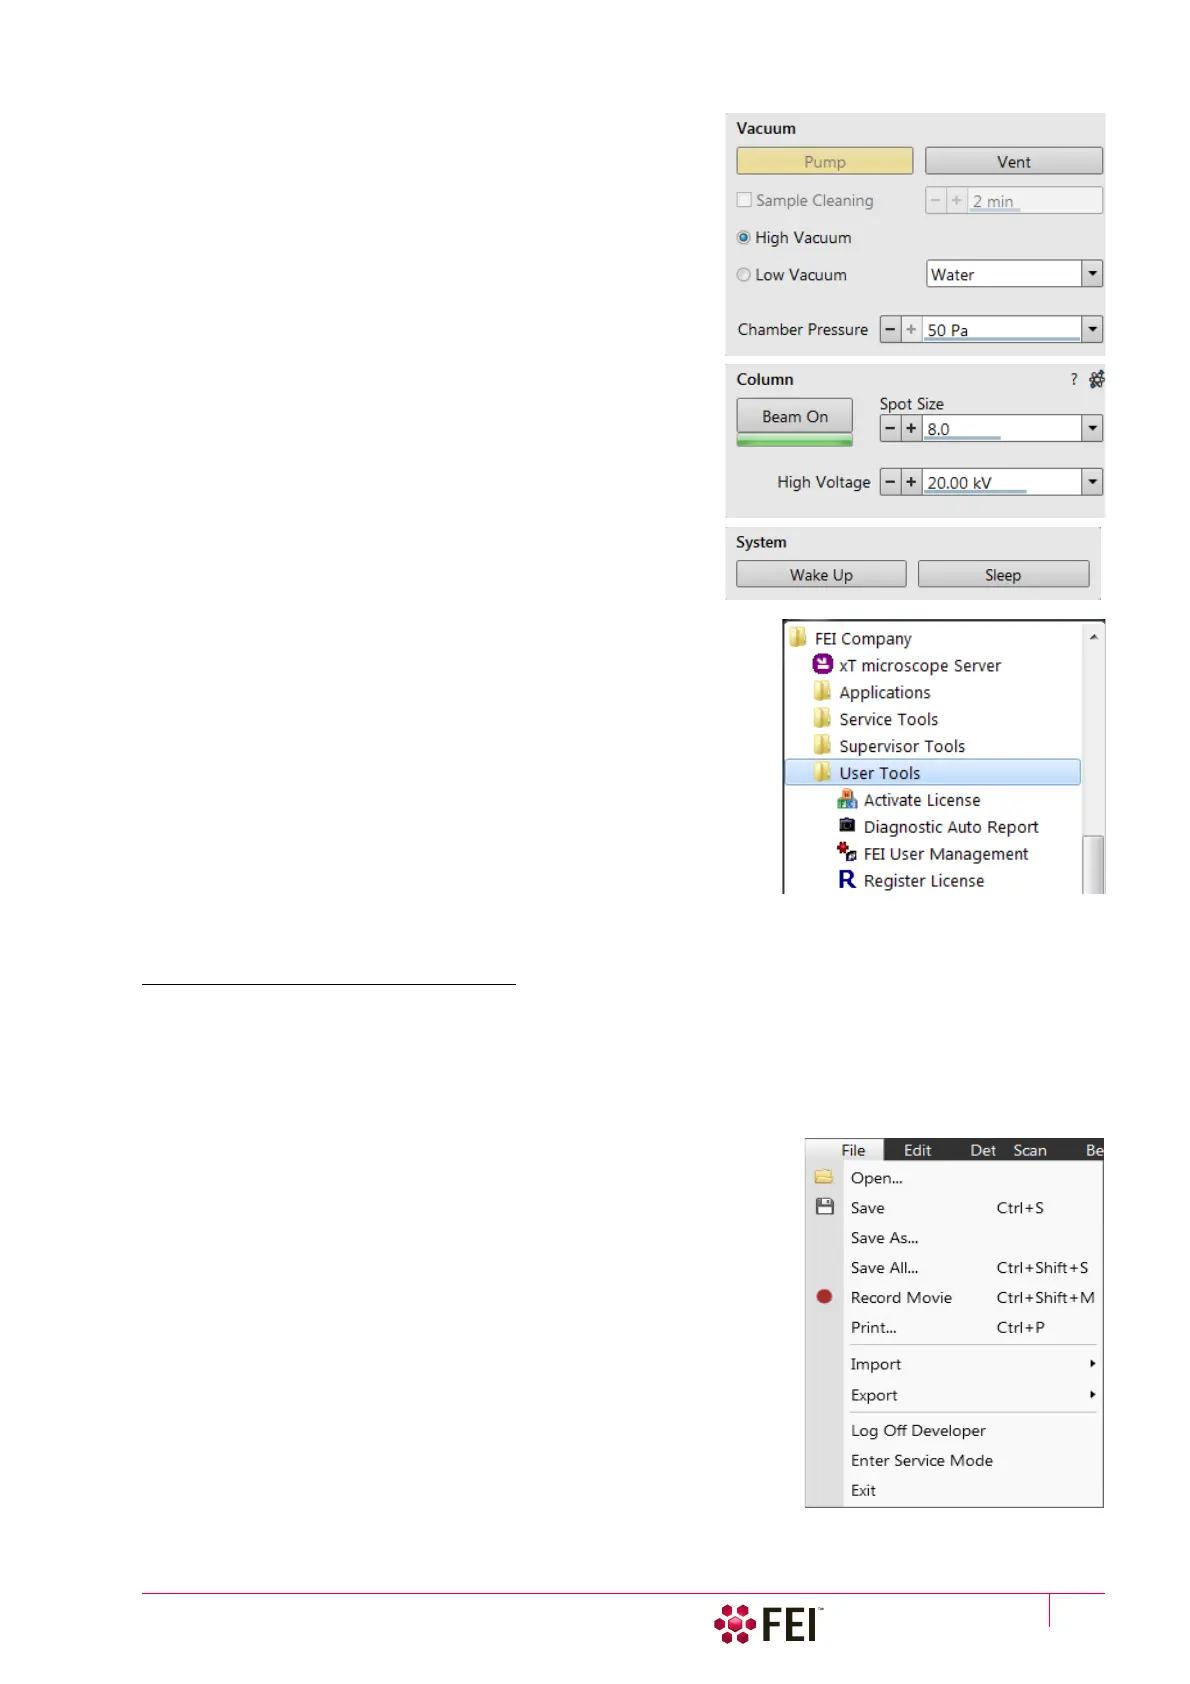
10. Select the desired Vacuum module / Vacuum mode radio
button and click on the Vacuum module / Pump Button. Wait
for the Pumped status.
11. Click on the Column module / Beam On button to start the
selected beam only or the System module / Wake Up
(c)
button
to start both beams. A
Column module source awaking
progress bar indicates the actual status and the button turns
orange when finished.
See Chapter 5 to set desired imaging conditions.
Note
a)
When switching the console on (starting from the Standby state),
the SEM aperture becomes heated. It may take several (5–10)
minutes before it is at the proper temperature. Do not make any
adjustments during this interval (aperture, source or lens alignment)!
The microscope could become misaligned when the aperture reaches
the operational temperature.
b)
Once you have your user account set up via FEI Account manager
software (see Chapter 3), you can use your name and password to
access both Windows 7 system and the Microscope Control software. Take
note of the Password policy (see above), which helps to protect individual
settings and results.
c)
Usually, the Scios remains on with the vacuum system in operation, but
typically the ion emitter and accelerating voltages for both columns remain
off. The system starts with the setting in use when the Microscope Control
software was closed. This allows quick resumption of daily operation.
Overnight and Standby
When leaving the system, it is advisable to bring it to the Overnight state by following the procedure:
1. Click on the System module / Sleep button to switch off both beams and to stop the ion source.
2. If one needs to remove the sample, select the Stage menu / Tilt 0° (Ctrl + E). Click on the Vacuum module / Vent
button. Wait for the Vented status and remove your sample.
3. Click on the Vacuum module / Pump button to pump to the High Vacuum.
(d)
4. Select
(e)
the File menu / Log Off to log off the present user and to
provide the Log On dialog for entering another one. Switch off the
monitor.
Now the system is in the Overnight state, to proceed to the Standby state
follow the procedure:
5. Click on the xT microscope Server window / Standby button.
This stops the UI, the xT microscope Server application services and
switches off the console (the green power button on the microscope
front control panel changes to amber one).
In the Standby state the electron emission is on and the chamber vacuum
is maintained by running vacuum pumps.