Software Control: Microscope Control Software
C O N F I D E N T I A L – FEI Limited Rights Data3-30
Control Pages and Modules
The software controls on the right side of the screen are organized into
Control pages
, which are divided into
Modules
holding specific functions. The required page can be selected either by clicking on the corresponding icon button or
with the use of short-cuts (see further).
The Control pages and modules available for the system are:
• Beam Control page
1. Vacuum, 2. System, 3. Column, 4. Magnification, 5. Beam, 6. Beam Deceleration, 7. Scan Rotation, 8. Detectors
• Navigation page
9. Stage, 10. Stage Z, 11. Tilt Correction
• Detectors page
12. Detector Settings, 8. Detectors, 13. Digital Zoom, 14. Enhanced Image (LUT / Mix 3 / Mix 4 / Color / Process)
• Patterning page
15. Patterning Control, 16. Properties, 17. Selective Mill, 18. Gas Injection,
19. Advanced Patterning (iSPI / Monitor / Drift Suppression)
• Direct Adjustments page
20. Direct Adjustments (Beam / Stigmator Centering / Focus), 8. Detectors
• Sample Preparation page
15. Patterning Control (reduced), 16. Properties,
17. Selective Mill,
18. Gas Injection, 9. Stage (reduced)
• Column Presets page
21. Use Case, 22. Column Presets, 8. Detectors
• Microscope Alignments page
23. Alignments (Instructions / Individual steps)
Note
The number in front of the module name represents an order in which the modules are introduced in the following text.
Some of the module controls are beam dependent. In this case, an active beam type is indicated by
the corresponding icon at the right-hand side of the module.
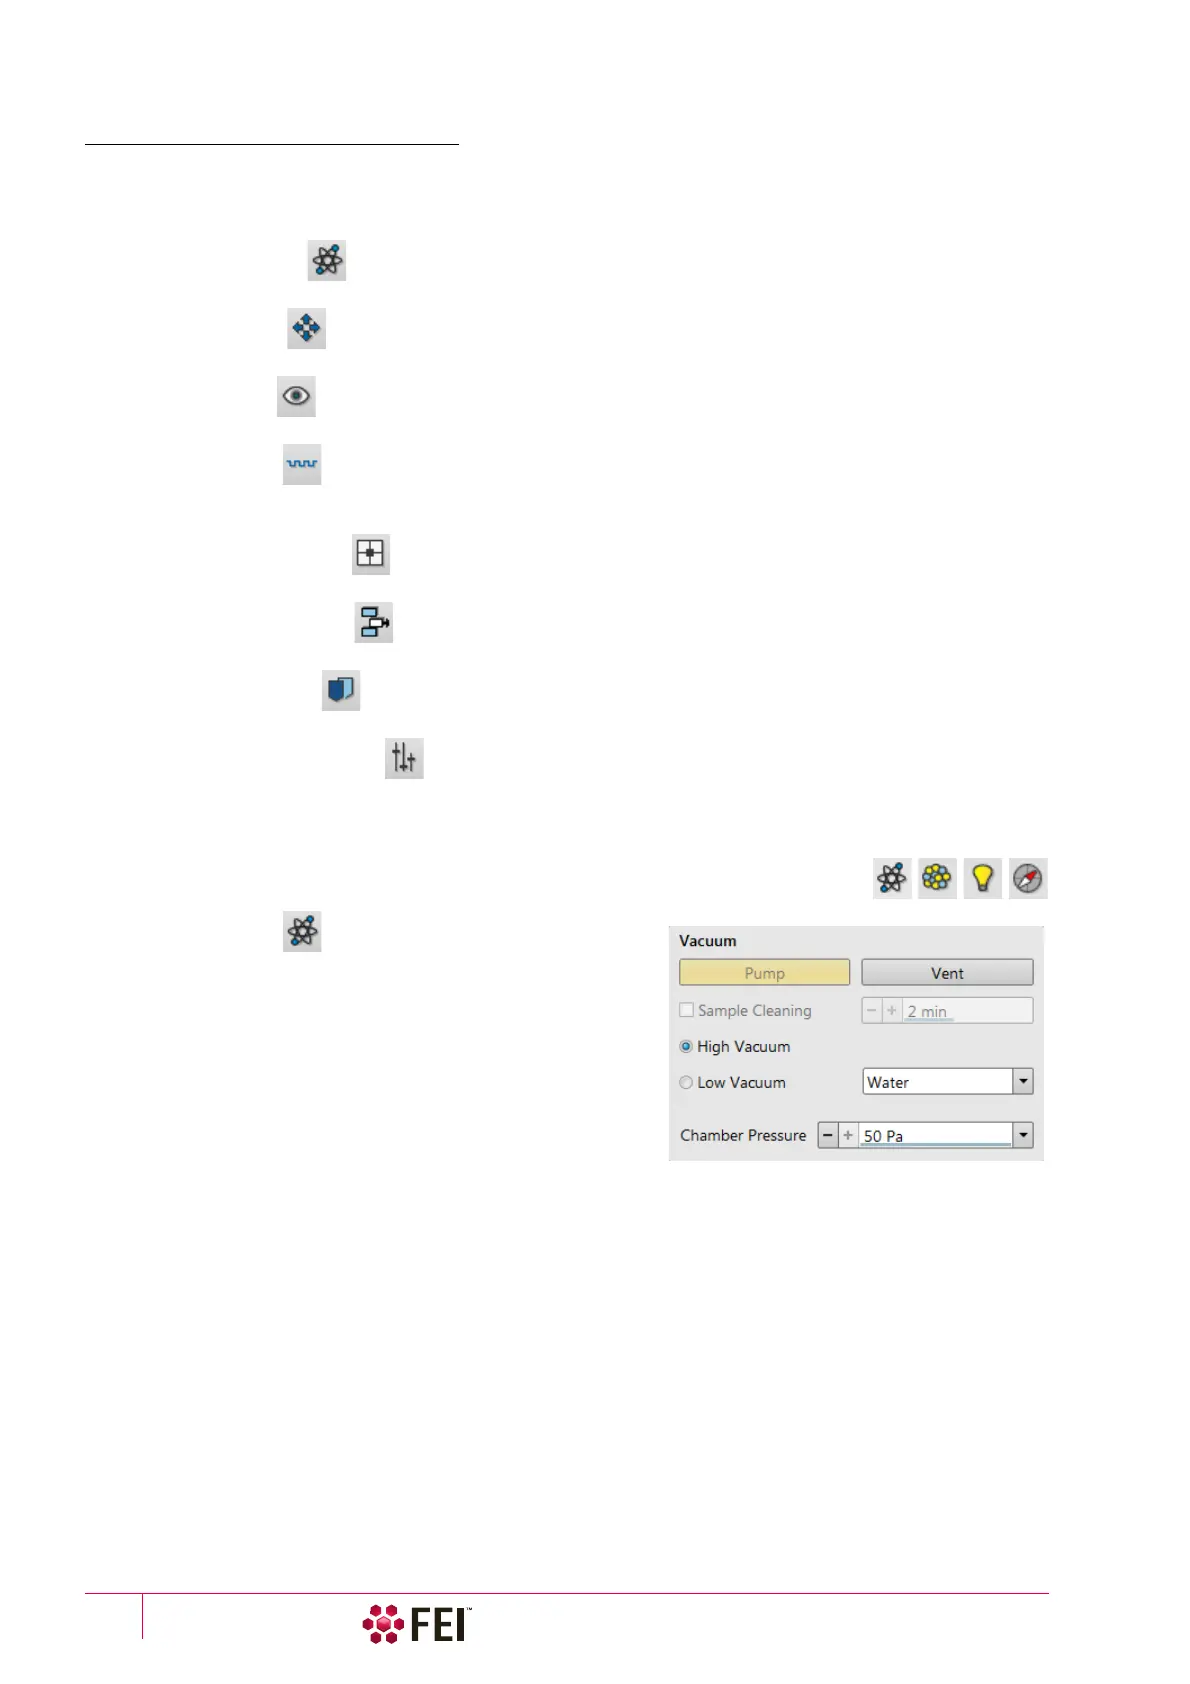
1. Vacuum Module
The module is used to control the pressure in the specimen
chamber. Clicking on the Pump button starts the pump-down
procedure for the specimen chamber and the column. The
system allows to switch the accelerating voltage on only when
the chamber is sufficiently evacuated. Clicking on the Vent button
starts chamber venting for a sample or detector exchange after a
user confirmation.
Ticking the Sample Cleaning check box pumps the system, makes
the Sample Cleaning procedure (duration can be set) and keeps
column pumped.
The Mode radio buttons bring the system to:
• the High Vacuum mode, which is the conventional operating mode (associated with all scanning electron
microscopes), used for observing conductive specimens that can withstand low pressure conditions and do not
release gas.
In this mode the system pumps continuously to achieve the lowest possible pressure.
• the Low Vacuum mode for observing not coated and not conductive or partially conductive specimens.
In this mode, the chamber pressure is controlled using the Chamber Pressure adjuster, while the column is at a
much lower pressure. The gas environment can be selected from the list box.
The system automatically switches to one of the modes when the chamber is Vented and a dedicated detector is
installed. If no dedicated detector is installed, user is asked to determine a detector mounted by PLA accessories
dialog (see chapter 2).