Operating Procedures: Optimizing Imaging
C O N F I D E N T I A L – FEI Limited Rights Data5-14
Digital Imaging Enhancement / Imaging Mixing / Coloring
The Enhanced Image module offers various digital imaging enhancements.
Note
When saving an image with the digital enhancements applied, be sure to choose the correct Digital file format (see
further).
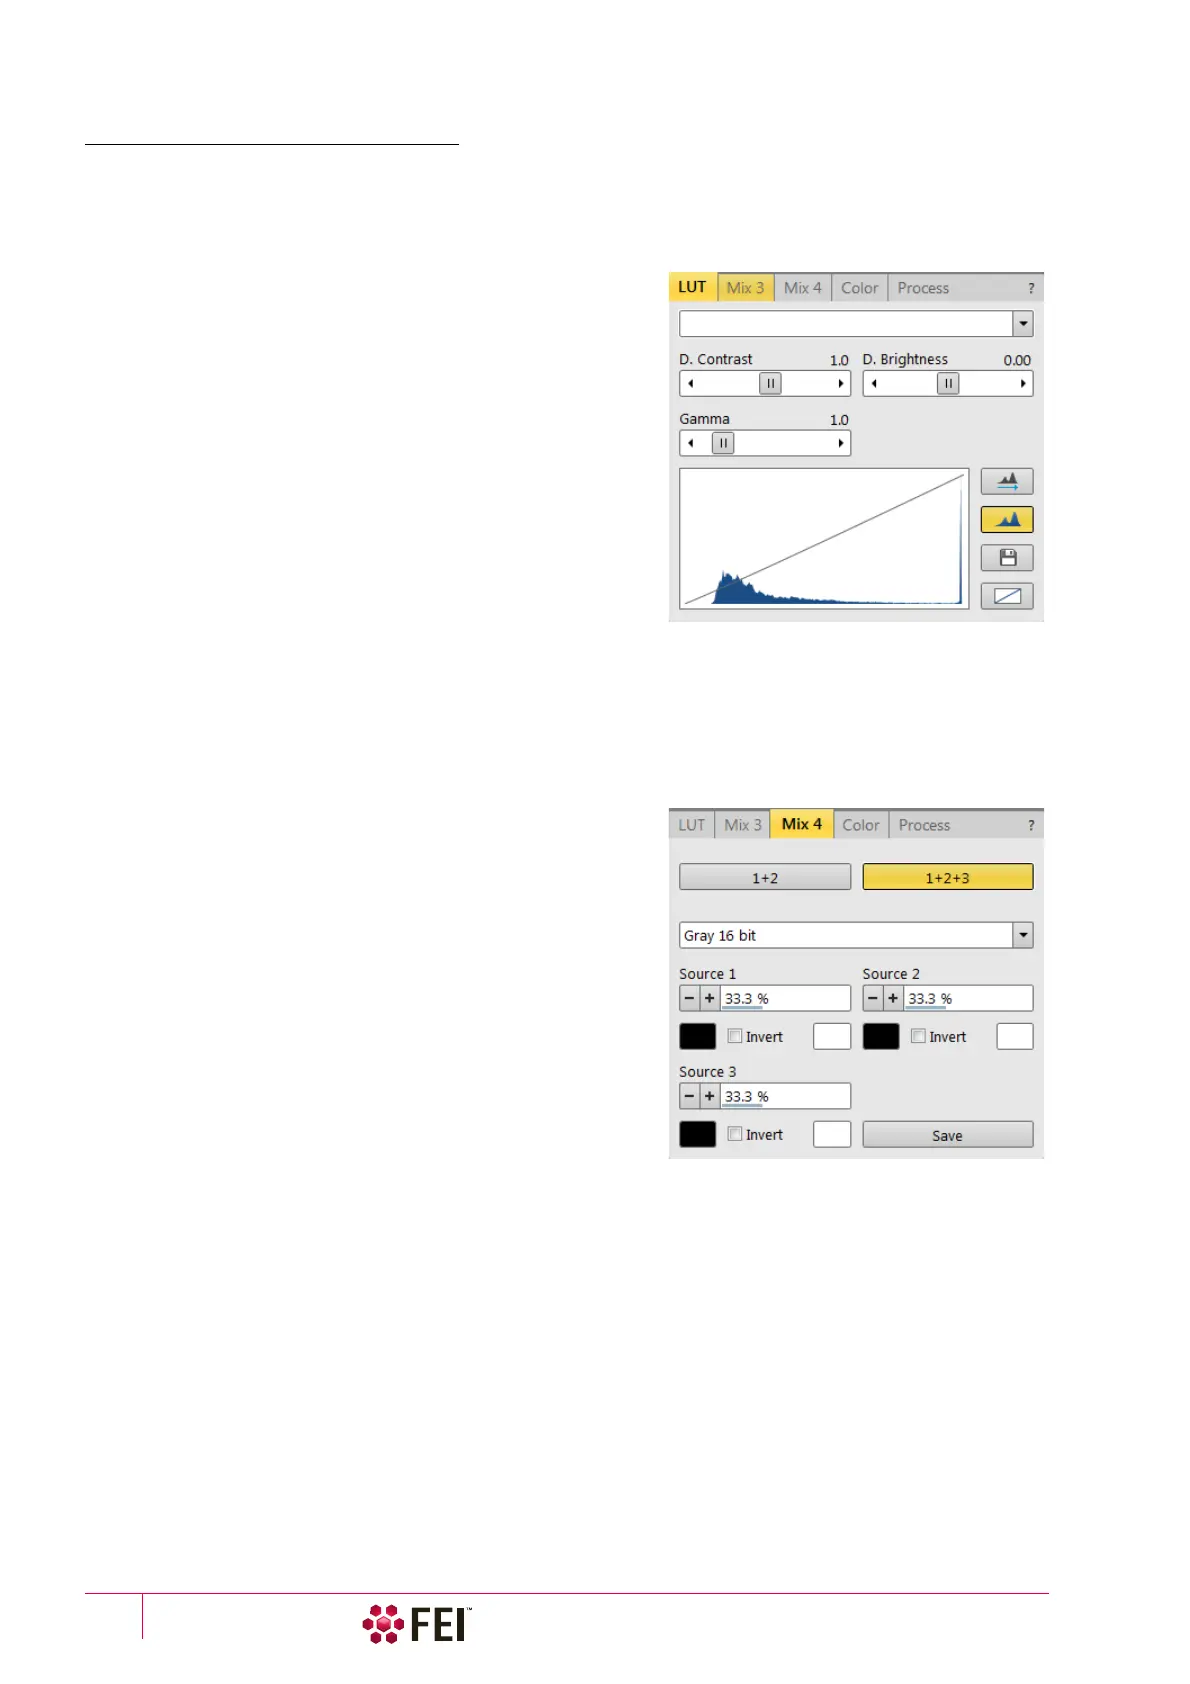
LUT (Look-Up-Table) tab Module
enables to monitor and modify a grey level distribution
(histogram).
• Presets list box – enables to select the Digital Contrast, Digital
Brightness and Gamma values using pre-defined or custom
presets.
• D. Contrast adjuster – sets a digital contrast in the range from
-10 to +10 (negative values lead to an inverse imaging).
• D. Brightness adjuster – sets a digital brightness in the range
from -2.0 to 2.0.
• Gamma adjuster – corrects image brightness non-linearly in
the range from 0.1 to 10.
• Graph area – graphically shows the applied modification via the
grey line. Horizontal / Vertical axis represents the input /
output values.
• Auto Levels button – sets automatically D. Contrast,
D.
Brightness and Gamma to optimize actual imaging.
• Histogram button – switches on / off the grey level distribution (corresponding to the active imaging) illustration.
The left / right side corresponds to black / white original image pixels. The height of the blue line is proportional
to the number of pixels with the corresponding grey level.
• Save button – saves the actual setting as the custom preset.
• Default button – restores the default values.
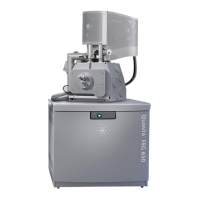
Mix 3 / Mix 4 tab Module
The Mix feature operates in display 3 / display 4 and is
automatically enabled when clicking the 1 + 2 / 1 + 2 + 3 button.
Any combination of live and paused images can be mixed
together, providing all mixed images have the same pixel
resolution. However, there are some logical limitations and
behaviours related to the Mix display:
• Average and Integrate filters are disabled.
• Pause / Activate functionality influences the mixed imaging
only, not its sources. The Mix display is always paused
immediately regardless of the actual scanning status.
• Optical imaging is not mixed.
Note
In the Mix 3 tab the Source 3 controls and the 1+2+3 button are not
available.
• 1 + 2 / 1 + 2 + 3 button – switches on / off mixing of
corresponding displays, also restores detectors or automatically selects suitable ones in appropriate displays.
• Presets list box – enables to select the mixing ratios and colors using pre-defined or custom presets.
• Source 1 / 2 / 3 adjuster – tunes the mixing ratio of display 1 / 2 / 3 imaging. The adjuster % value influences
correspondingly the resulting image and the other ones change automatically to reach the 100% sum.
• Clicking on the Color control areas (below each Source adjuster) enables to select a color, replacing the source
image black (left) / white (right) one. The image grey scale is linearly transformed to a new color spectrum
before it is mixed with other image(s).
Note
Colorized imaging (see the Color tab) is converted to greyscale one before mixing.
• Invert check box – inverts a corresponding source spectrum. It has the same effect as exchanging the left and
right colors selection.
• Save button – saves the actual setting as the custom preset.