System Options: Optional Detectors
C O N F I D E N T I A L – FEI Limited Rights Data 7-11
Settings for STEM 3 / 3+ Detector
1. Position the desired sample grid in the field of view using the ETD. Focus and link Z coordinate to FWD.
2. Select the Detector Settings module / Detector list box / STEM 3
/ STEM 3+ detector.
3. Insert the STEM 3 / 3+ detector.
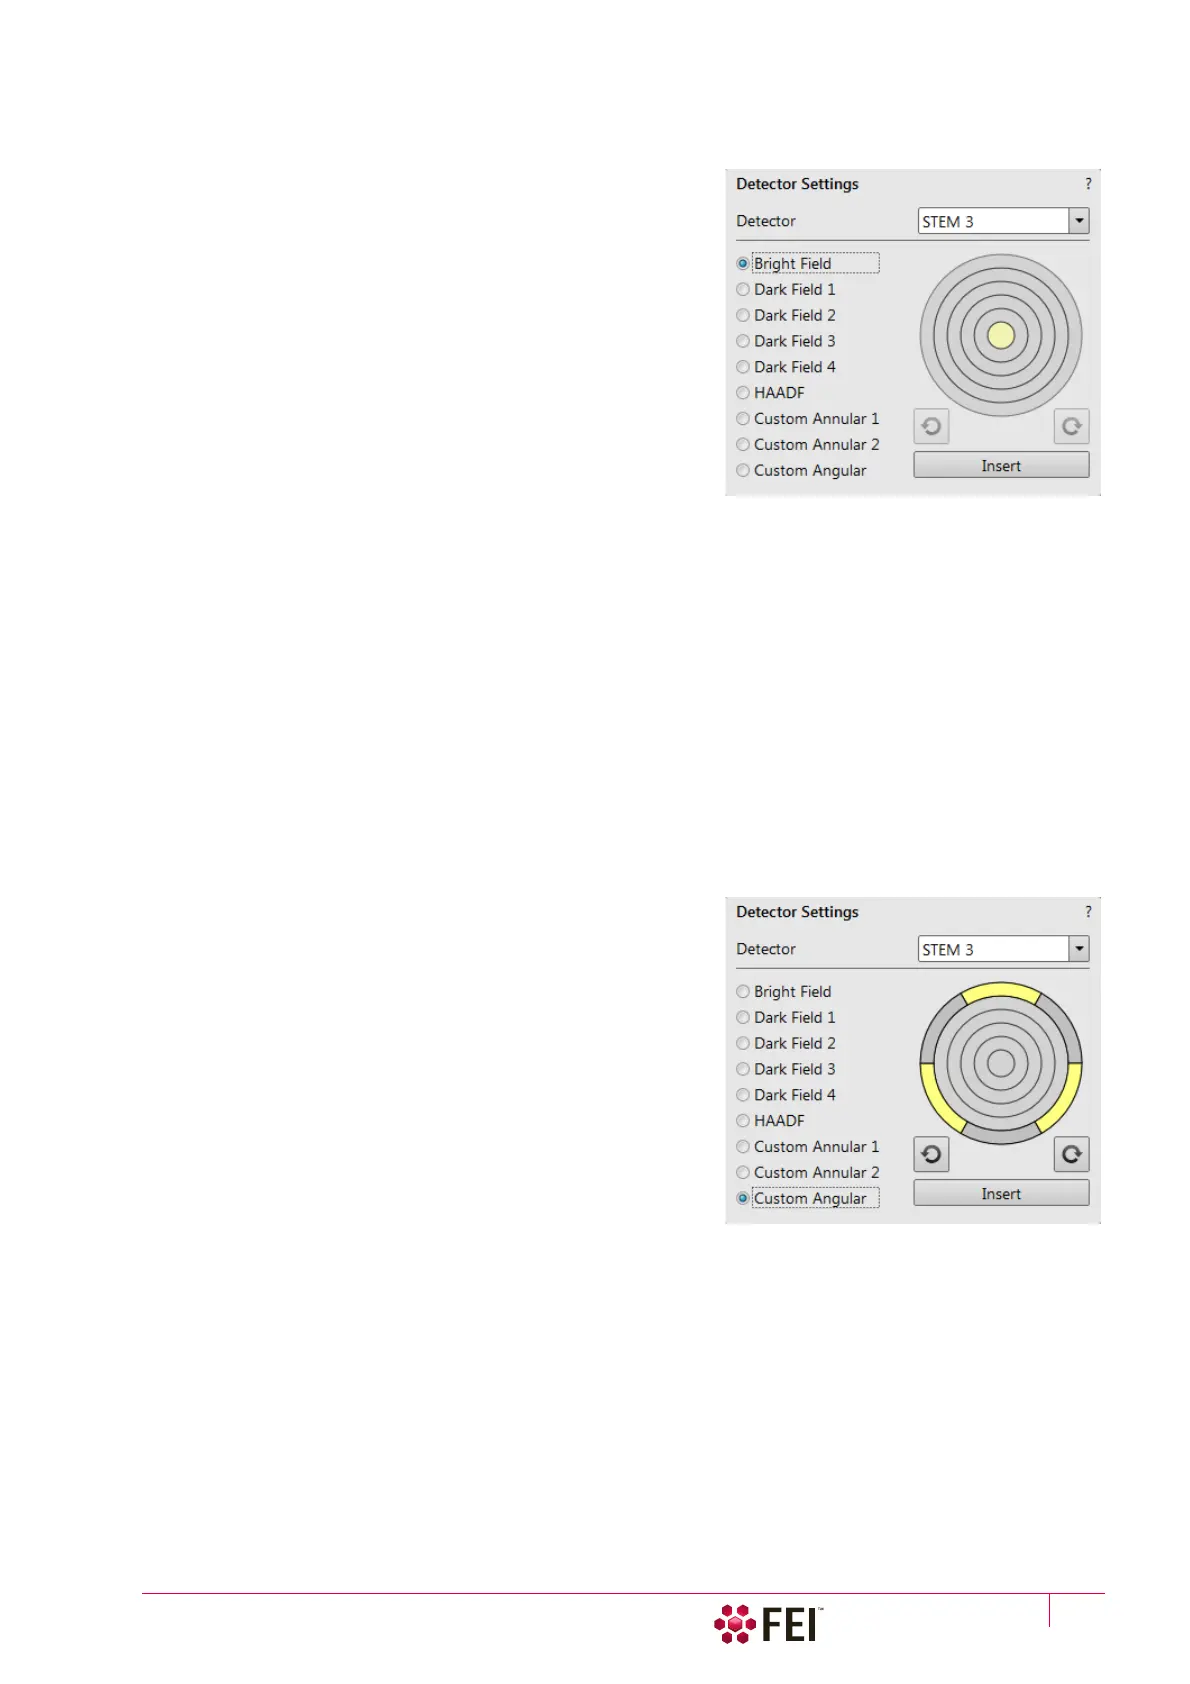
Bright Field imaging
1. Click on the Bright Field radio button.
2. Adjust the contrast and brightness. An image should be visible
at low magnification.
3. Change the voltage to suit the contrast necessary over the
sample.
For example: light materials (poly-silicon or silicon oxide) may
work better with 5–10 kV to create contrast, whereas dense
materials (metals) may require 10–20 kV or higher.
4. Set the desired magnification, fine focus and correct the
astigmatism.
Dark Field imaging 1 / 2 / 3 / 4
In this mode it is possible to use separate segments by selecting appropriate Dark field number.
1. Obtain a Bright Field image first.
2. Click on the Dark Field 1 / 2 / 3 / 4 radio button.
3. Adjust the contrast and brightness.
HAADF (High Angle Annular Dark Field) imaging
This mode may require higher voltage to create a suitable image as the angle subtended to the detection diode can
be wide. Choosing 2× the value used for Bright field is a good guide level. HAADF segments cannot be combined
with DF or BF.
1. Obtain a Bright Field image first.
2. Click on the HAADF radio button.
Custom Annular 1 / 2
This two variations uses separate sets of segments.
• Click on the Custom Annular 1 / 2 radio button.
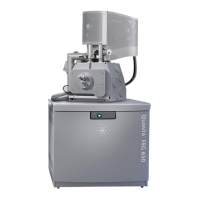
Custom Angular
• Click on the Custom Angular radio button.
You can select any combination of outer segment partitions by
clicking on them in the detector diagram. Active segments are
highlighted in yellow.
Area of active segments can be “rotated” using the circle arrow
buttons to view orientation contrast changes.