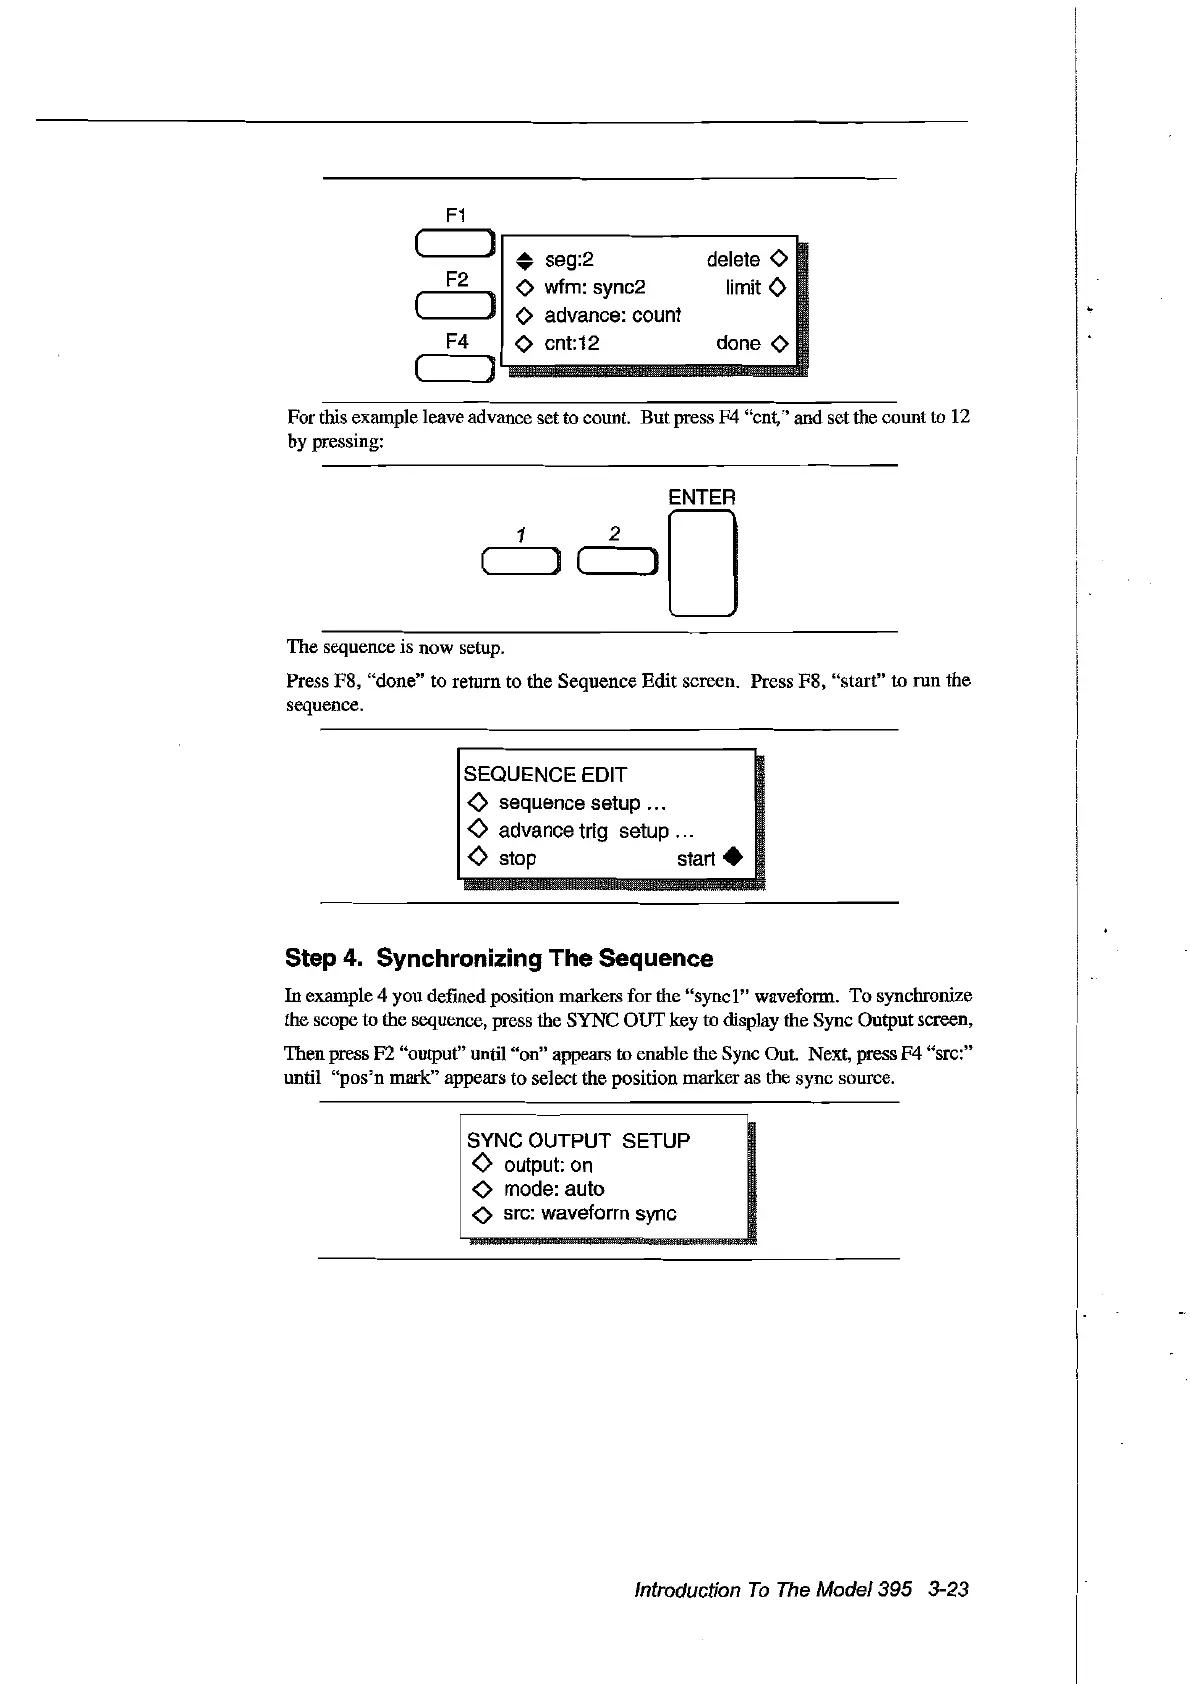
F1
( )
• seg:2 delete
<>
F2
<>
wfm: sync2
limitO
( )
<>
advance: count
F4
<>
cnt:12
done
<>
( )
For
this example leave advance setto count.
But
press F4 "ent," and set the eount
to
12
by pressing:
ENTER
1 2 0
( )
C'---J)
The sequence is now setup.
Press F8, "done" to return to the Sequence
Edit
sereen. Press F8, "start" to run the
sequence.
SEQUENCE EDIT
<>
sequence setup ...
<>
advance trig setup ...
<>
stop start •
Step 4. Synchronizing The Sequence
In
example 4 you defined position markers for the
"synel"
waveform.
To
synebronize
the seope to the sequence, press the SYNC
OUT
key to display the Syne Output sereen,
Then press F2 "output" until "on" appears to enable the Syne Out. Next, press
F4
"sre:"
until
"pos'n
mark" appears to select the position marker as the syne source.
1
SYNC~U~PUT
SE;UP
!
<>
output: on
.
<>
mode: auto
1
<>
src: waveform sync
Introduction
Ta
The
Model395 3-23
Artisan Technology Group - Quality Instrumentation ... Guaranteed | (888) 88-SOURCE | www.artisantg.com