Fold Position Adjustment
713
Maintenance
21
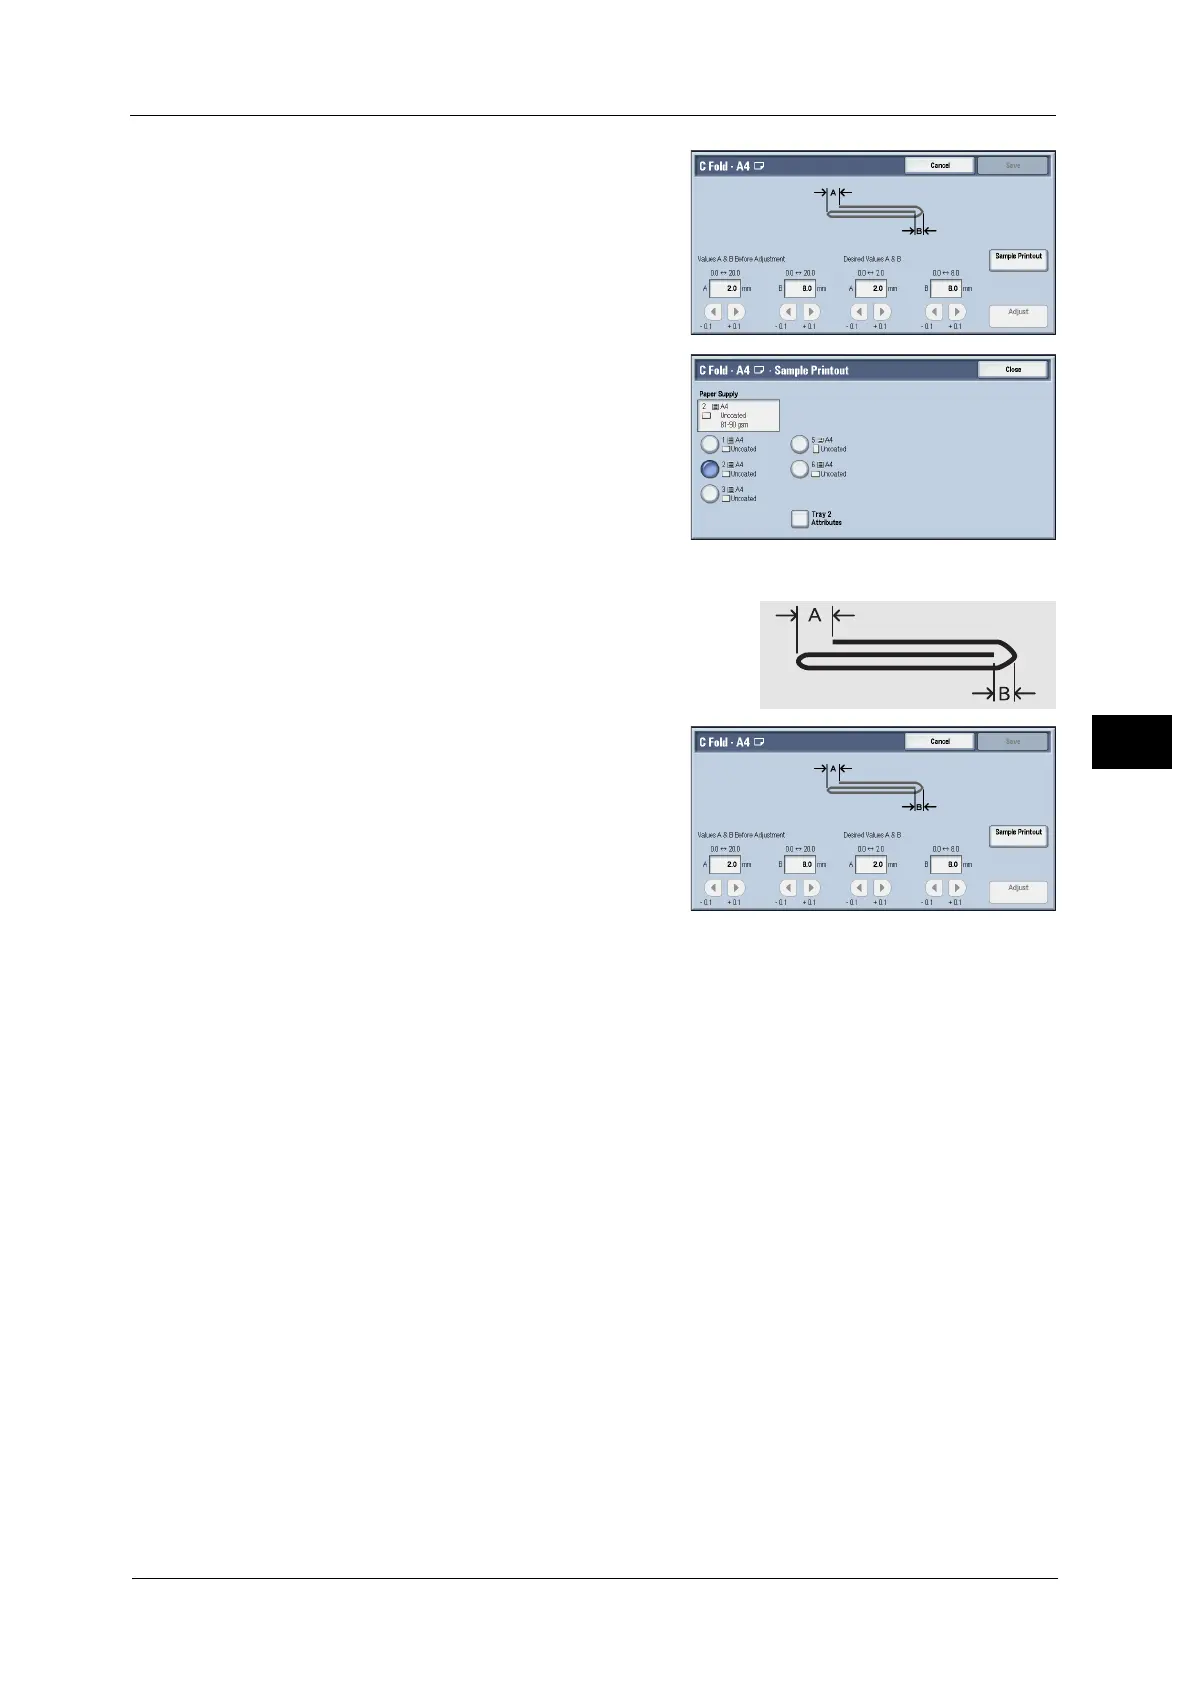
2 Select [Sample Printout].
3 Select the tray in which you loaded paper, and
press the <Start> button.
A sample printout is printed.
4 Select [Close].
5 Check the sample printout, measuring the A and B fold
position movement amounts.
6 Enter the values you measured in step 5 in
[Values A & B Before Adjustment], and the
value to which to adjust in [Desired Values A &
B].
Important • Set value A and value B so that an edge of
the paper does not extend beyond a fold
position of the paper. Extending an edge of
paper beyond a fold position of the paper
may cause a paper jam.
7 Select [Adjust].
8 Select [Sample Printout] again.
9 Select the tray in which you loaded paper, and press the <Start> button.
The sample printout is printed.
10 Select [Save].
11 Confirm the same printout.
12 Adjust the alignment again if necessary. (Step 5 to 11)
13 Select [Save].
14 Select [Close] until the Services Home screen is displayed.
Note • When you configure settings under [System Settings] or [Setup] and then press the <Services Home>
button, the screen directly goes back to the Services Home screen.

 Loading...
