22 Problem Solving
874
Problem Solving
22
Paper Jams at the Output Tray ................................................................................................................................................ 880
Paper Jams at the Finisher Tray ............................................................................................................................................... 880
Paper Jams at the Booklet Output Tray ................................................................................................................................. 880
When the D4/D5 Folder Unit is installed
Paper Jams at the Handle [2a] and the Knob [3a] ............................................................................................................. 881
Paper Jams at the Handle [2a] and the Knob [1c].............................................................................................................. 881
Paper Jams at the Handle [2b]................................................................................................................................................. 882
Paper Jams at the Knob [2c], the Handles [2e]/[2f], and the Tri-fold Output Tray [2d]............................................ 883
Paper Jams at the Tri-fold Output Tray [2d] and the Handle [2g].................................................................................. 884
Paper Jams at the Unit [4] and the Knob [4a] ..................................................................................................................... 884
Note • A remedy differs depending on where the paper jam occurs. Follow the instructions displayed and
remove the jammed paper.
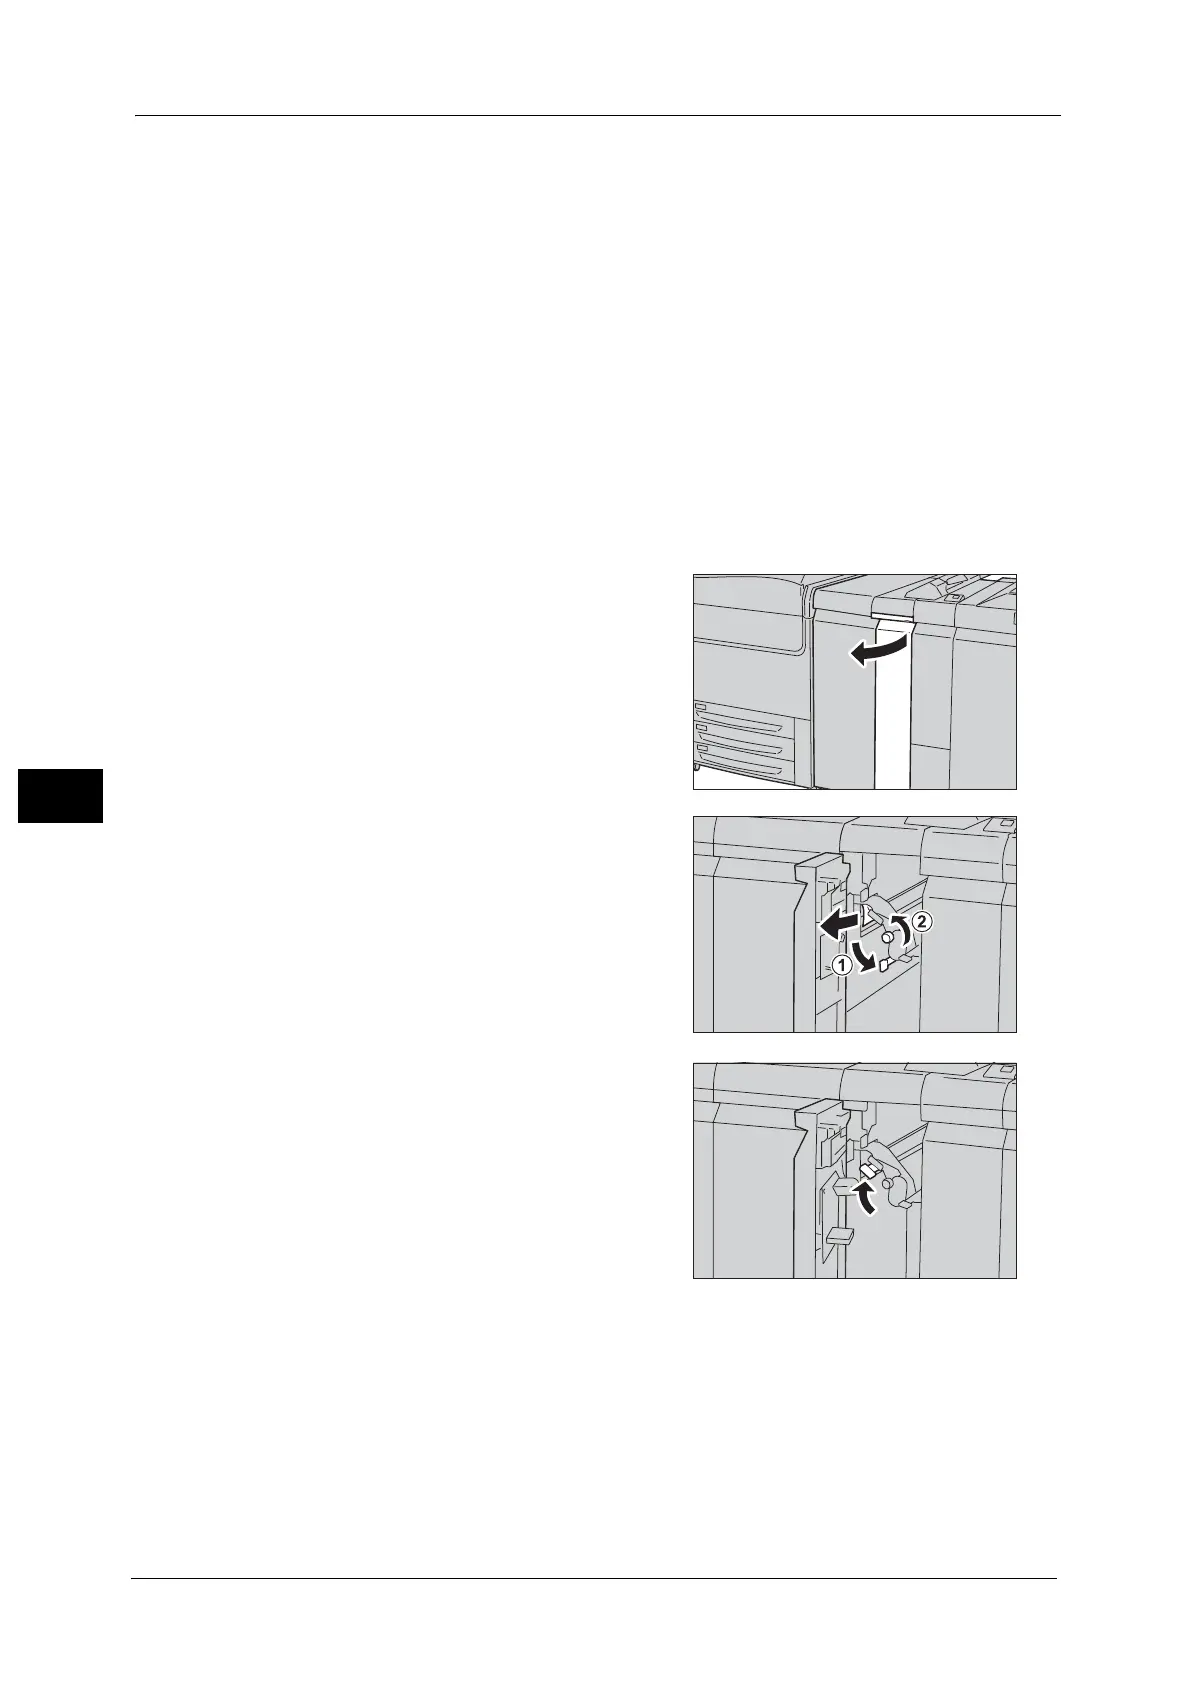
Paper Jams at the Handle [1a] and the Knob [1c]
1
Make sure that the machine has stopped, and
open the finisher left door.
2 Move the handle [1a] downwards (1) and turn
the knob [1c] to the left (2). Remove the
jammed paper.
Note • If paper is torn, check for any torn pieces
inside the machine.
• If you cannot see jammed paper, check
handle [1d] as well.
3 Return the handle [1a] to its original position.
4 Close the finisher left door.
Note • A message will be displayed and the machine will not operate if the finisher left door is even slightly
open.

 Loading...
