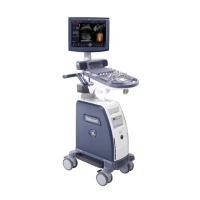
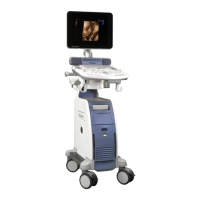
GE HEALTHCARERAFT VOLUSON® P8 / VOLUSON® P6
DIRECTION 5459672-100, R
EVISION 6 DRAFT (JANUARY 17, 2013) PROPRIETARY SERVICE MANUAL
4-24 Section 4-4 - Functional Checks
4-4-6 Using Cine
4-4-6-1 Activating Cine
Press FREEZE
, then roll the TRACKBALL to display the images of the stored sequence one by one.
4-4-6-2 Cine-Split Function (Multiple Format)
After FREEZE
of a sequence in 2D Mode two or four different images of the sequence can be displayed
simultaneously in Dual respectively Quad Display Mode.
Move the TRACKBALL
to display the images of the stored sequence. Use the FORMAT keys to
change to the next (part of) frozen 2D image sequence to play back the cine memory.
NOTE: The Cine-Split function (multiple format) is also possible in 2D Cine mode.
4-4-6-3 Activating 2D Cine
1.) After Freeze, select the CINE MENU
on the menu area.
2.) Select the START
of the sequence.The selected image is simultaneously displayed.
3.) Turn the END
digipot to the end of the sequence. The selected image is displayed.
4.) Select the review SPEED
and the read ZOOM factor.
5.) Select the Cine Mode review direction.
6.) To start/stop the Cine Loop playback select 2D CINE START/STOP
.
After stopping the sequence, move the TRACKBALL
to display the images one by one.
4-4-6-4 Spectral Doppler- or M Cine Loop
Press FREEZE
, then roll the TRACKBALL to display the Cine / Loop one by one.
The UPPER TRACKBALL KEY
changes from the 2D Cine to the D Loop (respectively M Loop).
NOTE: The active Cine is displayed on the monitor screen: 2D/D(M)-image or 2D/D(M)-image.
4-4-6-5 Activating 3D Rotation Cine
1.) After 3D Volume acquisition the 3D ROT. CINE
key on the Voluson® P8 / Voluson® P6.
2.) Select the Rotation angle with the select keys or select it manually with the START IMAGE
and
END IMAGE
rotary controls.
3.) Select the Step angle and the Rotation axis.
4.) Select the CALCULATE CINE SEQUENCE
key to start the calculation.
5.) To start/stop the 3D Rotation Cine sequence select START/STOP
.
4-4-6-6 Activating Volume Cine
1.) After Real Time 4D acquisition move the TRACKBALL
horizontally to display the Volumes of the
stored sequence one by one. (Alternative use the VOL CINE #
control to select the desired volume.)
For further details refer to the Voluson® P8 / Voluson® P6 Basic User Manual, Chapter 11.6.
4-4-6-7 Activating Auto Cine
1.) After Real Time 4D acquisition select the CINE
key on the Voluson® P8 / Voluson® P6.
2.) Select the START VOLUME
and the END VOLUME of the sequence with the rotary controls.
3.) Select the Cine Mode direction and the review SPEED
.
4.) To start/stop the Cine sequence select the START/STOP
key.
NOTE: After stopping a sequence, move the TRACKBALL
to display the images / volumes one by one.
 Loading...
