○○○○○○○○○○○○○○○○○○○○○○○○○○○○○○○○○○○○○○○
1•4 Front/Rear Panel
The graphic LCD Display
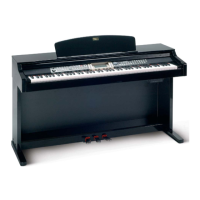
The PS1000/1300 has a large, three-colored, backlit liquid crystal display of the multifunction type which simplifies all your
operations. Each time you turn the instrument on, the display will show the Grand Piano Preset ready to play.
This user interface is divided into 6 zones:
• The Master Transpose setting;
• The sequencer measure counter;
• A 3-digit display showing the program change number of
the current Sound, Preset, Style or Song, or the value or
status of the current function;
• An 8-digit display showing the name of the current Sound,
Preset, Style, Song, or Function.
4) Function indicators (right)
These indicators show the on/off status of the corresponding
panel functions. For example, if you press the REVERB but-
ton repeatedly, the REVERB indicator turns off or on. When
on, the Presets are processed by the Reverb effect processor,
when off, the Reverb effects are bypassed.
5) Mode
The three names, Upper 1, Upper 2, Lower, correspond to the
3 real time Keyboard Sections (or Tracks). When the right dis-
play arrowhead [ ] appears next to one of these three names,
the corresponding keyboard section is
Selected
and ready to
accept a change (of sound, volume, etc.). To move the arrow-
head, press the corresponding
Keyboard Activator
button as
many times as necessary.
6) Disk
This is the list of operations available when working with Floppy
disks. Once you press the DISK button, the arrowhead points
automatically to the LOAD operation and the CURSOR [ ] and
[ ] buttons select the type of operation required (Load, Save,
Delete, Format, Utility).
1) Menu (left)
This is a list of functions which are accessed by moving the
cursor’s arrowhead [ ] next to the name of the desired func-
tion using the CURSOR [ ] and [ ] buttons. The movement
of the arrowhead is cyclic: once it reaches the top or bottom, it
continues its course by appearing at the other extreme end of
the list. Once selected, you can select the various parameters
of the function with the PAGE [ ] and [ ] buttons.
2) Indicators (left)
These indicators show the on/off status of the corresponding
panel buttons. For example, if you are playing a Style and
decide to change variation by pressing one of the Variation
buttons, the VARIATION indicator turns on for the entire transi-
tion period from one Variation to another.
3) Central display area
This large area is further subdivided into several smaller zones:
• The Preset track zone showing the on/off status of the tracks,
the Program change number of the Sound assigned to the
tracks and the respective Volume level (shown as a bar
graph). In Style/Real Time mode, the tracks shown corre-
spond to those of the Style accompaniments (Drums, Bass,
Acc. 1, Acc. 2, Acc. 3 and the real time keyboard (Upper 1,
Upper 2 and Lower);
• The type of chord played with the left hand for the accom-
paniment;
• The on/off status of the Metronome;
• The Tempo setting and relative beat pattern indicator;
• The Floppy Disk icon indicator;
The Display
12 3 4 5
6
MENU (left)
INDICATORS (left) CENTRAL
DISPLAY AREA
INDICATORS (right) MODE
DISK