○○○○○○○○○○○○○○○○○○○○○○○○○○○○○○○○○○○○○○○
2•48 User Guide
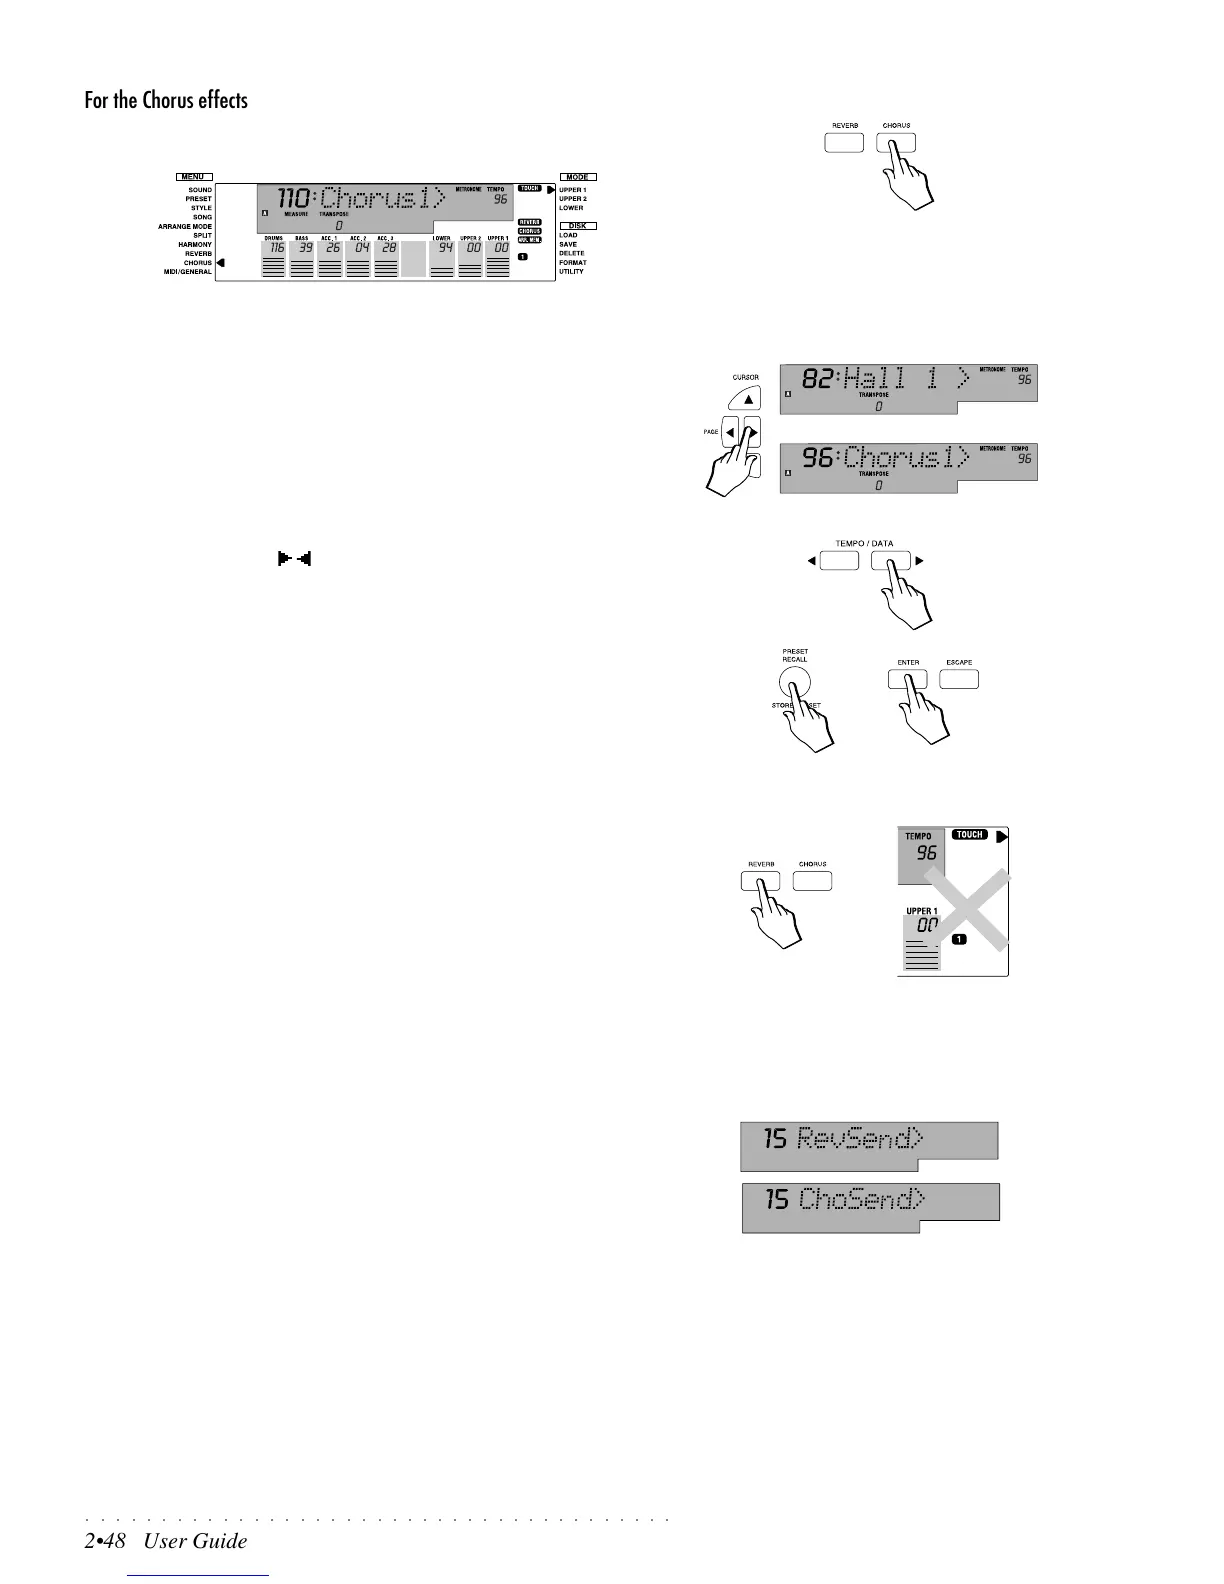
For the Chorus effects
2. Hold down the CHORUS button to gain access to the Chorus DSP.
The left arrowhead moves next to the REVERB or CHORUS menu function.
The 8 digit display shows the name of effect type assigned to the current
Preset and the 3 digit display shows the general effect volume level.
3. Use the PAGE buttons to select a different effect type.
This method allows you to scroll through the effect types available. Both
DSP units (Reverb and Chorus) have 22 effect types to choose from.
One effect type from each DSP can be assigned to a Preset.
Change the general effect volume
4. Use the Tempo/Data / buttons to change the general effect volume.
Repeat the operations if necessary for the other DSP.
Save the effect types to the Preset
5. Hold down the STORE PRESET button for an instant and confirm the “?”
message with ENTER to save the changes to the current Preset.
If you select a different Preset, or select the same one again without saving
the changes, the newly assigned effects will be lost and the original settings
will be restored.
Deactivating (bypassing) the effects
You can bypass one or both effect types assigned to the current Performance
at any time.
• Press the REVERB or CHORUS button repeatedly to toggle between
the ON and OFF status.
The corresponding display indicator responds by turning on or off accord-
ingly.
Adjusting the Send levels
Each track of the current Preset can be independently adjusted for the amount
of Reverb (RevSend) or Effect (ChoSend) applied.
RevSend : Controls the REVERB level for each track of the current
Preset.
ChoSend : Controls the CHORUS level for each track of the current
Preset.
How to set the Send parameters is explained in detail on page 2.7 of the Pre-
sets chapter, under the paragraph “Editing the Programmable Presets”.