○○○○○○○○○○○○○○○○○○○○○○○
Quick Guide 1•13
Selecting Sound Presets (ROM)
With the PS1000, you can quickly select the Sound Presets. These presets
contain single, layered and split sounds. There are a total of 128 permanent
(ROM) Presets and 16 User Programmable Sound presets.
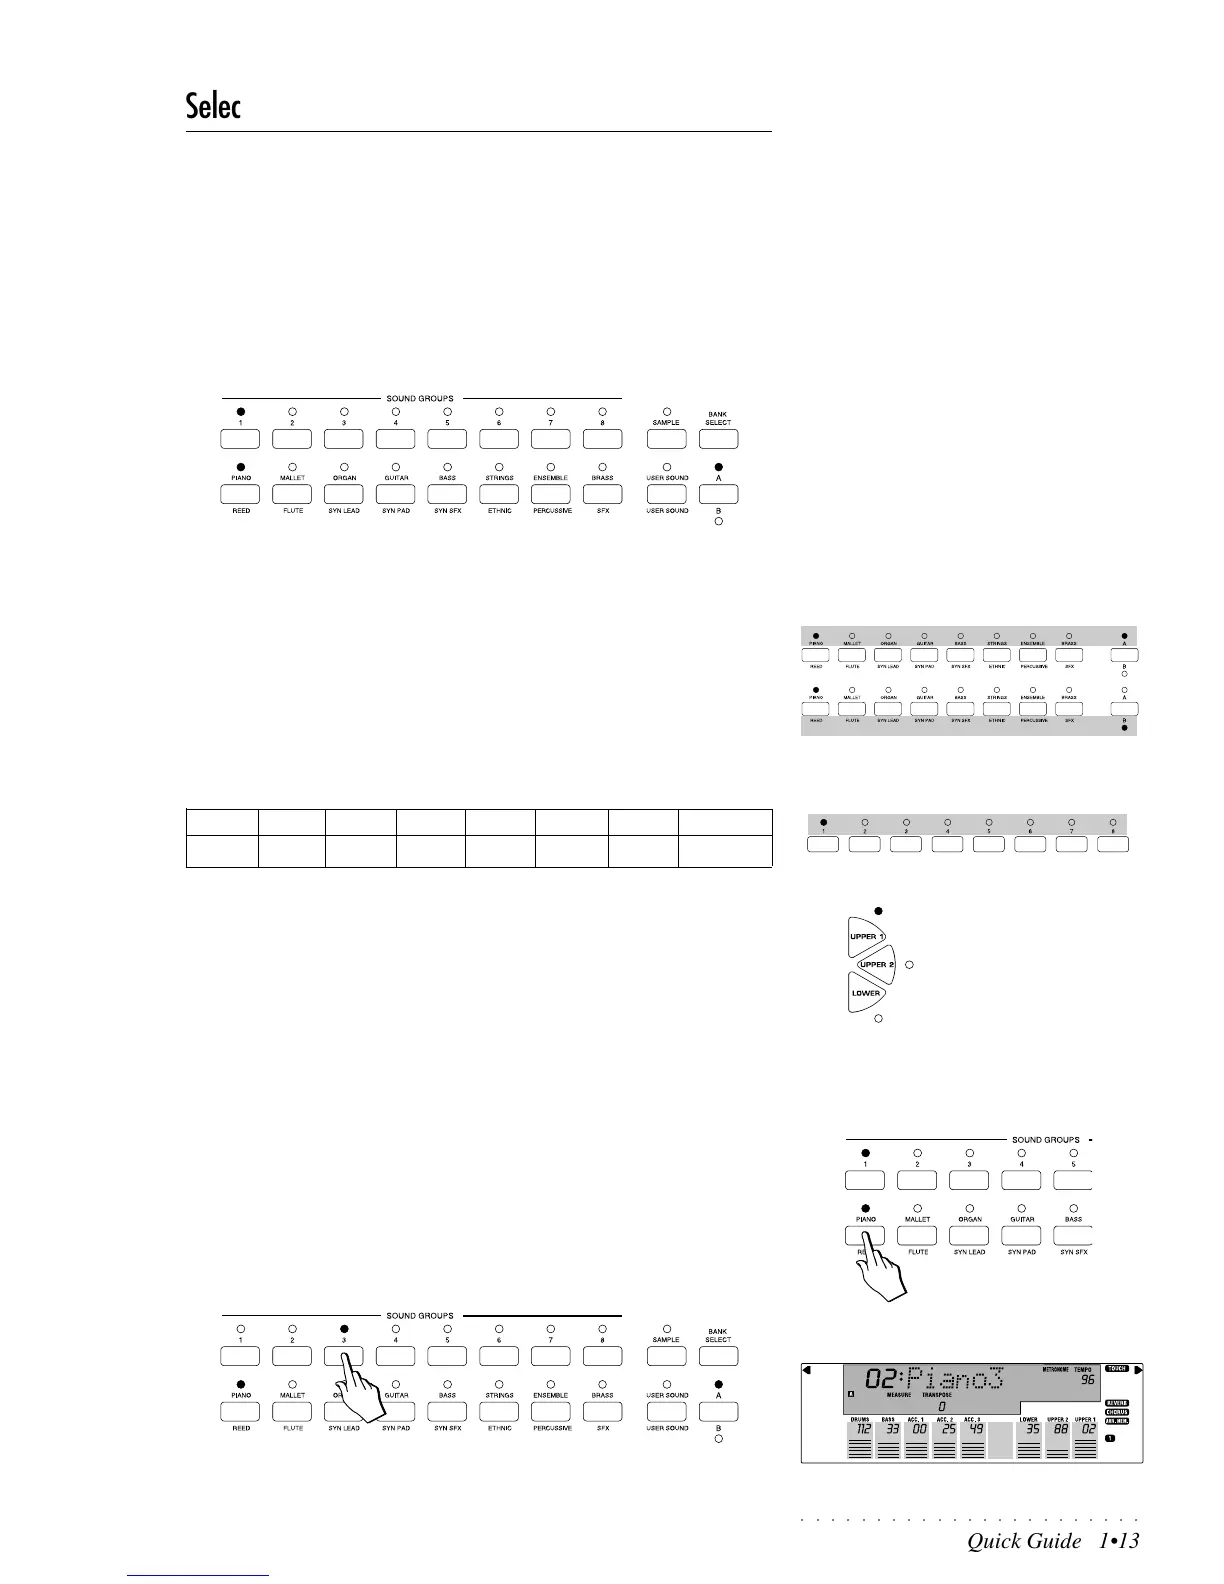
The Sound Groups section
The Sound Presets are housed in the Sound Groups section which consists of
two rows of buttons.
The first 8 buttons of the lower row are Sound Group buttons, marked above
(piano, mallet, organ, etc.) and below (reed, pipe, syn lead, etc.) with sound
“family” names. The Sound Group selected depends on the status of the LED
of the A/B selector button on the extreme right of the group.
When LED A is on, the Group buttons select the names silkscreened above
them.
When LED B is on, the names selected are those under the buttons. To switch
from A to B, press the A/B selector button then press one of the Groups buttons.
The 8 buttons numbered 1-8 select 8 different Presets of the currently selected
Preset Group and are factory-set to recall Presets in the following manner:
12345678
Single Single Single Single Layer Layer Split Split
Each Preset of the current Group contains a memorized Single, Layer and Split
sound combination which you can recall in real time by activating the appropri-
ate keyboard activator buttons (Upper 1; Upper 2, Lower). The Single Presets
activate the Upper 1 keyboard section across the entire keyboard. The Layer
Presets activate the Upper 2 section layered with Upper 1. The Split Presets
activate the Lower keyboard section (which splits the keyboard) together with
one or both the Upper sections.
When you select a Sound Group from the lower row for the first time after
turning on, Preset n. 1 of the upper row is automatically selected by default.
Example 1
1. If you select the Piano Group button, Preset 1 (GrandPiano) is recalled
automatically for the Upper 1 keyboard section.
LED A of the A/B selector button will be on as well as the LEDs of the PIANO
Group button and button 1.
2. Now select button n. 3 of the top row.
This will recall the Single Preset “Piano 3” from the same PIANO Group.
Keyboard Activator
buttons
IMPORTANT
When you press the A/B Selector button to
switch from bank set A to bank set B (or vice
versa), the LED currently shown off will flash
for about 3 seconds, during which time you
must make your bank selection. If the LED
stops flashing, it will not be possible to switch
bank set.