○○○○○○○○○○○○○○○○○○○○○○○
Presets 2•11
3. Press ENTER to confirm.
The Preset will be memorized to the selected location.
In the example shown in step 2, Preset 45 corresponds to Preset n. 9 of
Group 5.
If you press ESCAPE, the operation will be cancelled and the new Preset
will not be stored to RAM memory. It will, however, still be available until
you select another one or turn the instrument off.
Changing the Prog. Preset name
The 63 factory Prog. Presets are all identified with a name. When you save a
new Prog. Preset, it takes the name of the destination Preset. You can choose
to maintain the same name or change it. This operation must be carried out in
Preset mode (the left arrowhead pointing to the Preset Menu function).
To change the name of a Preset
1. With your Prog. Preset selected, check that the arrowhead to the left of
the display is next to the PRESET menu function.
2. Press the PAGE [
] to pass to the name write page.
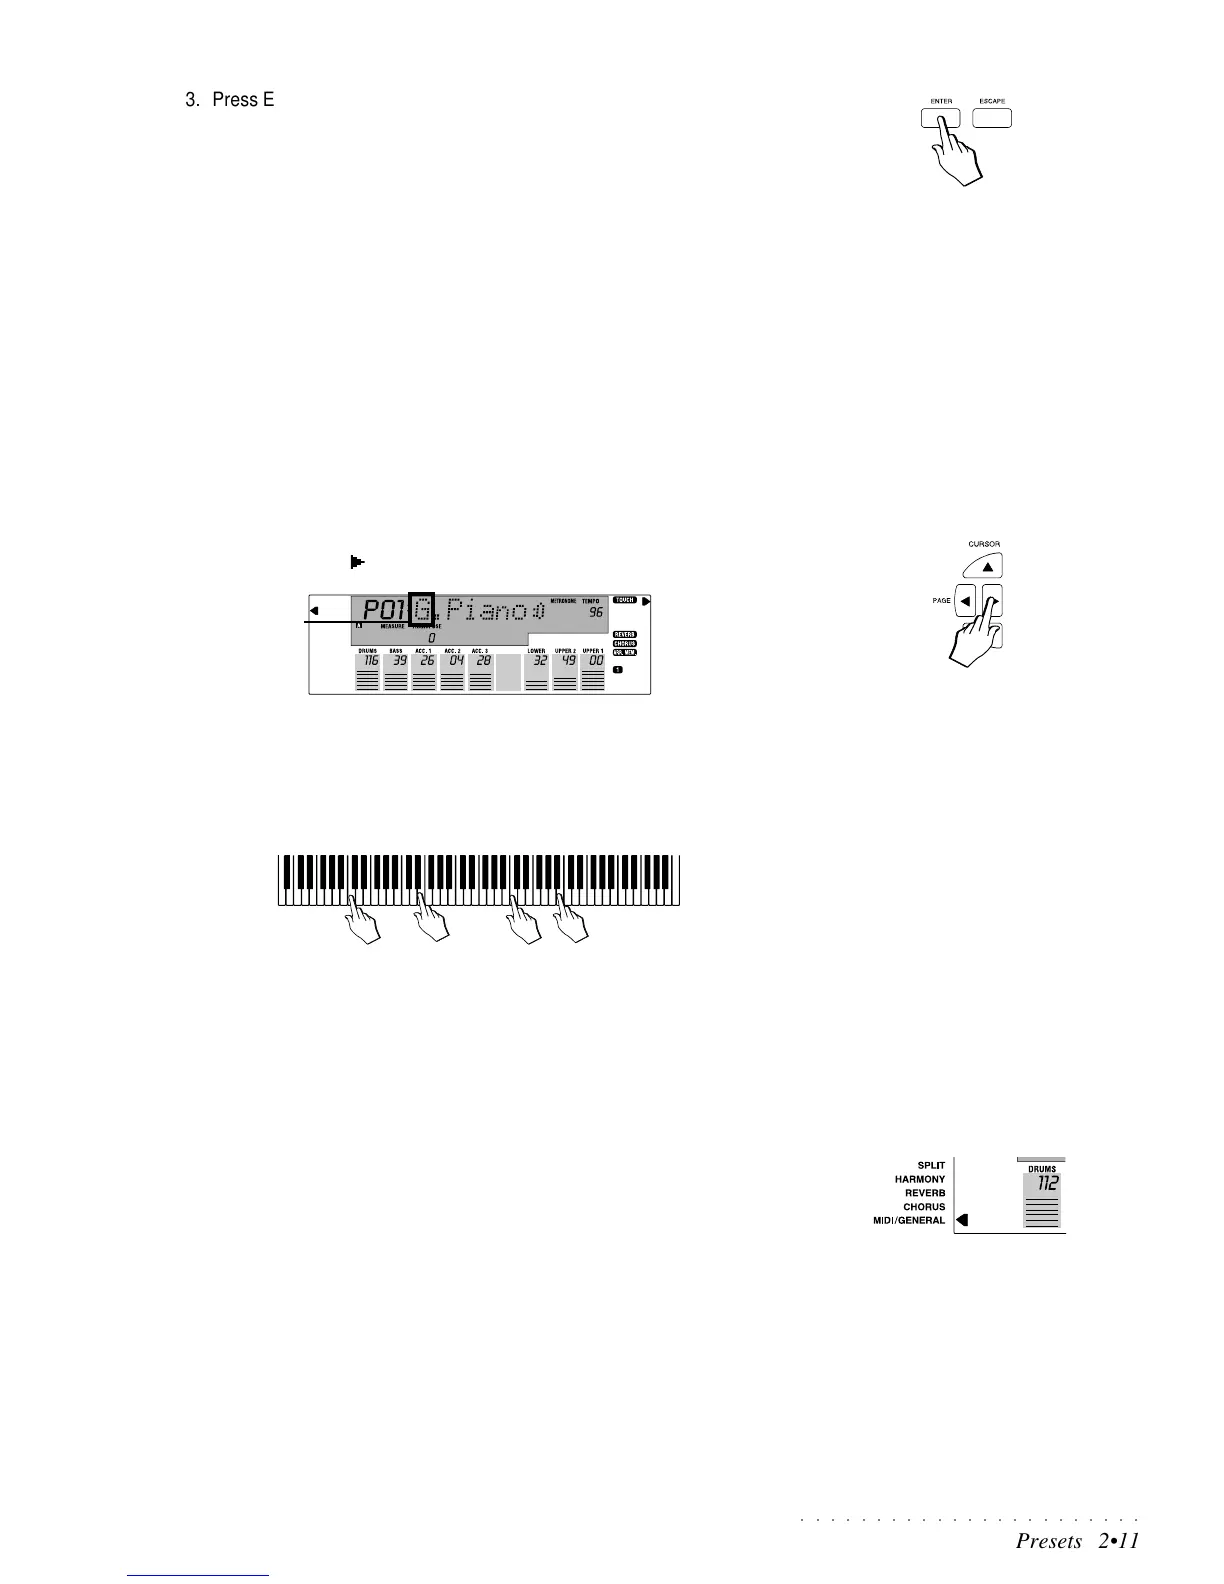
The first letter of the name will be shown flashing to indicate the current
cursor position. The flashing letter is active for a change.
Use the Octave +/– buttons to move the flashing cursor right [+] or left [–].
3. Write the name by using the notes of the keyboard to enter the letter,
number or symbol at the cursor position.
Refer to the “Text Entry” paragraph on page 1.6 of the Quick Guide.
4. Save the name with the Store Preset function as already described.
To restore the original Preset settings
Under the MIDI/GENERAL Menu, you will find the INIT (initialize) procedure
which contains the option to restore the PRESETS to their original factory set-
tings.
For detailed explanations, turn to page 2.51 of the MIDI/GENERAL chapter.
Flashing