○○○○○○○○○○○○○
Hard Disk 2•67
Save to Hard Disk partition
PS1300 data can be saved to a Hard Disk partition using one of the following
methods:
• as single elements: Song, Style (User), Midi File;
• as a set of files corresponding to Groups: Styles (User), Presets (7 Pro-
grammable Preset Groups + 2 User Sound Preset Groups), Sample (entire
contents of the Sample RAM memory);
• all the data present in RAM memory (including Song Styles) using the ALL
option.
In order to save a single element, you can choose to save with the same name,
or specify a different one. To save Presets, Samples, Styles and all RAM memory
data (All), a name is not required.
Save procedure
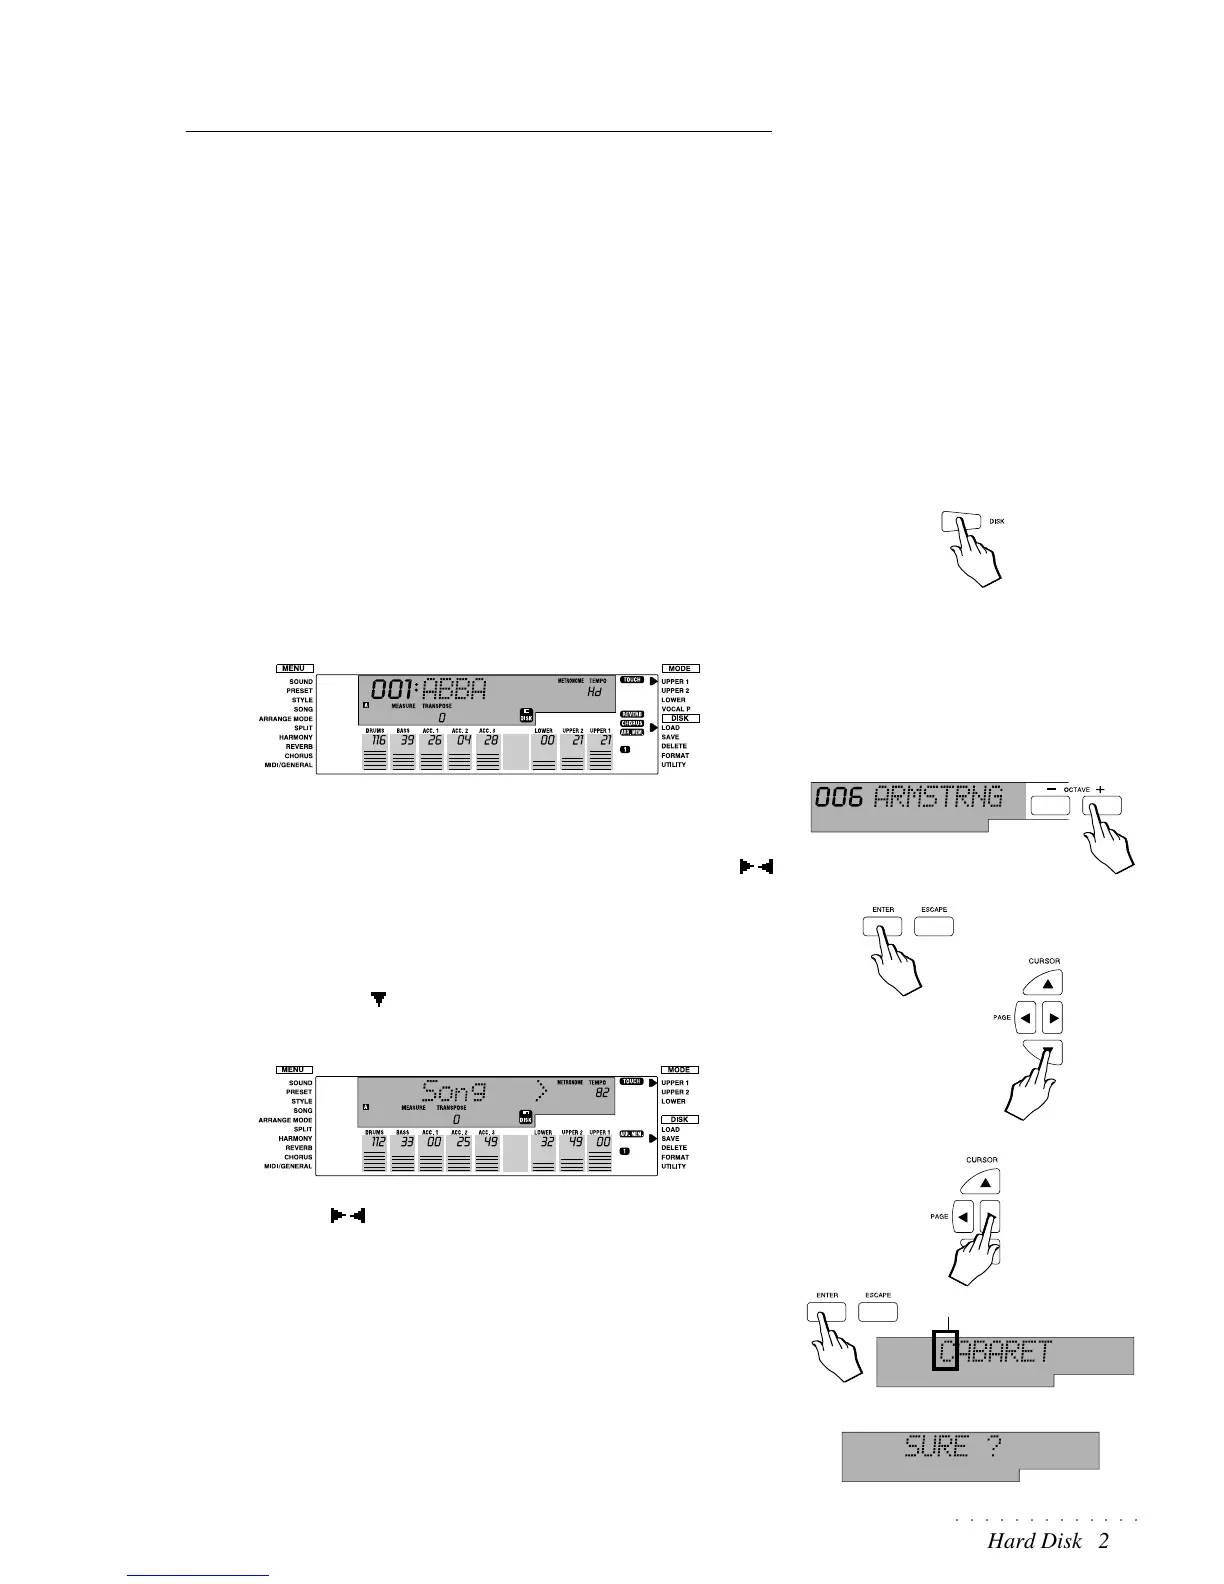
1. Press the DISK button once, or twice if a floppy disk is inserted in the
drive.
The Hd symbol appears in the Tempo display area together with a small
floppy disk icon and the name and corresponding number of the first parti-
tion available is displayed.
2. Use the OCTAVE +/– buttons to scroll through the Hard disk partitions in
numerical order.
(It is also possible to scroll in alphabetical order with the Tempo/Data /
buttons).
3. Once selected, press ENTER to gain access to the partition you want to
save your file to.
4. Move the right display arrowhead next to the SAVE Disk Menu function
using the CURSOR button.
The Song file type is shown in the display.
5. Use the PAGE / buttons to select a file type that you wish to save to
the selected partition (Song, Midi File, Style, Styles, Presets, Sample).
To save all the Ram memory data to the partition, select the ALL option.
6. After selecting the file type, press ENTER.
If you select the Song, Midi F, or Style file type, the name of the single
element contained in RAM memory is displayed with the first letter flashing
(our example in the margin on the right shows a Song file). In this case,
proceed to the next step (7).
If you select the Styles, Preset or Sample file type or the ALL option, the
display shows the message “SURE?” as a confirmation request. In this
case, go directly to step 10.
FLASHING