○○○○○○○○○○○○○○○○○○○○○○○
Presets 2•7
Editing the Programmable Presets
The 63 Prog. Presets contained in the PS1000 are all user-programmable. Al-
though the selection of factory settings try to cover a range of user needs, you
may decide that one or more factory configurations require some changes to
suit your personal requirements. The changes you make to a Programmable
Preset are saved with the STORE PRESET button.
Preset programming tasks are very easy and they offer the possibility of mak-
ing preferred sound combinations for realtime playing, Style playing and Song
Style recording.
Programming a Preset involves changing the panel settings and/or modifying
the Track (Part) parameters. For example, from the panel you can select a
different Style and Variation, change the On/Off status of the Reverb and Cho-
rus buttons, etc.. Of the track parameters, you can change a sound assign-
ment, adjust a volume, change an effect send setting, etc..
For changes in panel settings, it is acceptable to set the panel as required and
save the Preset to the same location. For changes of the features memorized
in one or more Parts, it is important to remember to exit Preset Mode in order to
“release” the Function buttons and so use them to select the Part that you wish
to change.
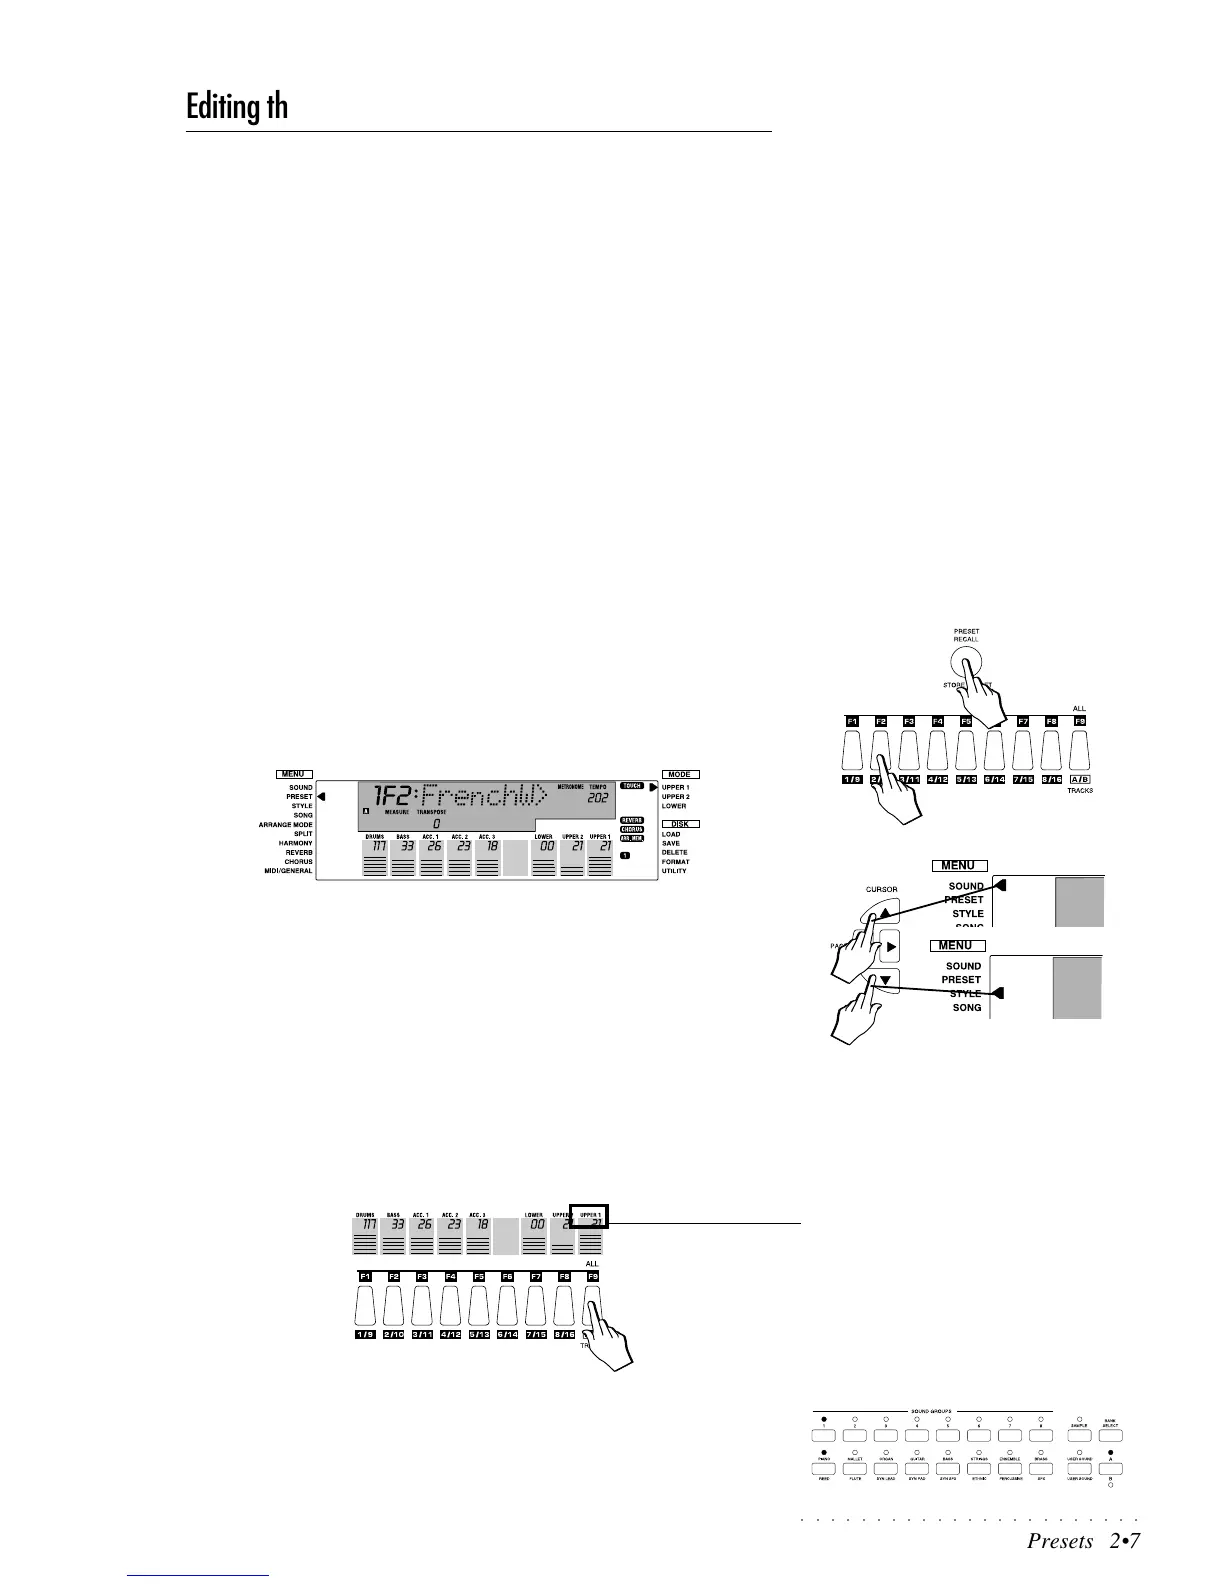
Let’s go through an example of how to make your own Programmable Preset.
Example: change the Sound and adjust the Volume level of the Upper 1 Part
of a Programmable Preset.
1. Press the PRESET RECALL button and select a Preset as already ex-
plained.
In this example we select Preset 2 (FrenchW) using Function button F2.
2. Move the left display arrow away from Preset mode with the Cursor Up
or Down buttons (pointing to either Sound or Style Mode).
In Preset mode, the Function buttons are used to select the individual Prog.
Presets, but to modify a part you must be able to select it with the corre-
sponding Function button. After selecting the Preset that you want to change,
move the left display arrowhead away from the Preset Mode indicator using
the Cursor Up/Down buttons (the left display arrow must NOT point to Pre-
set mode).
3. Press the Function button corresponding to the Part that you wish to
change.
In this case, press button F9 to select the Upper 1 Part. The name “Upper
1” will start to flash in the display.
4. Select a single Sound using the method described ion page 2.3 of the
Sounds and Samples chapter of the User Guide.
(Press the Bank Select button to select a Sound Bank, select the Groups
button which contains the desired sound and press the corresponding but-
FLASHING