○○○○○○○○○○○○○○○○○○○○○○○○○○○○○○○○○○○○○○○
1•12 Quick Guide
Multimedia
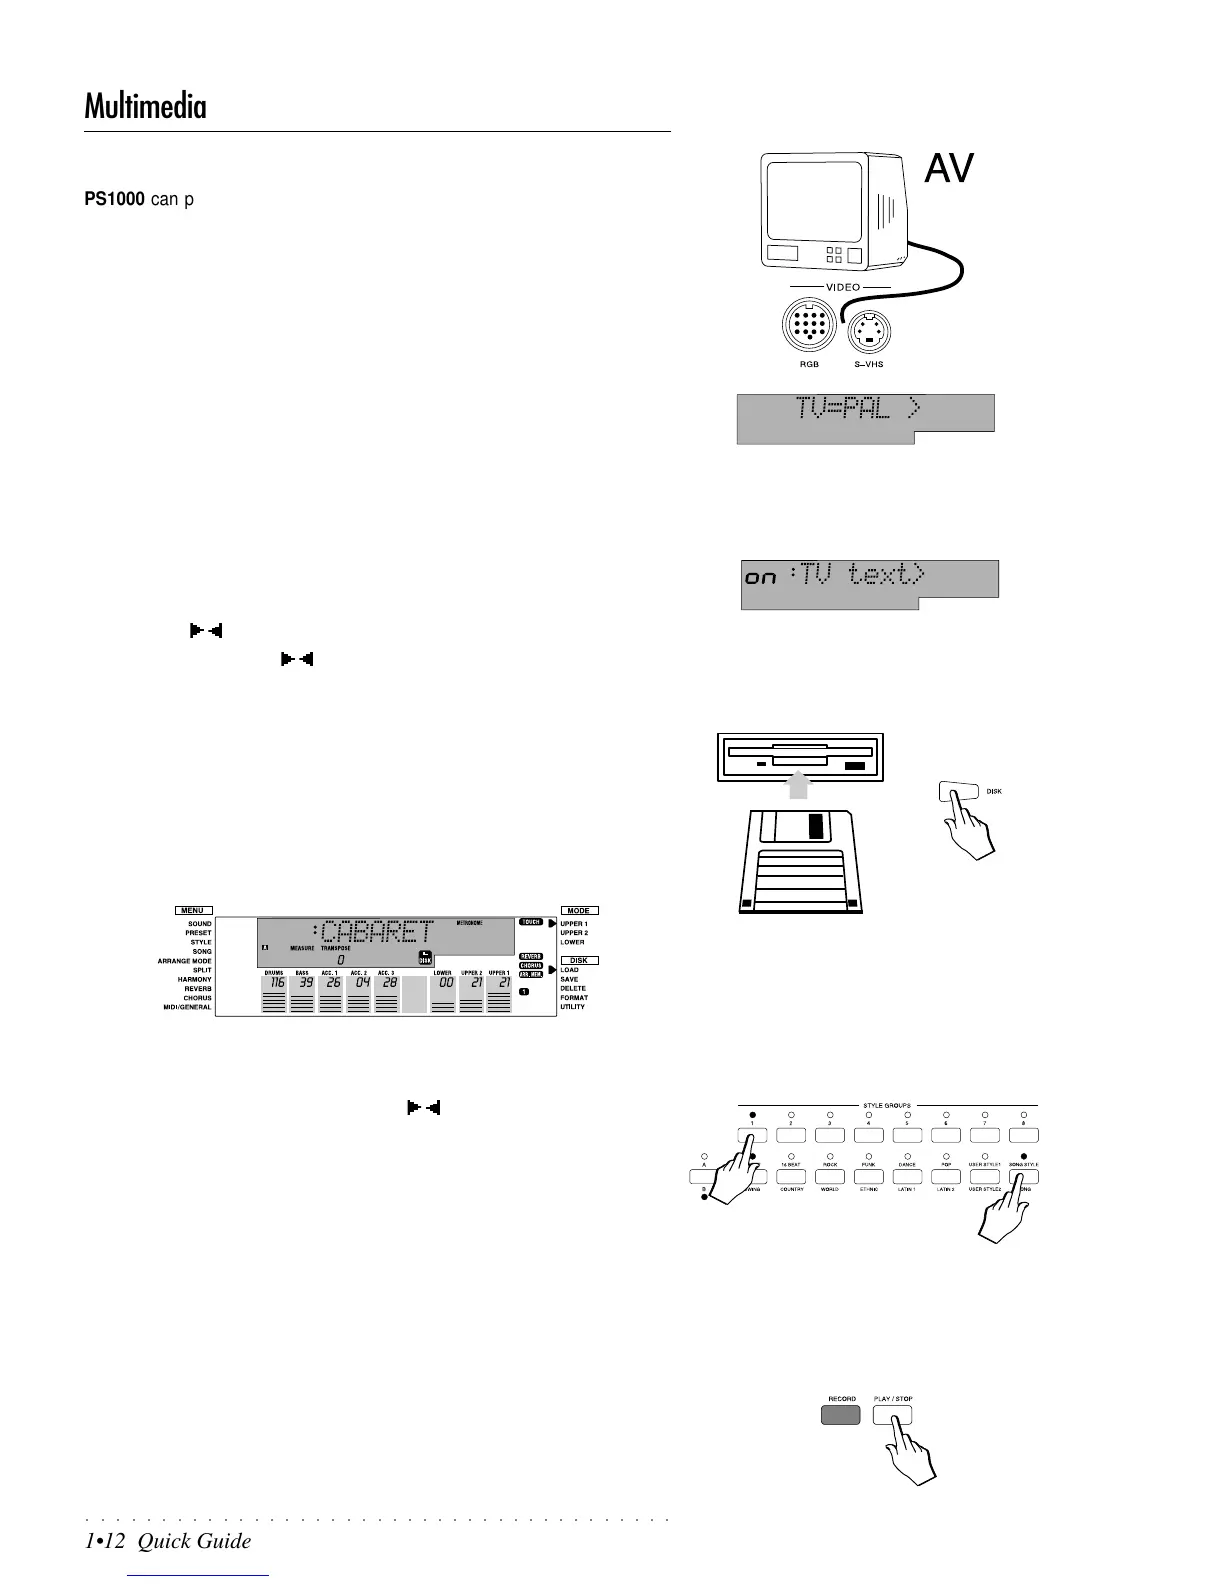
PS1000 can project Lyrics onto an external monitor when playing PS Series
Disks. There are a large number of disks that project lyrics when played. If you
connect the RGB socket of the Video Interface to a domestic TV or computer
monitor, you can project the Lyrics onto the external monitor. You may have to
load a Song into memory.
1. Connect the rear panel RGB (or S-VHS) connector of the VIDEO inter-
face to a monitor or domestic TV.
PS1000 is supplied with a special RGB/SCART cable.
PS1000 is set by default to communicate with video systems conforming to
the PAL (European) standard.
If you are using the instrument in the U.S.A., be sure that the “TV” param-
eter is correctly set to the NTSC standard under the GENERAL function.
If your TV set has the S-VHS socket, use the rear panel S-VHS connector.
2. Go to the “TV Text” page under the MIDI/GENERAL menu function and
set the parameter to ON to enable the connection between the instru-
ment and the TV set.
Use the Cursor Up/Down buttons to select the MIDI/GENERAL menu and
the PAGE / buttons to select the TV TEXT parameter.
Use the TEMPO/DATA / buttons to toggle between the On and Off status.
3. Tune the TV to the AV channel.
To select the AV channel, consult the owner’s manual of the television set.
Computer monitors or studio videos normally operate in AV mode.
4. Insert a disk containing PS Songs into the disk drive and press the DISK
button.
The DISK icon is displayed and the right display arrowhead points to the
LOAD function in the DISK menu. The name of the first Song available in
the disk is also shown at the center of the display.
(At this point, it is also possible to select the Fast Load option - refer to the
Disk chapter for more details).
5. Select a Song with the Tempo/Data / buttons, then press ENTER
twice to load the Song into memory (background loading).
The Song will be loaded to the first available location in song memory (in
the case of an empty song memory, the Song will load to button 1 of the
Song Group).
6. Press the SONG button in the Style Groups section and press button 1
of the top row of buttons 1-8 to select the Song.
You may have to press the A/B button to activate the “B” LED before press-
ing the SONG button.
7. Press PLAY/STOP to start the playback.
The external monitor will scan the lyrics of the Song in synchronization with
the playback.
8. Stop the Song playback with START/STOP or STOP.
The Song lyrics will no longer be projected on the external monitor.
Note: If you are using the FAST LOAD option
(LoadMode=On), the instrument’s panel but-
tons and keyboard will be temporarily disabled
while data is loaded into memory.
IMPORTANT
When you press the A/B Selector button to
switch from bank set A to bank set B (or vice
versa), the LED currently shown off will flash
for about 3 seconds, during which time you
must make your bank selection. If the LED
stops flashing, it will not be possible to switch
bank set.