○○○○○○○○○○○○○○○○○○○○○○○
Sounds 2•3
Selecting single Sounds
In the Quick Guide, you learned how to select Single, Layer and Split Presets
which recall factory-set sound combinations, ready to play on the Upper 1,
Upper 2 and Lower keyboard sections.
If you want to modify a Preset so that it recalls your preferred sound combina-
tion (single, layer or split), you must select and activate one of the keyboard
sections in order that it may accept a change. Once changed, you can choose
to continue playing with your new combination without storing it to memory, or
to save it for future use. If you decide not to memorize the new setting, it will be
lost the instant you select another Preset.
The following example explains how to assign a different Sound to one of the
User Presets and memorize the new setting to the same User Preset. A similar
method is used to change the sounds of the Style, Song Style and Song tracks.
This is explained on page 2.7 of the Programmable Presets chapter.
Assigning a different Sound to a User Preset
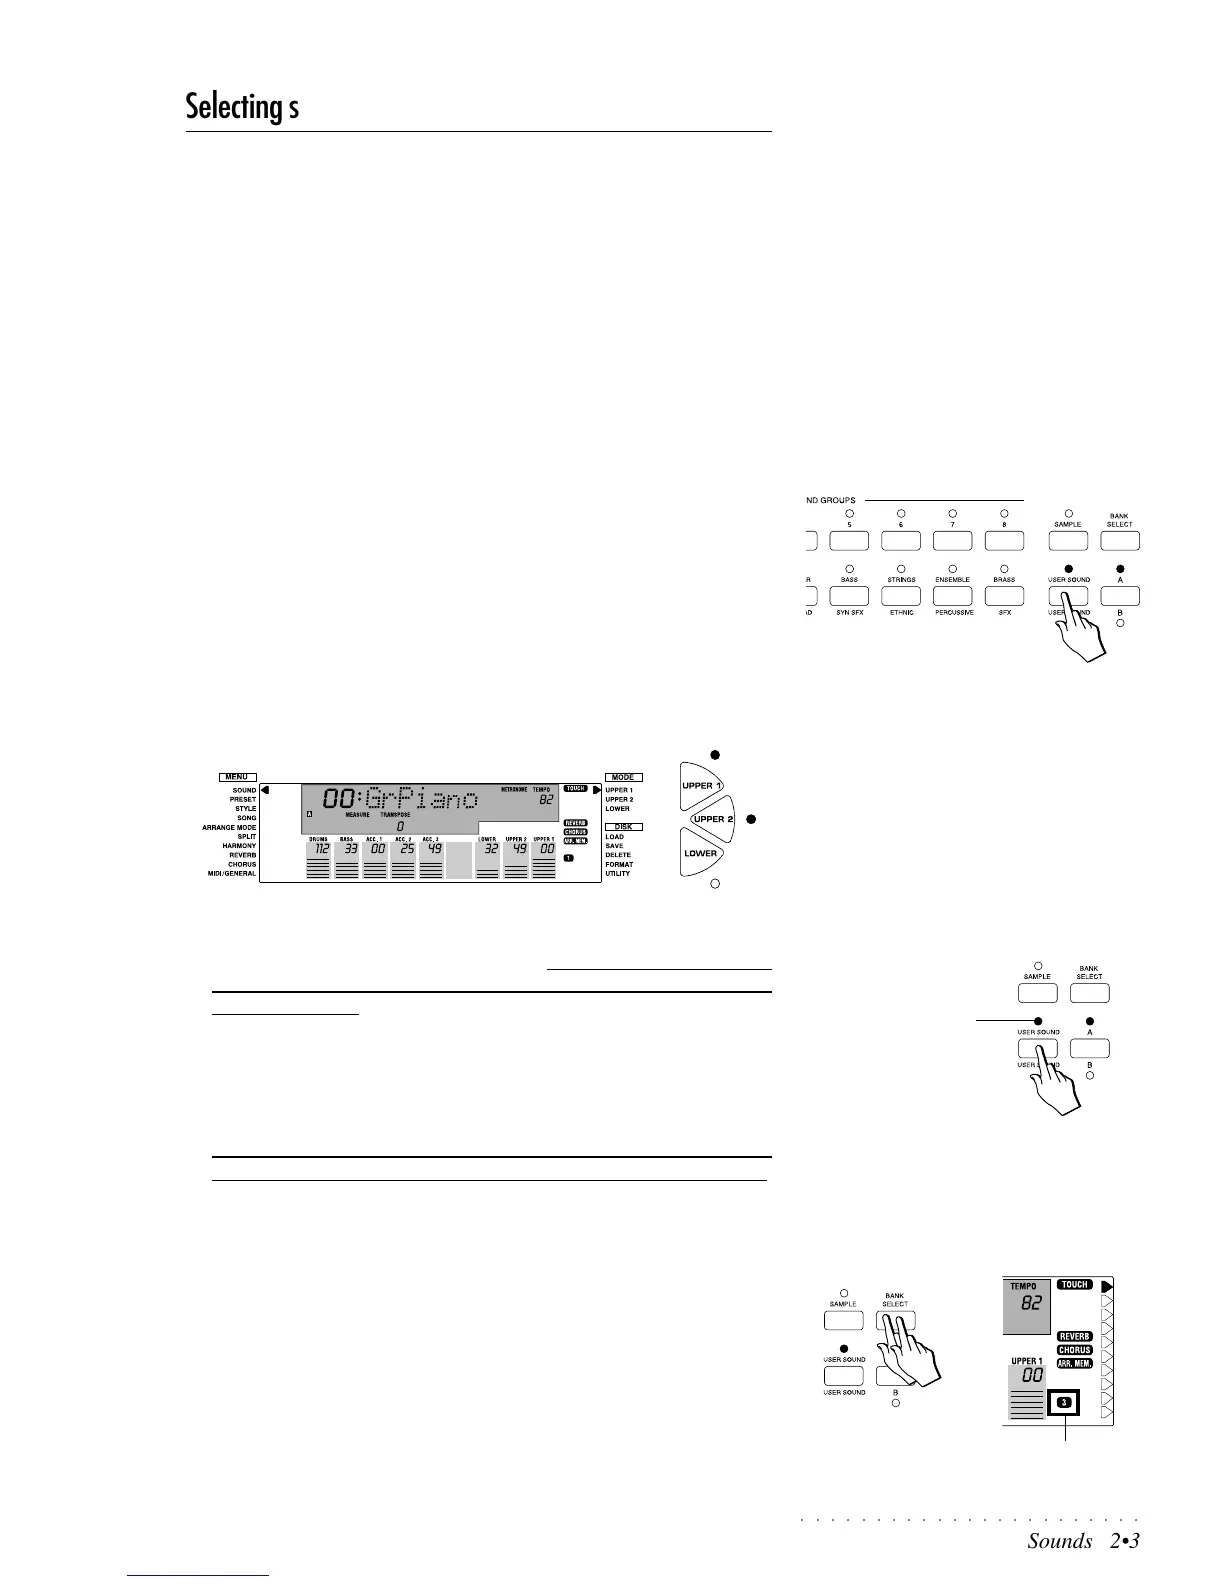
1. Press the USER SOUND button on the extreme right of the SOUND
GROUPS section.
Regardless of which LED of the A/B selector is on, you will recall the last
selected User Preset of the current set (A or B).
2. If not already selected, select the User Preset n. 1 of the A set.
You will recall a Layer Preset consisting of the GrandPiano and SlowStrings
sounds, assigned to the Upper 1 and Upper 2 sections respectively.
Both LEDs of the Upper 1 and 2 buttons will be on.
The right display arrowhead will be pointing to the Upper 1 section in the
Mode list, meaning that the Upper 1 section is currently selected and, there-
fore, ready to accept a change of sound. This is a general rule for the
keyboard sections; the arrowhead must point to the section whose sound
you wish to change.
3. Hold down the USER SOUND button until the corresponding LED starts
to flash.
The current keyboard section (in this case Upper 1) is placed “on-standby”,
ready to accept a change of sound.
At this point, the SOUND GROUPS section operates as a sound selec-
tion keypad allowing you to select a sound from any group and any bank.
If you are not sure of the exact location of your sound, refer to the Sound
Tables on page A.1 of the Appendix which list the Sounds in Program
Change/Bank Change order as well as Sound “Family” order.
For example, if you were to select the Sound Hawaiian Guitar, from the
tables you will see that this is a Bank 3 sound that resides in Preset n. 3 of
the Guitar Group.
4. Select a different bank by pressing the BANK SELECT button.
Each time you press this button you will scroll to the next Bank. In this
example, pressing the button once will select Bank 2 and pressing it a sec-
ond time will select Bank 3. (If you press it again, you will return to Bank 1).
Note: MIDI Bank 6 cannot be selected from the panel using the Bank Se-
lect button.
FLASHING LED
BANK number 3
IMPORTANT
When you press the A/B Selector button to
switch from bank set A to bank set B (or vice
versa), the LED currently shown off will flash
for about 3 seconds, during which time you
must make your bank selection. If the LED
stops flashing, it will not be possible to switch
bank set.