○○○○○○○○○○○○○○○○○○○○○○○
Quick Guide 1•15
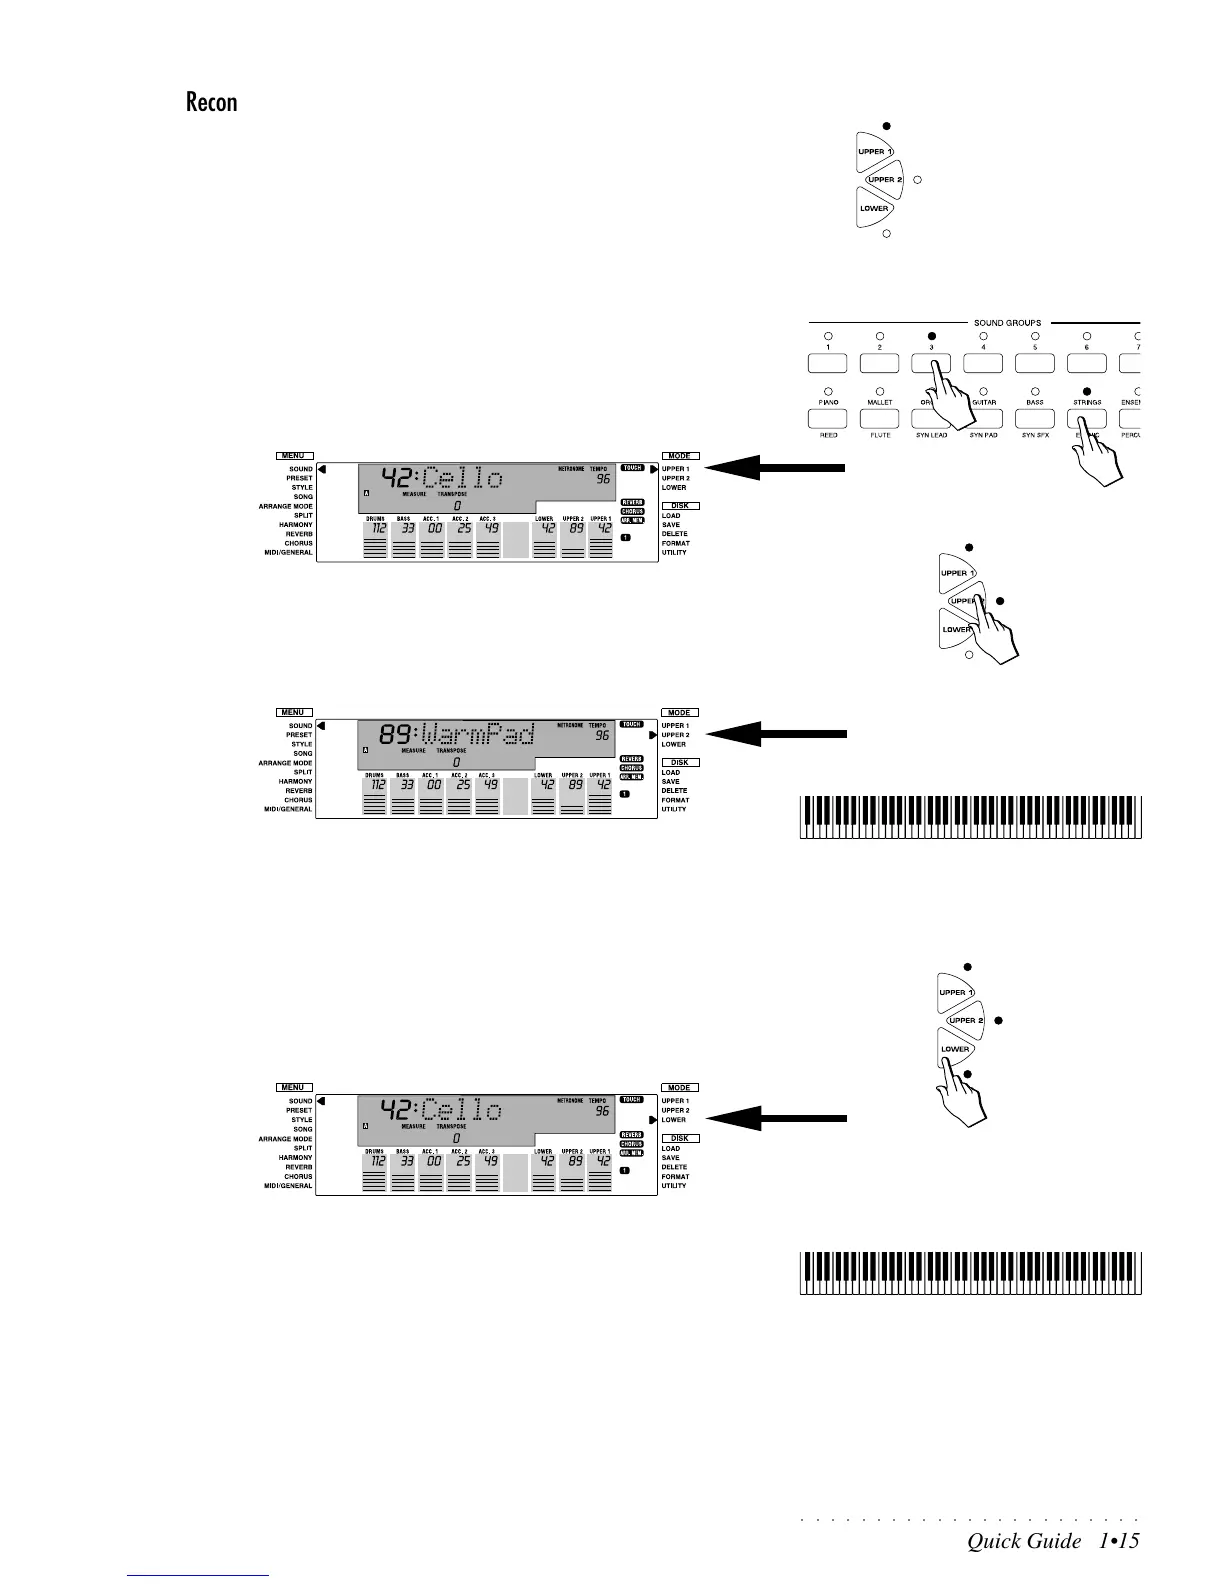
Reconfiguring the Presets using the Keyboard Activators
You have seen so far that at the touch of a button, you can select a Single
(buttons 1 - 4), Layer (buttons 5-6) or Split (buttons 7-8) Preset.
At the touch of a single button, you can also reconfigure the current Preset into
one of the other configurations using the three buttons, called “Keyboard Acti-
vators”, located to the right of the display (Upper 1, Upper 2, Lower).
The resulting Preset configuration changes are temporary, but you can memo-
rize them to the Programmable Presets with the Store Preset procedure (see
the Programmable Presets chapter for specific details).
Example 4 - from Single to Layer
8. Select the Single Preset n. 3 from the STRINGS group (LED A on). You
will recall the Single Preset “Cello” assigned to the Upper 1 section.
9. Press the UPPER 2 button (LED on) and play a single note on the key-
board.
The right display arrowhead will point to the Upper 2 mode meaning that the
Upper 2 keyboard section is selected.
When you play, you will hear two sounds for every single note played. The
Upper 2 selector button introduces a second sound layered with the first (in
this case, Cello and Warm Pad).
Example 5 - from Layer (or Single) to Split
10.Continuing from point 9 above, press the LOWER selector button (LED
on) and play with both hands on the keyboard.
The right display arrowhead will now point to the Lower mode meaning that
the Lower keyboard section is selected.
The keyboard will be split into two parts, with a split point at note C4.
On the lower keyboard zone within the range A0 - B3, you will hear Cello
sound while on the right hand, across the note range C4 - C8, you will hear
the two layered sounds Cello and Warm Pad.
Whatever configuration you decide to play with remains memorized until
you change the configuration again, or until you select another Preset or
select the same one. It is also possible to deactivate all three keyboard
sections at the same time.
Keyboard Activator
buttons
<-------- Cello --------><----------- Cello ----------->
<-------- WarmPad -------->
<------------------------ Cello ------------------------>
<--------------------- Warm Pad -------------------->