252
Conguring and Establishing a Wireless LAN Connection (LR8450-01 Only)
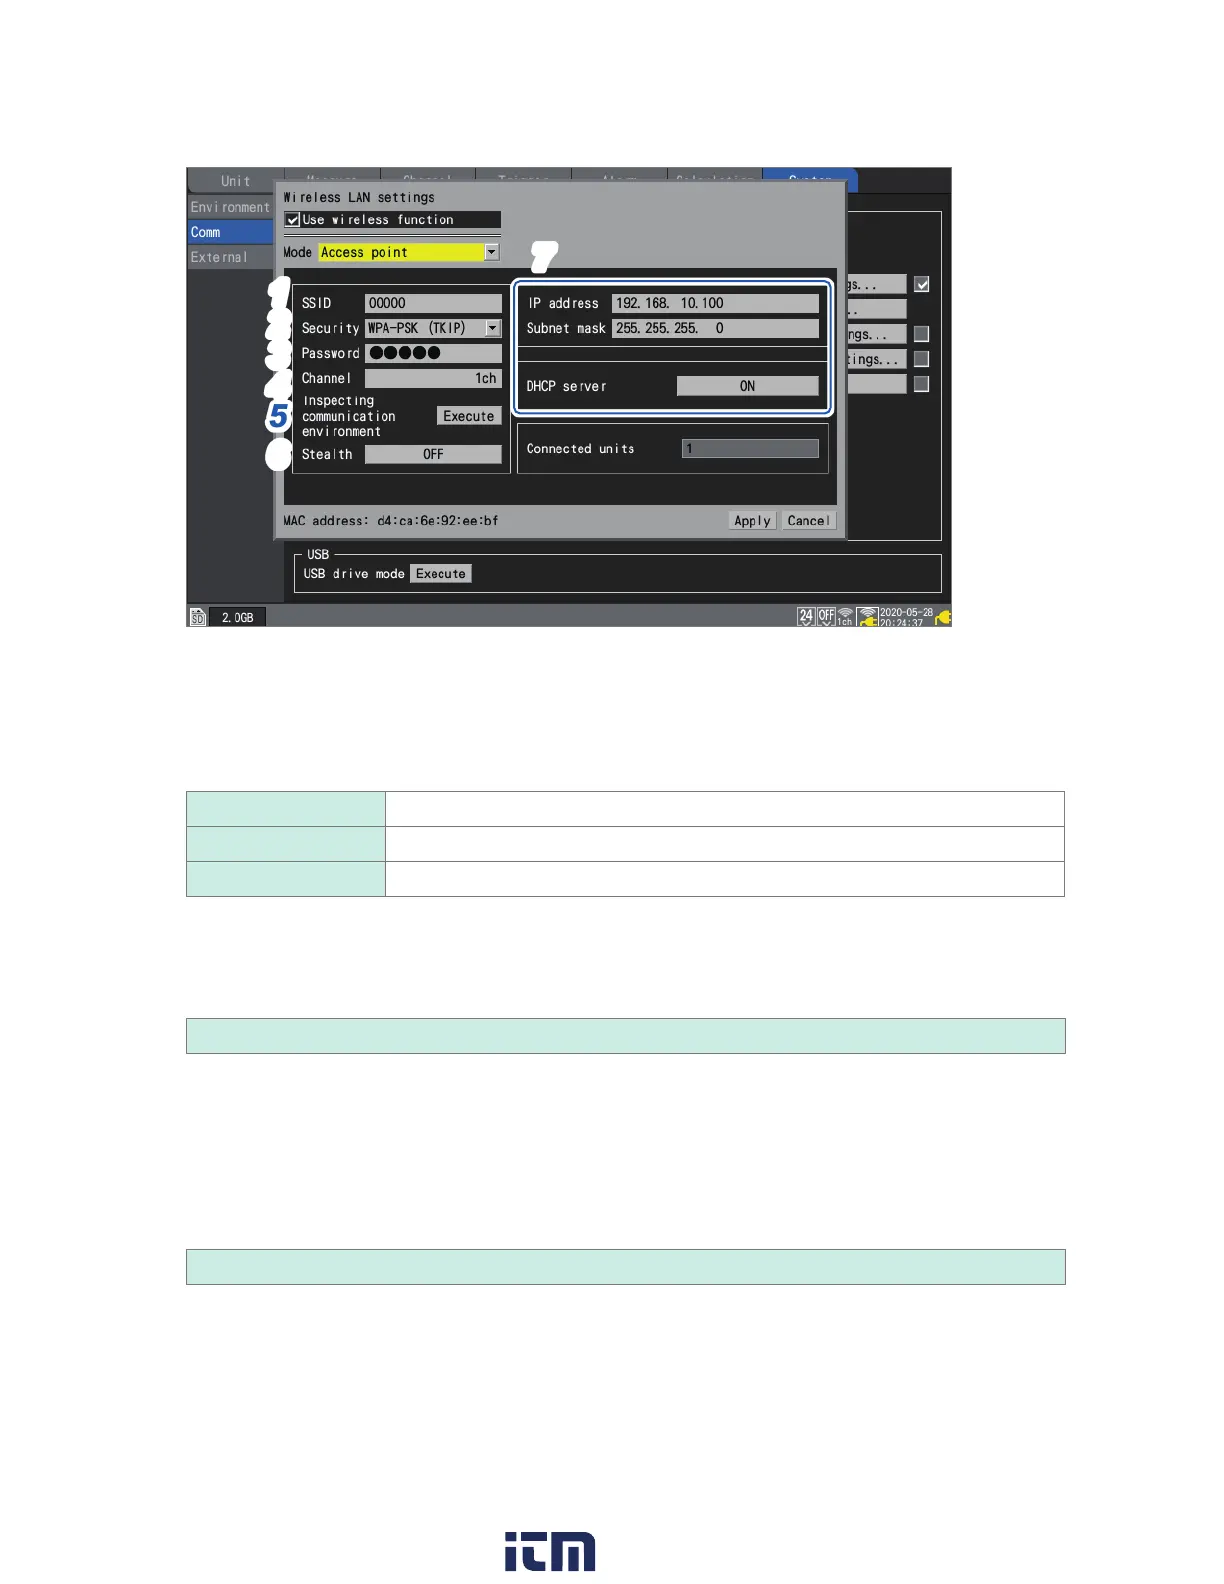
When setting [Mode] to [Access point]
1
2
3
7
5
4
6
1
Under [SSID], set an identication name for an access point.
The SSID is initially set to the string [LR8450#xxxxxxxx] (the letters xxxxxxxx represent the serial
number of the instrument). You can change to any SSID.
2
Under [Security], select an encryption protocol.
OFF Does not encrypt data.
WPA-PSK (TKIP)
Encrypts data with WPA.
WPA2-PSK (AES) Encrypts data using WPA2.
3
When encryption is enabled, set a password to connect to the access point.
The default password is [password]. Change to any password with at least eight characters.
4
Under [Channel], set the frequency band channel for use in the wireless LAN.
1ch
to 11ch
When using multiple pieces of LR8450-01, make sure that they are not using the same channel.
5
Press the ENTER key while [Execute] under [Inspecting communication environment] is
selected.
The communications environment around the instrument will be displayed.
The instrument will indicate the communications congestion level with colors (green, yellow, red).
6
Under [Stealth], select whether other terminal devices can search for the instrument.
O
, On
7
Set the IP address, subnet mask, and DHCP server.
See “Conguring LAN settings” (p. 245).
The [Connected units] box shows the number of the stations presently connected to the
instrument.
w ww . . co m
information@itm.com1.800.561.8187