MAINTENANCE PROCEDURE MAINTENANCE
4-22
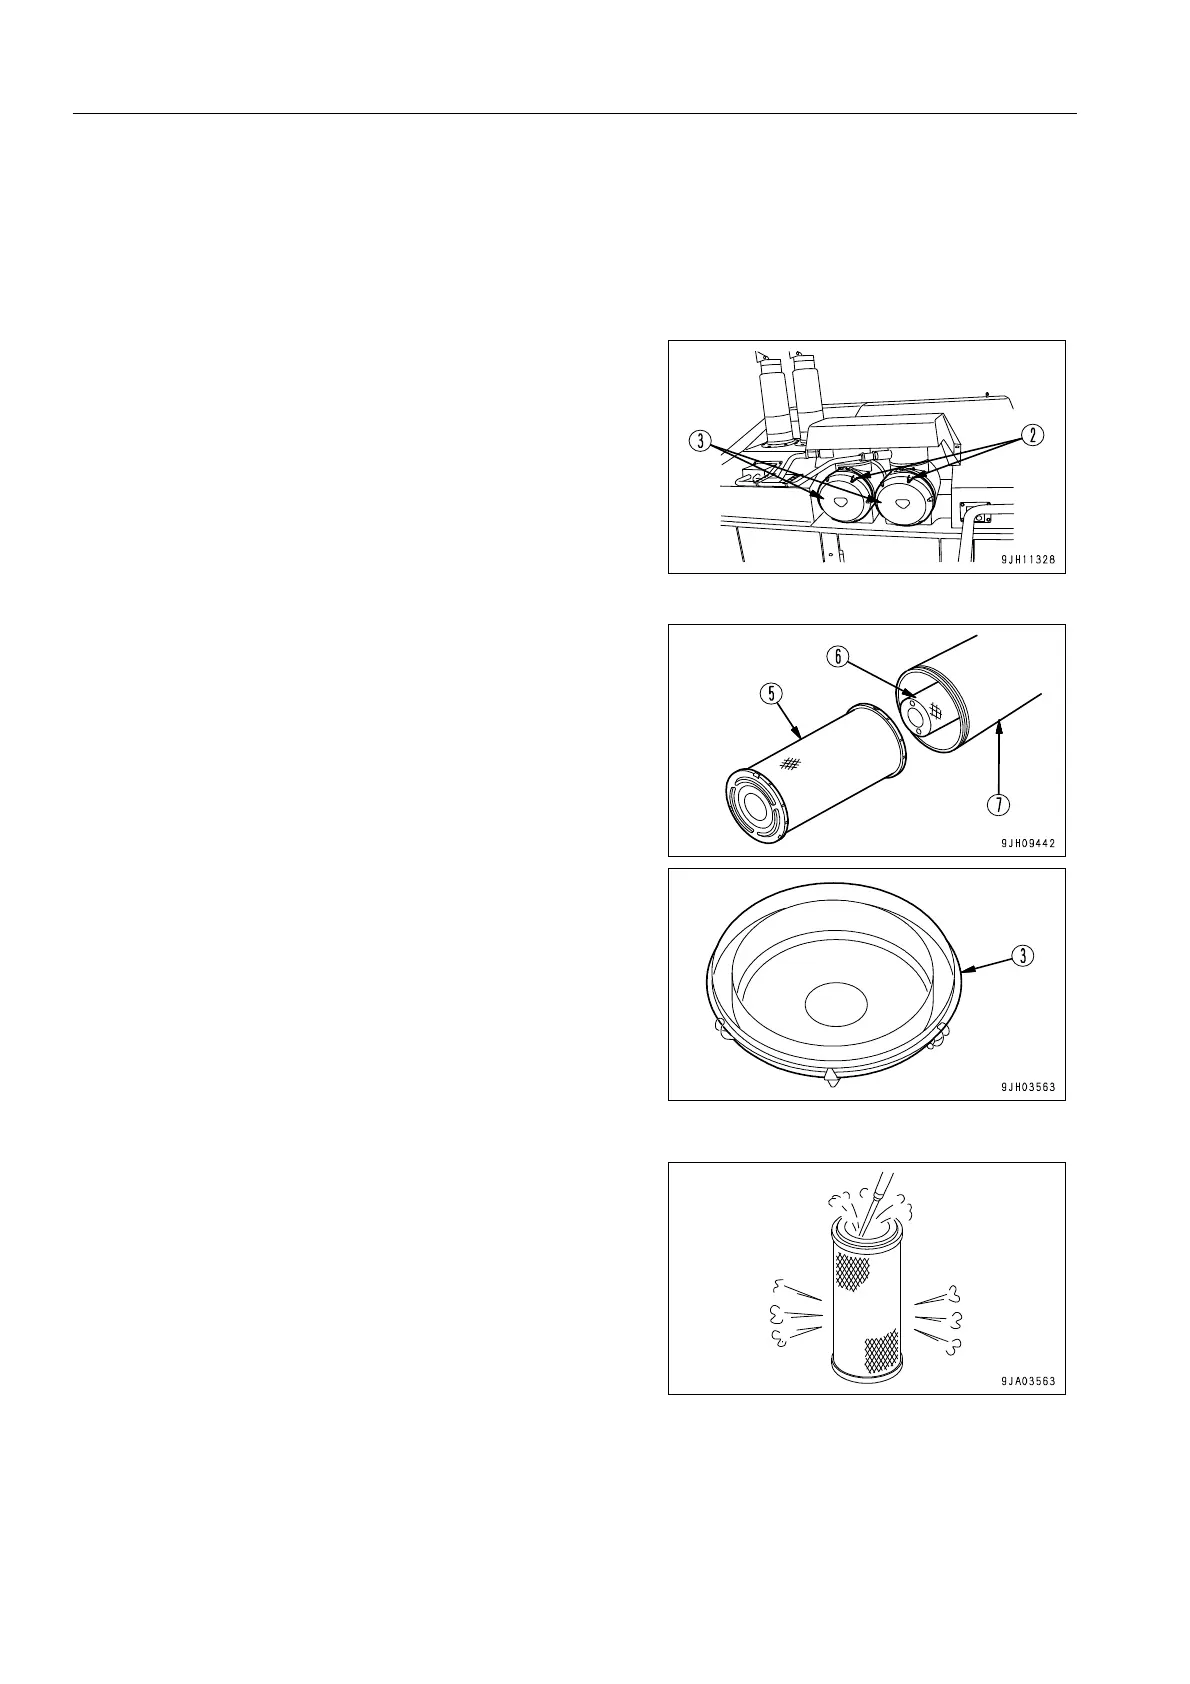
Cleaning Outer Element 4
Before and after cleaning the element, do not leave or keep it in direct sunlight.
1. Remove hooks (2) of each air cleaner (6 places), then
remove cover (3).
q Never remove the inner element (6). It will allow dirt to
enter and cause failure of the engine.
q Do not use a screwdriver or other tool.
2. Hold the outer element (5), rock it lightly up and down and
to the left and right, and rotate the element to the left and
right to pull it out.
3. When the outer element (5) has been removed, check that
the inner element has not come out of position and is not at
an angle. If is is at an angle, insert your hand and push it in
straight.
4. After removing the outer element (5), cover the inner ele-
ment (6) with a clean cloth or tape to prevent dirt or dust
from entering.
5. Wipe off or brush off the dirt stuck to cover (3) and the
inside of the air cleaner body (7).
When cleaning the element, do not hit or beat it against
anything.
6. Direct dry compressed air (less than 0.69 MPa (7 kg/cm²)
to the outer element from inside along its folds, then direct
it from outside along its folds and again from inside.
1) Replace the outer element which has been cleaned 6
times repeatedly or used throughout a year. Replace the
inner element at the same time.
2) Replace both inner and outer elements when the air
cleaner clogging monitor (1) lights up soon after installing
the cleaned outer element even though it has not been
cleaned 6 times.