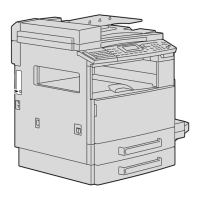
Installing the printer driver
3
IC-206 3-19
Installing using the Add Printer Wizard on Windows XP/Server 2003
2
Note
When using a USB cable to connect this machine to the computer, turn
off this machine, and then install the printer driver. When the machine is
turned on, Plug and Play causes the Add New Hardware Wizard to
appear.
1 After Windows has started, insert the printer driver CD-ROM into the
CD-ROM drive of the computer.
2 Click the Windows [Start] button, and then click "Printers and Faxes".
– The Printers and Faxes window appears.
– If "Printers and Faxes" does not appear in the Start menu, click
"Control Panel" in the Start menu, click "Printers and Other
Hardware", and then click "Printers and Faxes".
3 Click "Add a Printer" under "Printer Tasks".
– If "Printer Tasks" does not appear, double-click the "Add Printer"
icon.
The Add Printer Wizard starts up.
4 Click the [Next] button.
5 Select "Local printer attached to this computer", and then click the
[Next] button.
– The "Automatically detect and install my Plug and Play printer"
check box should be cleared.
– In order to print on a network, the connection port must be set up
as a network port. Since the port settings can be specified after
installation, this procedure describes how to install the printer driver
for a local connection. For details on specifying the port settings,
refer to "Connecting the computer and this machine over a
network" on page 4-18.
6 Select "LPT1: (Recommended Printer Port)" beside "Use the following
port", and then click the [Next] button.
7 Click the [Have Disk] button.
8 Click the [Browse] button, select "Driver\WIN2K_XP\English" on the
CD-ROM, and then click the [Open] button.
– With 64-bit operating systems, select "Driver\WinXP64\English".