LumaSMART
®
User Manual Installation of the LumaSMART® Controller • 44
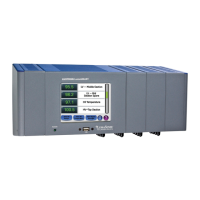
4.1 Mounting and Installing the LumaSMART Controller
The LumaSMART controller can be mounted using one of two methods:
• Wall mount
• Panel mount
The LumaSMART controller can be used in any location if the environmental requirements are met (Refer to
Section 2.3.1.5 Operating Specifications
).
Caution: The mounting position and location chosen should ensure that the vents on the top of the
LumaSMART box will not be blocked during normal operation.
The table below lists the work hours and special tools needed to install the LumaSMART. Neither test equipment
nor consumable materials are required.
Table 4: Installation Work Hours and Equipment
Requirement Description
Special Tools or Hardware
Torque wrench
Screw drivers (standard or flathead, medium-sized)
Socket wrench
RedHead
®
stud anchors
4.1.1 Installing the Wall-Mount LumaSMART Controller
The wall-mount LumaSMART controller is designed for mounting to a flat, vertical surface.
To install the wall-mount LumaSMART:
1. Determine where the LumaSMART controller is to be mounted.
2. The wall-mount version of the LumaSMART includes four universal mounting brackets. Mark the holes for
drilling.
3. Drill using an 8 mm (5/16 in) drill bit or tap the four holes in the wall upon which the LumaSMART is to be
mounted, matching the hole pattern drawing included with your system.
4. Mount the LumaSMART to the wall, using RedHead
®
stud anchors and washers.
5. Connect the fiber optic extension cables to the LumaSMART as discussed in Section 4.2
Installing the
External Fiber Optic Extension Cable.
6. Connect the electrical wiring to the LumaSMART as discussed in Section 4.3 Installing the Electrical Wiring.
7. Test the LumaSMART using the instructions in Section 4.5 Testing the Probe Signal Strength.
 Loading...