LumaSMART
®
User Manual Using the Software • 58
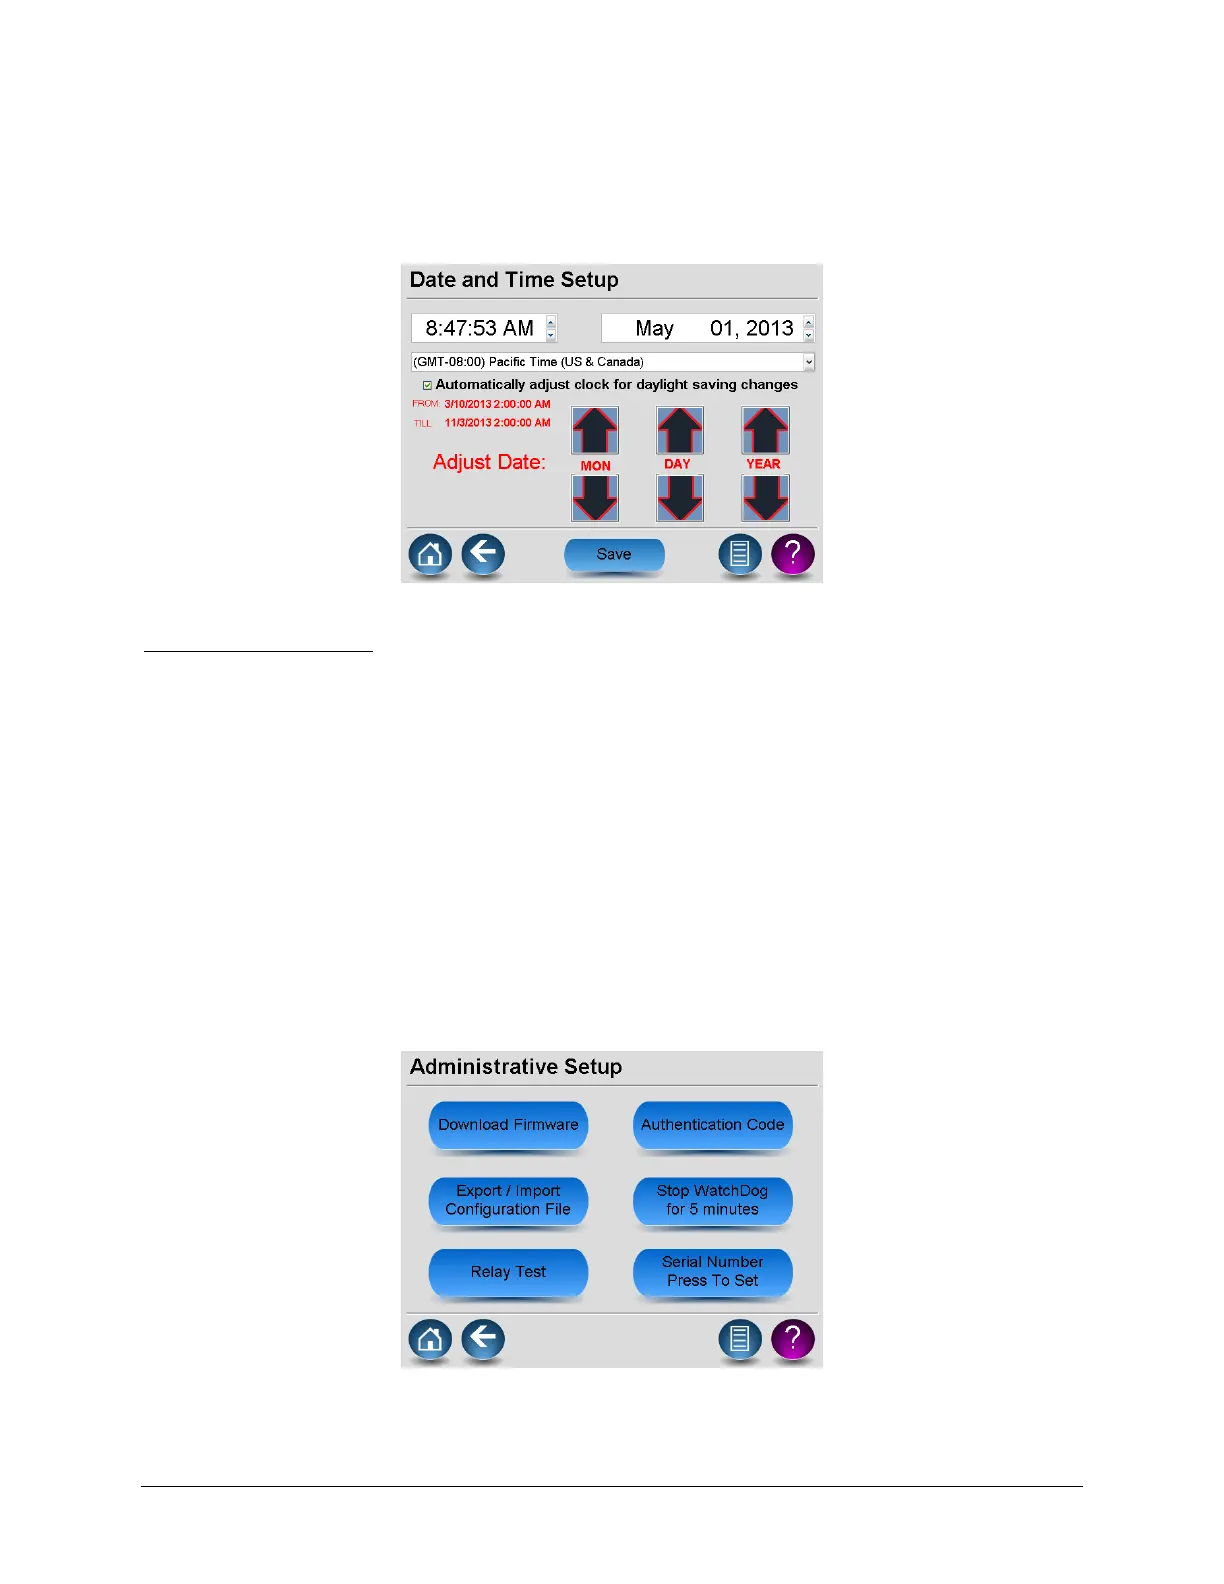
Date & Time
The Date & Time Setup screen should be corrected before manufacturer’s testing and again after
deployment/installation. This is required to ensure the date, time, time zone, and daylight saving time stamps are
correct in the system logs.
Date and Time Screen
To adjust the date and time:
1. Tap any place on the Time or Date portion of the screen to enable the adjustment arrows for the Date or
Time. In the figure above, the Date area of the display was tapped.
2. Tap on the displayed Time Zone to display a menu selection. Scroll up and/or down and trap on the
desired Time Zone. The selection menu will disappear and the Time Zone window should show the
specified selection.
If the selected Time Zone supports daylight savings time, the label Automatically adjust clock for daylight
saving changes will appear. In addition, the From/Till dates of DST will be displayed – verify that they are
correct. If the Time Zone does not support DST, these entries will be hidden. Tapping anywhere on the
line will toggle the check mark to select the desired behavior.
3. Press Save and then Confirm to implement the change at the exact second shown on the display.
Administrator Tools
The Administrator Setup screen allows you to make important updates to your software by changing the
authentication codes or applying a firmware upgrade. An authentication code is required to access this screen.
Administrative Setup Screen
 Loading...